


Products
Trending searches

LONGER How To|Using the Mask Feature in LightBurn
Many users aim to enhance the visual quality of their engraving by editing images before processing. Fortunately, LightBurn offers a powerful Mask feature that allows users to select and engrave only the most desirable parts of an image. This guide will walk you through how to apply and edit masks in LightBurn to make your engraving projects look more refined and professional.
1. Open LightBurn and Import Your Image
Launch LightBurn and import the image you want to work with. This will be the base for applying the mask.

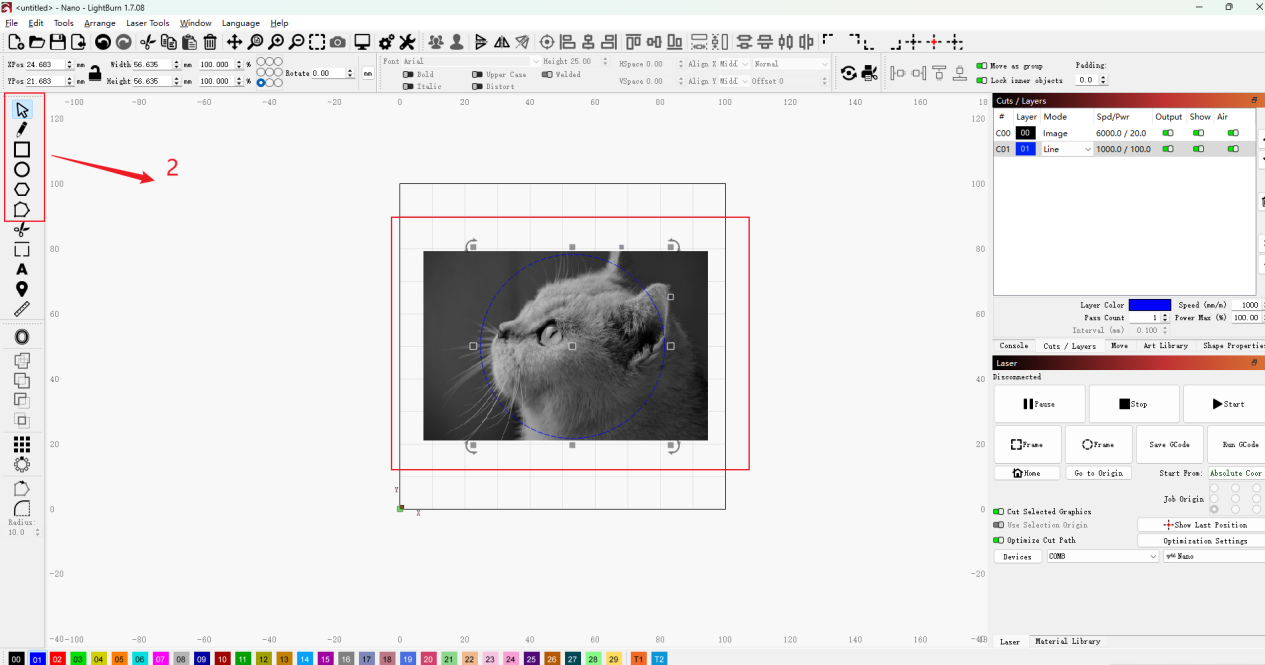
2. Draw a Shape Over the Desired Area
From the left toolbar in LightBurn, choose any shape-drawing tool (in this example, we’ll use a circle). Place the shape over the area of the image you want to keep.
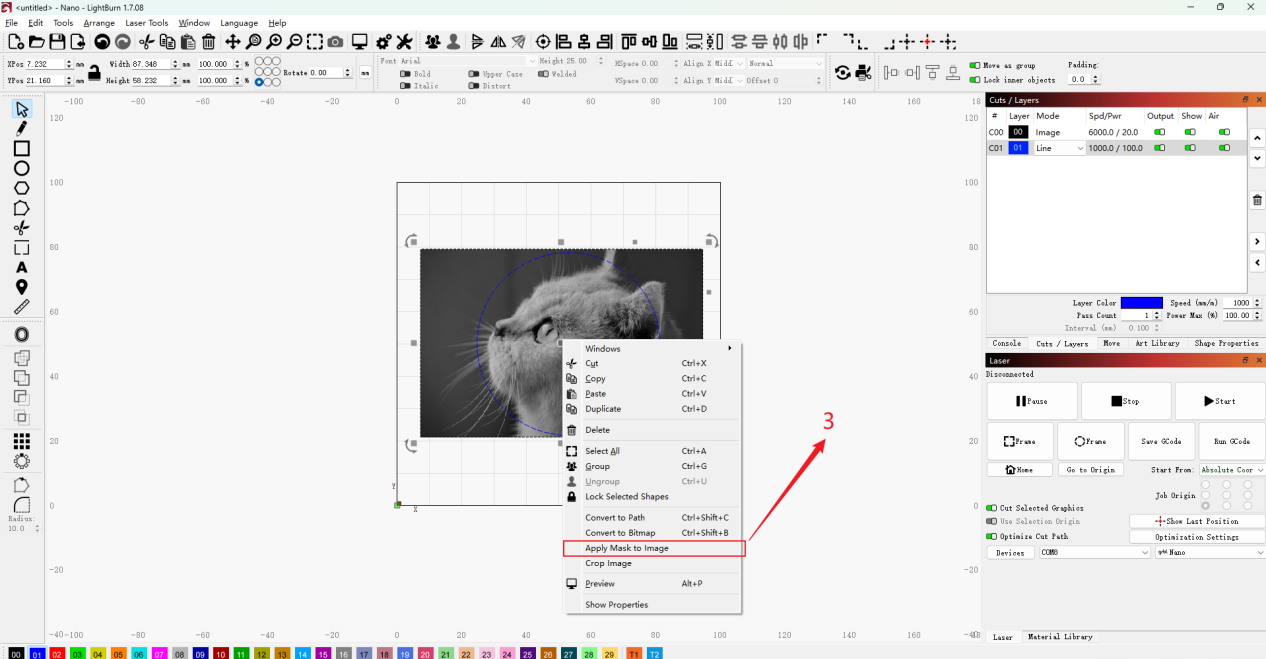
3. Apply the Mask
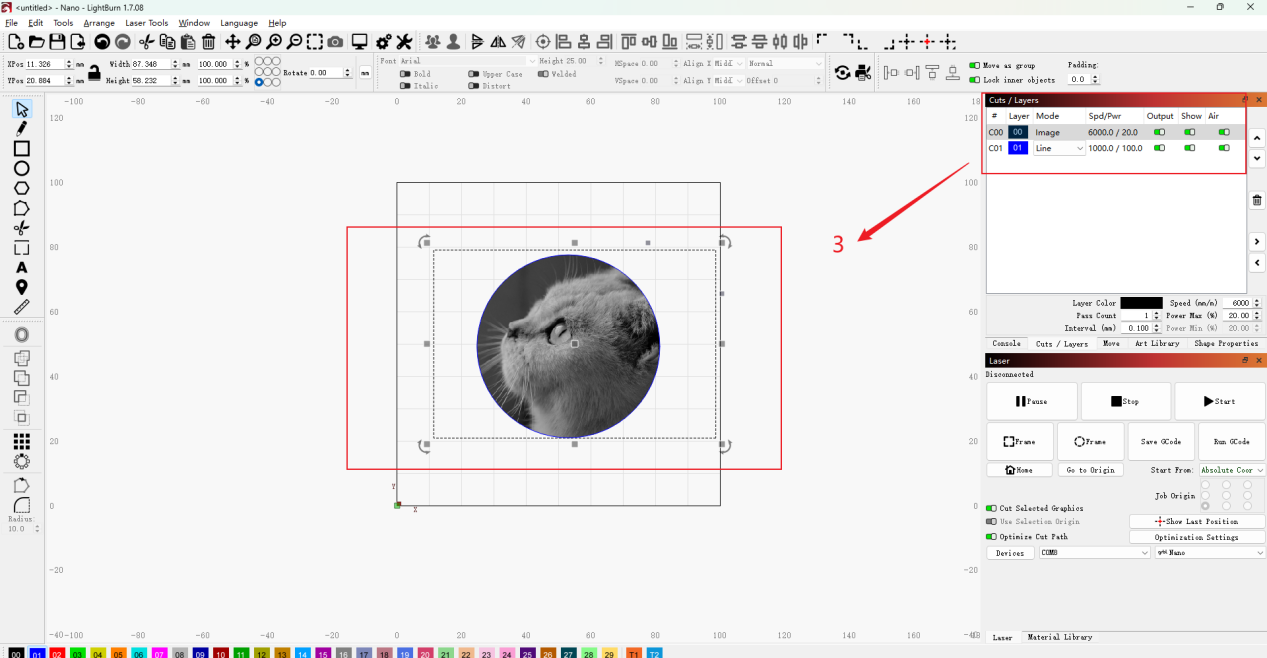
Select both the image and the shape. Then, right-click and choose "Apply Mask to Image". The selected area will now be isolated as a masked portion of the image.
If the masked area isn’t quite right, you can move the image or the shape to fine-tune the selection.
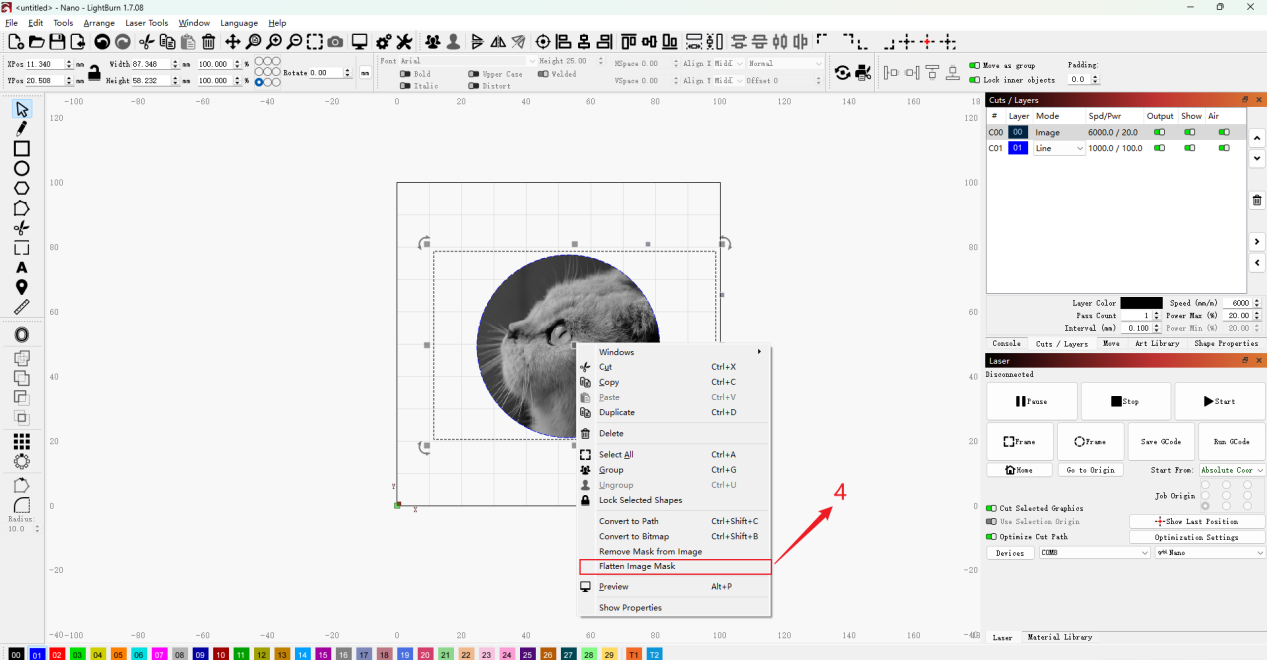
4. Flatten the Mask
Once you're satisfied with the masked result, right-click again and select "Flatten Image Mask". This merges the image and the shape into a single layer. Your cropped image is now finalized.
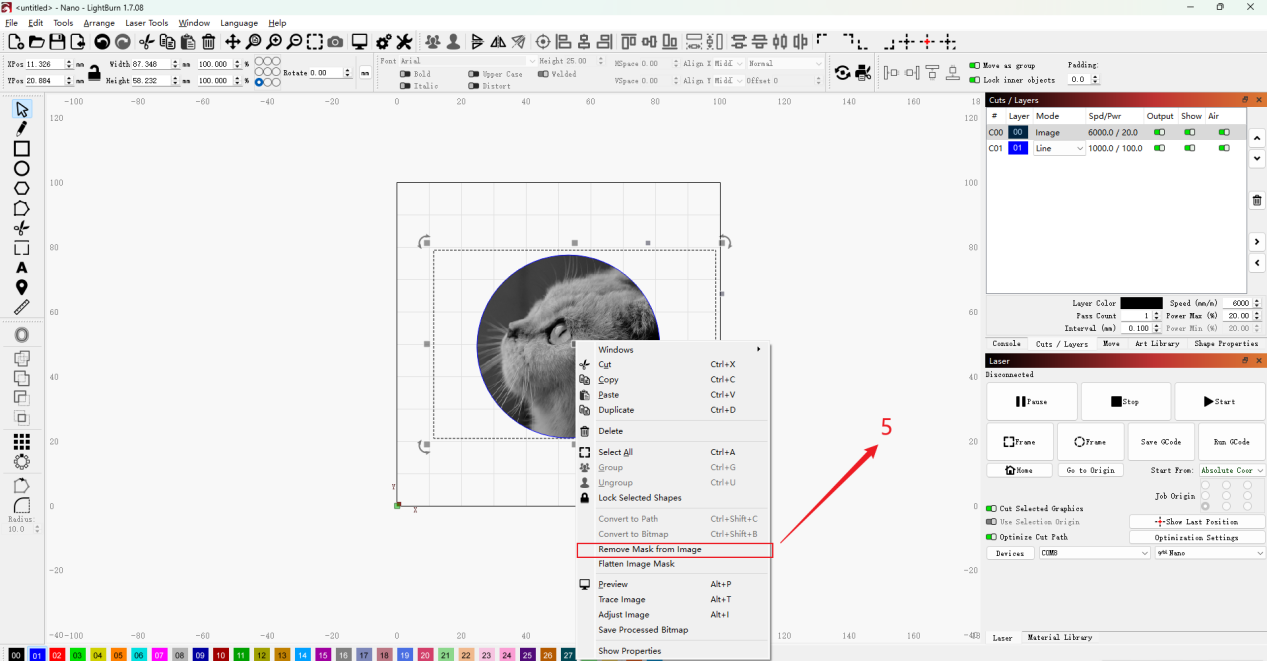
5. Remove the Mask if Needed
If you’re not happy with the result and want to start over, simply right-click and choose "Remove Mask from Image" in step 3. This will revert the image to its original unmasked state.
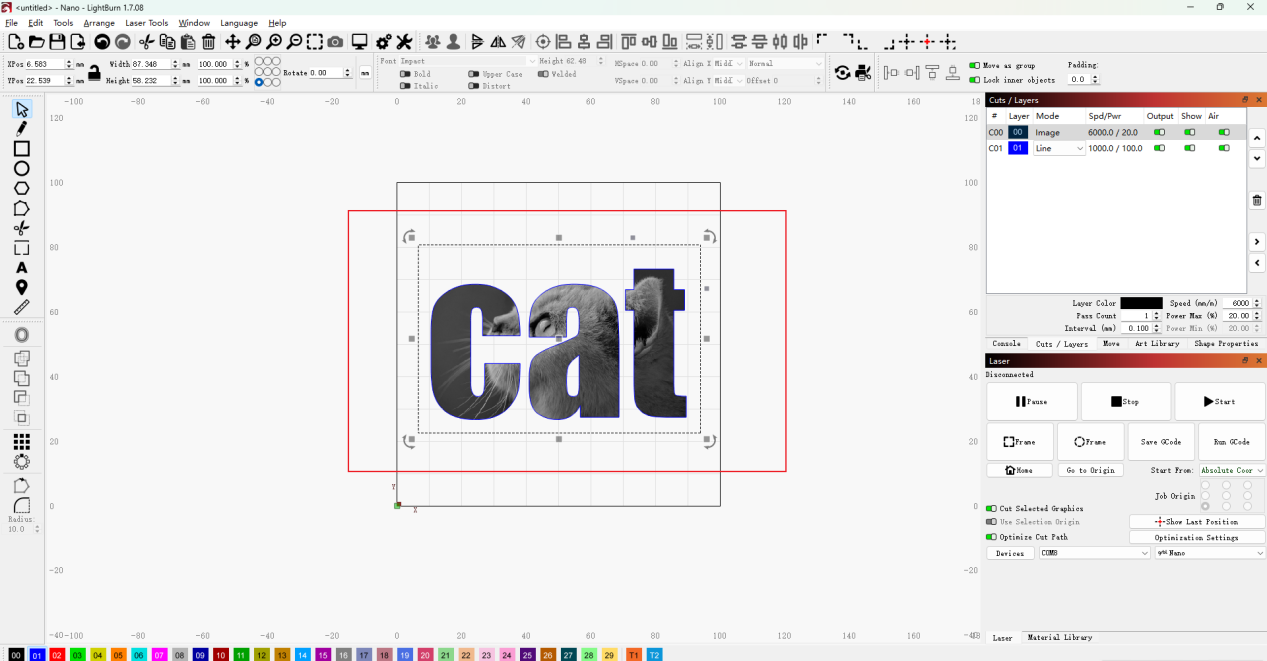
When we use letters, numbers, or other shapes instead of basic graphics, the results can also be impressive. It’s important to note that you should choose bold or thicker fonts for letters and numbers, as they produce better visual results.
Conclusion
The Mask feature in LightBurn is a simple yet powerful tool that can help you isolate and engrave only the parts of an image that truly matter. By following the steps above, you can cleanly crop and control your engraving designs for a more polished final result.
- Choosing a selection results in a full page refresh.
!