Academy

FDM 3D printer loss parts, do you know this? - LONGER
FDM 3D printer loss parts, do you know this?

3D printer aways work days and night, as I know, some one have print a model, it cost very long time, funny. for high strength work, some part of FDM 3D printer, will loss. let me show you some part easy loss, you can check while you going to print big project, make sure every thing well before printing.

More than 1000 hour printing?

1, Nozzle kit

nozzle kit of 3d printers

The nozzle kit is installed on the hot end of the printer. There are generally two failure conditions:

  1. The nozzle or blue heat sink is blocked

There are many reasons for being blocked by the filament. For example, if the nozzle is too close to the print bed, the filament cannot be squeezed out. Or when you replaced the new Teflon tube, you did not insert the Teflon tube to the bottom, causing the filament to get stuck in the gap between them.

  1. The thermistor or heating rod is damaged

Generally, their cables are broken. But if the machine is used for a long time, it will naturally wear out.

Buy Longer 3d Printer nozzle kit here: https://www.longer3d.com/products/longer-nozzle-kit-for-lk1-lk4-lk4-pro-lk5-pro


2, Limit switch

limit switch of 3d printer

The iron plate on the limit switch will loosen after many collisions. So when your machine has been used for a long time, you need to check whether the limit switch is still working properly.


3, Filament sensor

The filament sensor is a part that is very easy to wear. Its function is to detect whether the filament is used up. So that the printer will not print air when the filament runs out when you are not next to the machine.

filament sensor of 3d printer
After the machine has been used for a long time. The filament sensor may not be able to sense the filament even when there is a filament. So when your printer’s touch screen shows that the filament cannot be sensed, please check your filament sensor.


4, Extruder gear

The brass gear on the extruder may wear out after a long period of filament extrusion. So when your machine has been used for a long time, you need to check whether your extruder gear is worn.

extruder gear


5, Z axis screw

Z-axis screw

After using the machine for a long time, you need to check whether the grease on the Z-axis screw is still enough to keep it working normally.

6, Synchronous belt and Synchronous wheel

Synchronous beltSynchronous wheel

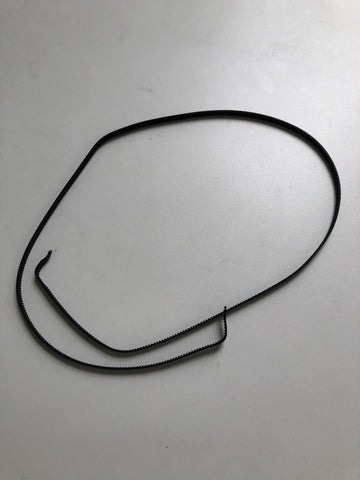
When there is a layer shift in your print or your XY axis cannot move normally. It is very likely that the belt or wheel is worn out (there may be other reasons). You can try a new belt or wheel.

There is a possibility of wear on the surface of the synchronizing wheel and the bearings inside.

 https://www.longer3d.com/products/lk5-pro-fdm-3d-printer

By Academy | June 10, 2021
How to fix extruder in abnormal - LONGER
How to fix extruder in abnormal

If your Longer LK1, LK4, LK4 PRO, or LK5 PRO FDM 3D printer is experiencing extruder issues, it can seriously impact your print quality. Common problems include uneven filament extrusion, stringing, layer gaps, or complete print failure. In this detailed guide, we will walk you through how to troubleshoot and fix an abnormal extruder, step by step, using proven methods that most 3D printing users can follow.

This guide is perfect for Longer 3D printer owners, makers, and hobbyists who want to improve their printer maintenance skills and achieve high-quality, reliable 3D prints.

Common Causes of Extruder Malfunctions

Extruder problems usually stem from two main issues:

1. Clogged Nozzle

A clogged nozzle is the most frequent reason for extrusion problems. Signs include:

  • Filament is not extruding consistently or stops mid-print

  • Stringing or gaps appear in model layers

  • Unusual sounds from the extruder motor

How to fix:
Use the official nozzle cleaning methods provided by Longer, including:

  • Heating the nozzle and manually pushing filament through

  • Using a fine needle or cleaning rod to remove clogs

  • Flushing the nozzle with cleaning filament for stubborn blockages

A clean nozzle ensures smooth and consistent filament flow, reducing print failures.

2. Extruder Motor or Cable Issues

If the nozzle is clear but the extruder still behaves abnormally, the problem may be in the motor, wiring, or motherboard. Follow these steps to troubleshoot:

Step 1: Swap Extruder Cable with X-Axis Cable

  1. Disconnect the extruder cable and X-axis cable, then swap them

  2. Power on the printer and control the X-axis, allowing the extruder to operate

  3. Observe the results:

    • X-axis works properly → Extruder motor is faulty and needs replacement

    • X-axis still does not work → Possible cable or motherboard issue

Step 2: Further Cable and Motherboard Testing

  1. Connect the Y-axis cable to the extruder

  2. Connect the motherboard’s extruder port cable to the X-axis

  3. Test X-axis operation:

    • X-axis works properly → Cables are intact

    • X-axis still fails → Motherboard or cable requires replacement

⚠️ Pro Tips for Safety and Accuracy:

  • Always power off the printer before swapping cables

  • Use official replacement parts to avoid additional damage

  • Check connectors for loose contacts to ensure proper operation

Video Tutorial

For first-time users, watching the official video can make troubleshooting easier:

Watch the detailed extruder troubleshooting video: https://youtu.be/XCjrieoyZ1c

How to Fix Extruder Problems

  1. Start with nozzle cleaning – most extrusion problems are caused by clogs

  2. Check the extruder motor and cables – swap cables to identify faults

  3. Replace faulty parts as needed – motor or motherboard replacement may be necessary

  4. Always follow safety precautions – power off the printer before maintenance

By following these steps, Longer LK1 / LK4 / LK4 PRO / LK5 PRO owners can quickly troubleshoot extruder issues and restore reliable, high-quality printing performance.

Why Proper Extruder Maintenance Matters

Regular maintenance of your FDM 3D printer extruder ensures:

  • Consistent filament flow

  • Sharper model details

  • Reduced print failures

  • Longer printer lifespan

Keeping your extruder in optimal condition is essential for professional-quality 3D printing at home or in a small workshop.

Conclusion

Proper maintenance and troubleshooting of your FDM 3D printer extruder is essential to achieving high-quality and reliable 3D prints. By systematically checking for a clogged nozzle, testing the extruder motor and cables, and replacing faulty parts when necessary, you can quickly restore optimal printer performance.

For Longer LK1, LK4, LK4 PRO, and LK5 PRO owners, following these steps ensures smoother filament flow, sharper model details, and fewer print failures. Regular extruder maintenance not only improves print quality but also extends the lifespan of your 3D printer.

Always remember: safety first—power off your printer before performing any maintenance, and use official Longer replacement parts whenever possible.

By keeping your extruder in top condition, you can confidently tackle complex prints and enjoy a more consistent, professional resin or FDM 3D printing experience.

By Academy | March 29, 2021
LONGER LK4 PRO check by yourself guidelines - LONGER
LONGER LK4 PRO check by yourself guidelines

If you own a LONGER LK4 PRO FDM 3D printer, occasional setting issues, mechanical errors, or printing failures may occur. Knowing how to perform a self-check and troubleshoot your printer can save time and prevent unnecessary downtime. This guide covers step-by-step instructions, video resources, and practical tips to keep your printer running smoothly.

Quick Video Guides for LK4 PRO Troubleshooting

To help you address common issues, LONGER provides the following official quick-start videos:

Step-by-Step Self-Check Procedure

If you experience an error or abnormal printer behavior:

  1. Check basic components first:

    • Ensure the nozzle, PTFE tube, and filament are properly installed

    • Inspect cables and connectors for loose connections

  2. Perform axis and motor checks:

    • Test X, Y, and Z movement through the control panel

    • Observe for abnormal noises or skipped steps

  3. Refer to specific video guides for detailed troubleshooting:

    • For hotend issues → Watch “Hotend Components Replacement”

    • For errors → Watch the corresponding Error resolution videos

  4. Stabilize and maintain the machine:

    • Check the base for wobbling and adjust as needed

    • Ensure all screws and mounts are tight

When to Contact Support

If the problem persists after performing the above checks:

Conclusion

Regular self-checks and maintenance on your LONGER LK4 PRO are essential for preventing print failures, saving filament, maintaining accurate X, Y, Z calibration, and extending the lifespan of your printer components. By dedicating a small amount of time to routine checks, you ensure smoother, more reliable prints and reduce hours of troubleshooting.

By Academy | February 5, 2021
How to Add LONGER 3D Printers into Cura 4.8 Version - LONGER
How to Add LONGER 3D Printers into Cura 4.8 Version

If you own a LONGER 3D printer such as the LK4, LK4 PRO, or LK5 PRO, setting up the correct slicing profile in Cura 4.8 is essential for achieving high-quality prints. This guide will show you step-by-step how to add your printer, import official resource files, and configure the best printing parameters.

Reach this link to watch how to add LONGER 3D Printers into the latest Cura software. And get more knowledge about longer lk4 pro cura settings, longer lk4 cura settings, and longer lk5 pro cura settings.

Why Add Your LONGER 3D Printer to Cura 4.8?

Adding your printer model to Cura ensures:

Step 1: Download Official Resource Files

  1. Visit the LONGER official resources page >>[Resources files]<<

  2. Download the configuration files corresponding to your printer model

  3. Extract the files to an easily accessible folder

✅ Tip: Always use the latest resource files to ensure perfect print quality and parameter compatibility.

Step 2: Open Cura 4.8 and Add Your Printer

  1. Launch Cura 4.8

  2. Go to “Settings” → “Printer” → “Manage Printers” → “Add Printer”

  3. Select “Custom FDM Printer” and enter your printer name (e.g., LONGER LK4 PRO or LK5 PRO)

Step 3: Import the Configuration Profile

  1. In the printer settings, choose “Import Profile”

  2. Locate the downloaded LONGER resource file

  3. Confirm all parameters are imported, including:

    • Build volume and nozzle diameter

    • Print bed and hotend temperature

    • Printing speed and layer height

Step 4: Save Settings and Test

  1. Save the printer configuration

  2. Slice a test model using the imported profile

  3. Review the slicing preview to ensure no errors

  4. Begin printing once everything is confirmed

Conclusion

Adding your LONGER 3D printer to Cura 4.8 with official resource files ensures high-quality, reliable FDM printing. Correct slicing configuration is key to achieving smooth surfaces, accurate details, and successful prints every time. Always use official LONGER profiles to fully unlock your printer’s potential.

By Academy | February 5, 2021