Laser Engraver Blogs

How to Check If the CH340 Driver Is Installed Correctly

To make sure your Longer laser engraver works with your computer, check that the CH340 driver is installed and working well. If not, please download and install the appropriate driver for your device.

Step 1: Check the CH340 Driver Installation

  • A. The connection issue may occur if the required CH340 driver is missing or improperly installed.

  • B. For macOS 10.15 or later, the CH340 driver is already built-in and does not require manual installation.

  • C. If installation is needed, download the driver package from the link below:
    👉 CH340 Driver Download

Video Tutorials:

Step 2: Verify COM Port Detection

For Windows Users

  1. Connect your Longer laser engraver to your PC using the included USB cable.

  2. Download and install the CH340 driver. The installation may prompt you to restart your computer.

  3. Follow the on-screen instructions to complete installation.If any error messages appear, please contact Longer technical support for assistance.

  4. To confirm successful installation:

Right-click This PC, select Manage → Device Manager → Ports (COM & LPT).

If you see CH340 listed under COM ports, the system has successfully recognized your device.

Device Manager USB-Serial CH340(COM3)

For macOS Users

  1. Connect your laser engraver to your Mac via the provided USB cable.

  2. Download and install the CH340 driver. You may need to reboot the system.

    • If installation errors occur, contact Longer technical support.

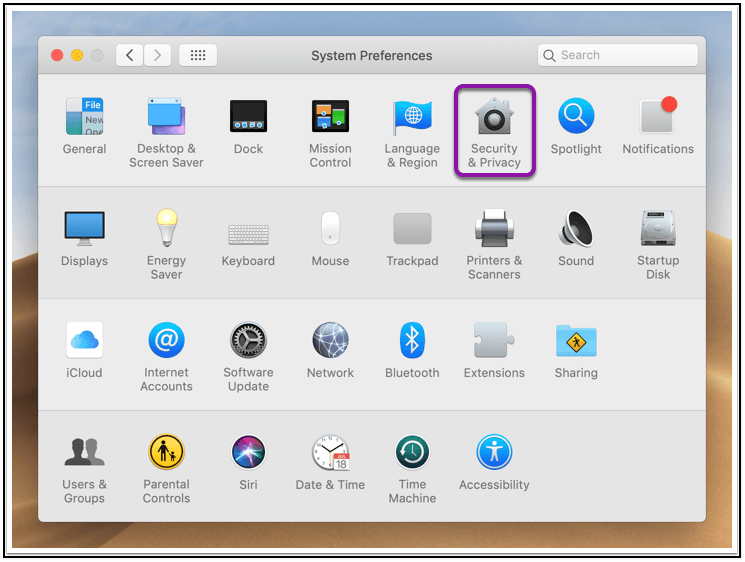
  3. After restarting, go to:
    System Preferences → Security & Privacy → General → Allow

    • Approve the CH340 driver installation when prompted (you may need to restart again).

    • Reconnect your laser engraver. Now LaserBurn, LightBurn, or LaserGRBL should automatically detect your device.

      General and Allow
    • If the “Allow” button does not respond, follow the terminal method below.

Step 3: Load the Driver Manually via Terminal

  1. Open Terminal:
    Finder → Applications → Utilities → Terminal

  2. Copy and paste the following command:


    sudo kextload /Library/Extensions/usbserial.kext/sudo
  3. Press Enter. If prompted, enter your Mac user password, then press Enter again.

    enter
  4. Once the command executes successfully, you will see a confirmation message in the Terminal window.

After completing these steps, your system should recognize the Longer laser engraver correctly. You can now connect and control your device through LaserBurn, LightBurn, or LaserGRBL without connection errors.

By Laser Engraver Blogs | October 15, 2025
How to Calibrate and Align the Nano Duo Camera in LightBurn

The Nano Duo comes equipped with a built-in camera that helps users precisely locate materials and designs before engraving.
In LightBurn, if you wish to use the camera feature, it must first be calibrated and aligned. The steps are as follows:

1. Focusing the Nano Duo

Before performing camera calibration and alignment, make sure to focus the Nano Duo properly.
Failure to do so may cause discrepancies between the designed and actual engraving sizes — resulting in engraved patterns appearing larger or smaller than intended.

2. Camera Calibration

Open LightBurn and select "Calibrate Camera Lens" in laser tools. 

Open LightBurn and select Calibrate Camera Lens in laser tools

Selecting "USB Camera" and "Standard Lens" in the interface, click "Next".

USB Camera Standard Lens Next

Place the calibration card in the camera view as shown, turn off "Honeycomb check enable", clik "Capture" button, and when "Next" lights up, proceed to the next step. Repeat the same operation multiple times.

capture

Note: A 90-degree rotation of the image is normal and does not affect camera calibration. Position the calibration card according to the diagram; the orientation of the device does not matter.

Until the interface as shown and click "Align Camera", and the lens calibration is completed. 

align camera

3. Camera alignment

At the end of section 2, click "Align Camera" ,select "USB Camera", and click "Next".

usb camera

In addition, you can also enter through "Calibrate Camera Alignment" in lasertools.

calibrate camera alignment

Place the wooden board, adjust the focus, set the engraving parameters, click "Frame" to confirm the engraving range is within the wooden board, and then click Engraving, and click "Next" after engraving.

Note: When carving thick materials like wood, refocusing is required.

refocusing

Click the "Capture Image" button to capture. When the image is clear in the camera view, click "Next". If it is not clear, recapture it or return to the previous step and engraving it again. 

capture image

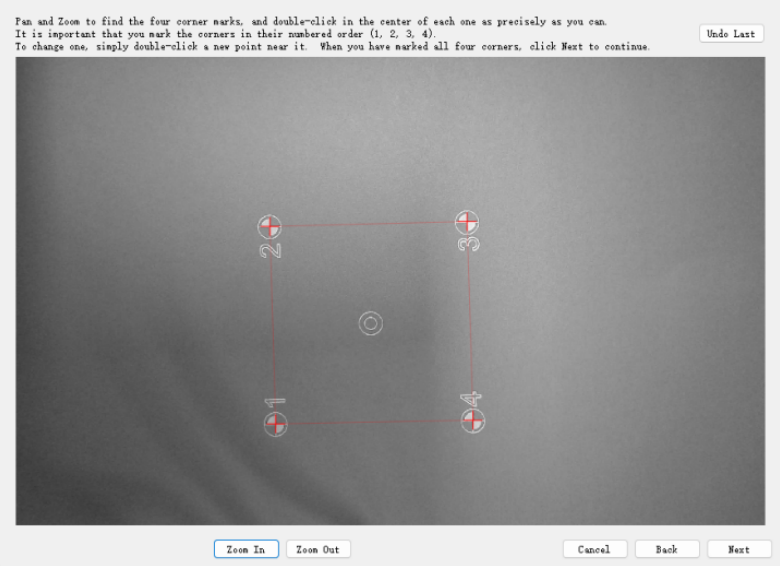
Pan and zoom to find the four corner marks, and double-click in the center of each one as precisely as you can. It is important that you mark the corners in their numbered order(1, 2, 3, 4).

marked all four corners

When you have marked all four corners, click "Next" to continue.

By Laser Engraver Blogs | October 15, 2025
How to update the firmware

For Windows, right-click the computer and select Manage, click Device Manager, click to expand Ports, find the port corresponding to the CH340 driver. Run the MKSLaserTool and click MKS ESP32 Download Tool, select the right port which is corresponding to CH340 driver and the update firmware. Set baud to 25000, Flash size to 8MB, and select ESP32 S3, click Start, it will prompt firmware successfully flashed after the update is completed.

1) Update by MKSLaserTool software

Please download LaserTool from https://github.com/LONGER3D/Longer-Laser and install it. Connect the laser engraver to computer with Type C cable, turn on the engraver. 

MKS Laser Tool V2.1.5Device ManagerMKS ESP32 Download Tool

2) Update by ESPTool Web

Enter https://espressif.github.io/esptool-js/ in the browser. This webpage can connect to the serial port to flash the firmware online.Select the baud rate 115200 and connect to the CH340 serial port, then Click Erase Flash first, then enter the Flash address 0x0 and select the firmware, then click Program to start burning. 

step 1
step 2
step 3

3) Update by LaserBurn APP

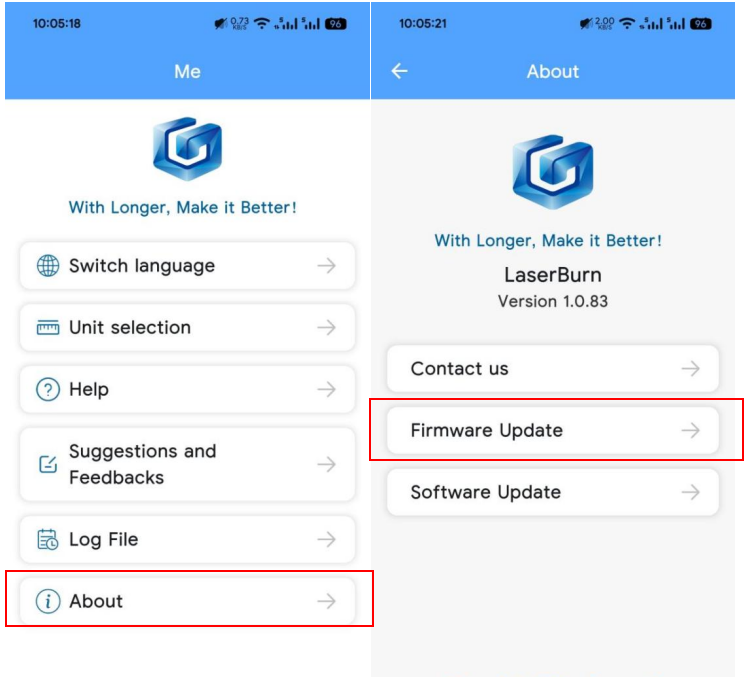
After the engraving machine is connected to the LaserBurn App, click Me→About→Firmware Update→RAY5 mini to upgrade the firmware.

Update by LaserBurn APP
By Laser Engraver Blogs | October 14, 2025
How to Use LaserGRBL to Control the Ray5 Mini for Laser Engraving

For Windows users, right-click This PC, select Manage, and open Device Manager. Expand the Ports (COM & LPT) section to locate the CH340 driver. Identify the COM port assigned to your Ray5 Mini and select it from the port list in LaserGRBL. Set the baud rate to 115200, then click Connect.

1) Connecting the Ray5 Mini to LaserGRBL

Expand the Ports (COM & LPT) section to locate the CH340 driverCOM and Baud

Once connected, the GRBL firmware will respond with a “welcome message” indicating the firmware version. You’ll also see “Status: Idle” displayed in the lower-right corner of the LaserGRBL interface — confirming a successful connection.

For macOS users, navigate to About This Mac → Overview → System Report, then click USB under the Hardware section. If the driver has installed automatically, you’ll find “USB Serial” listed under connected devices.

GRBL Firmware Information

If no COM port appears in the dropdown list, it means the engraver was not detected. This could be due to an unplugged USB cable, the engraver being powered off, or a missing driver. To fix this, go to Tools → Install CH340 Driver within LaserGRBL to install the necessary driver.

Machine StatusLaserGRBL Drive

2) Creating and Engraving a Project in LaserGRBL

Once the Ray5 Mini is properly connected, you can start setting up your engraving project.
Click File → Open File to import the image or design you want to engrave. Set the quality to 10 lines/mm, then click Next. Refer to your material’s parameter chart to define the optimal engraving power (S-MAX) and speed.

Make sure to select M4 – Dynamic Power Mode for laser operation.

💡 Tip: The S-MAX value should be 10 times the target laser power.

  • For 100% laser power, set S-MAX = 1000

  • For 60% power, set S-MAX = 600

Next, resize your image to fit the desired engraving area. If the design extends beyond the workspace, you can fine-tune its position using XY offset adjustments.

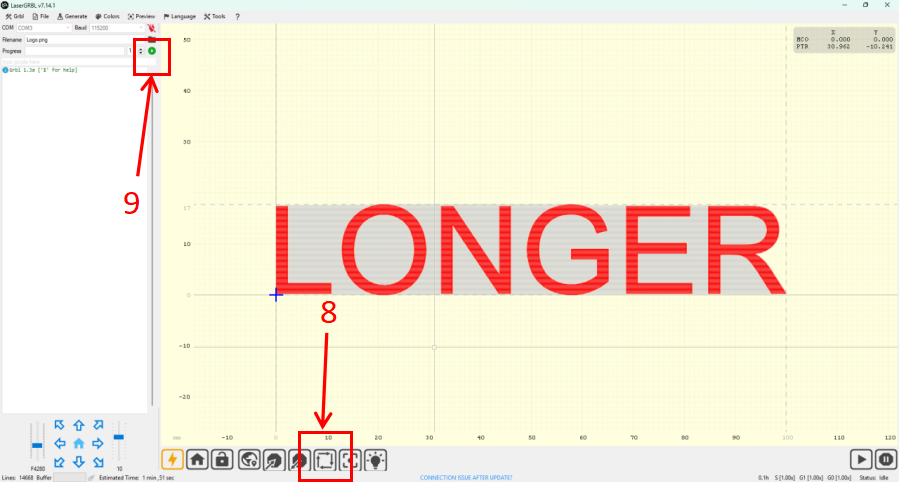
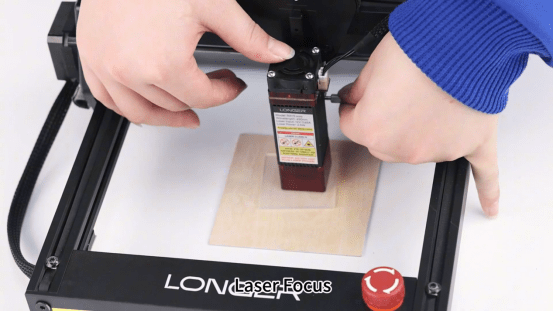
After importing the file and configuring parameters, use the focusing block to set the correct laser focus distance on the Ray5 Mini. Then, click the Frame button to confirm the engraving position on your material. Finally, press Start to begin the engraving process.

LaserGRBL Progress and Openfile

Additional Tips for Stable Engraving

  • Always check that your engraving surface is level and clean before starting.

  • Ensure the laser module lens is free of dust or debris for consistent output.

  • Save your preferred engraving profiles in LaserGRBL for faster setup in future projects.

Quality and NextDynamic Power Size and Offset

By following these steps, you can achieve precise, high-quality results with your Ray5 Mini laser engraver using LaserGRBL software — whether for DIY creations, small-scale production, or detailed material testing.

By Laser Engraver Blogs | October 14, 2025
LONGER How To|Guide to Connecting Ray5 Mini with LaserBurn (Mobile & PC)

This detailed guide walks you through connecting the LONGER Ray5 Mini laser engraver to LaserBurn software on both mobile and desktop. From Wi-Fi setup and file management to engraving workflows and real-time controls, it covers everything you need to start engraving with confidence. Whether you're a beginner or just need a quick reference, this how-to makes setup fast and frustration-free.

By Laser Engraver Blogs | September 16, 2025
LONGER Research | RAY5 mini Laser Engraver Overview: Compact Yet Powerful

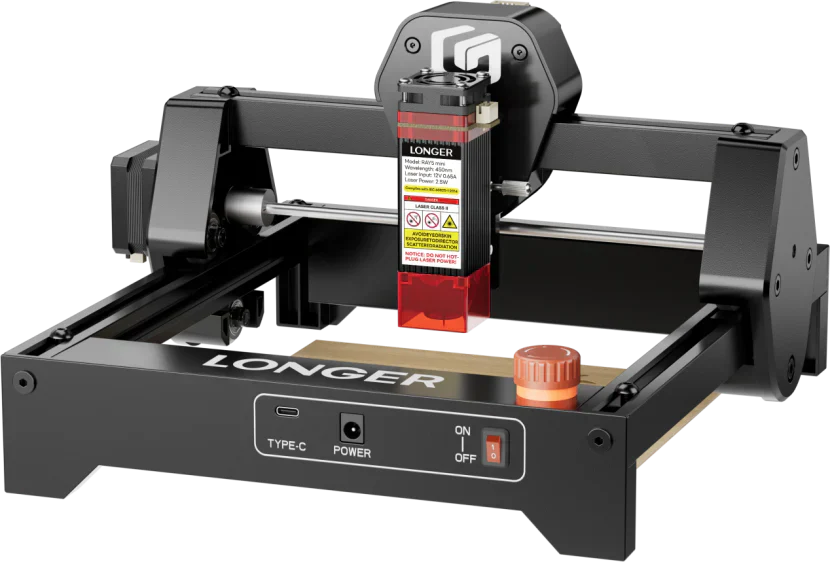
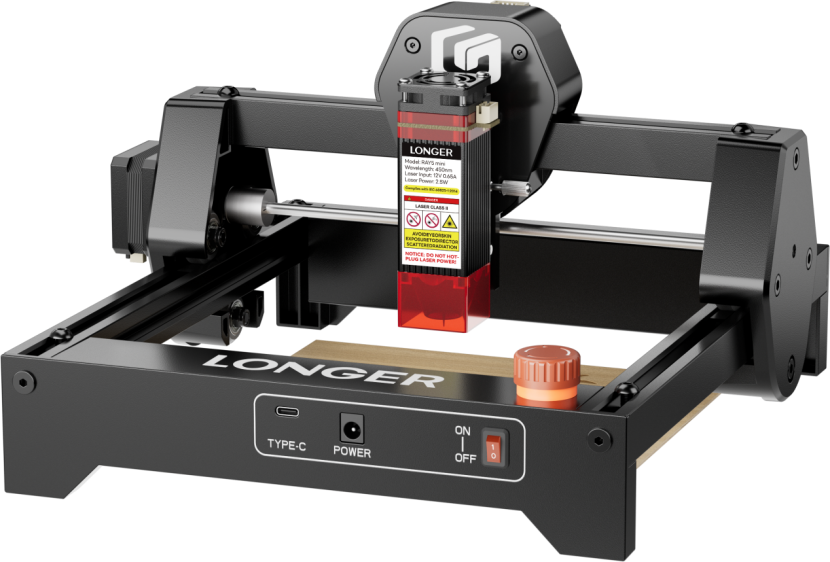
The LONGER RAY5 mini is a compact yet powerful laser engraver designed for creators on the go. With support for over 300 materials, high-speed performance, and built-in safety features, it’s the perfect tool for hobbyists, classrooms, and small businesses looking for precision and portability.

By Laser Engraver Blogs | September 16, 2025
3D Wood Relief Carving Manual
LONGER How To: 3D Wood Relief Carving Manual

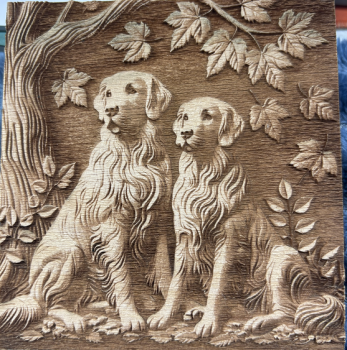
This LONGER manual explains how to perform 3D wood relief carving with a 20W 450 nm blue diode laser on Nano Duo using LaserBurn software. It covers essential safety protocols, material preparation, correct focus, power, speed, and line intervals to achieve precise engraving. With guidance on setup, positioning, real-time preview, and post-processing, users can create professional-quality wood relief carvings while minimizing burn risks.

By Laser Engraver Blogs | September 9, 2025
LONGER How to: Ray5 Mini Laser Engraver Tips Using LightBurn

The LONGER Ray5 Mini is a compact, high-precision laser engraver ideal for small-scale projects. This guide walks you through setup, focusing, and engraving using LightBurn software. From importing your design to the finished result, discover how to get professional-quality engravings with ease. The Ray5 Mini balances performance, safety, and user-friendliness—perfect for hobbyists, creators, and small studios alike.

By Laser Engraver Blogs | July 29, 2025
LONGER How To|How to Upgrade the Firmware on the Nano Duo

This step-by-step guide walks you through upgrading the firmware on the LONGER Nano Duo laser engraver. From downloading the latest files to updating screen, galvo, and main control components, each step ensures your device stays optimized. Firmware updates enhance performance, unlock new features, and improve overall engraving accuracy. Stay current to get the most from your Nano Duo.

By Laser Engraver Blogs | July 24, 2025
LONGER How to: How to Solve the issues caused by Lightburn V2.0

After upgrading to LightBurn V2.0, some users reported display glitches and preview issues affecting their workflow. This guide walks you through reverting to version 1.7.08 — a stable release fully compatible with Longer Ray5, B1, and Nano machines. Learn how to uninstall, reinstall, and reactivate the previous version of LightBurn to restore full functionality and continue engraving without disruption.

By Laser Engraver Blogs | July 23, 2025