


Products
Trending searches

LONGER How To: How to Add and Use the Art Library in LightBurn
LightBurn is a powerful design and control software widely used in laser engraving and cutting. One of its most practical features is the Art Library, which allows you to store and quickly access commonly used vector graphics or design elements. Whether you're creating holiday ornaments, birthday gifts, or practical tools, the Art Library helps streamline your workflow and ensures your favorite designs are always at hand.
Enabling the Art Library Window
To start using the Art Library, go to the “Window” menu at the top of LightBurn and select “Art Library.”
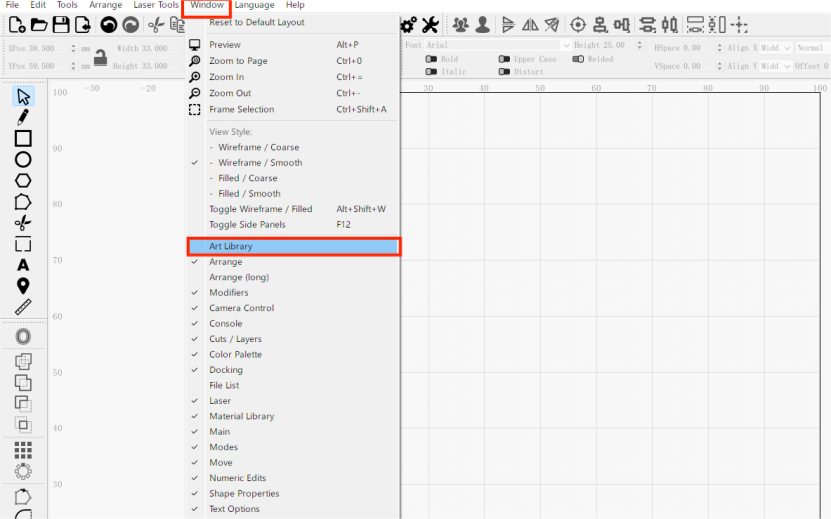
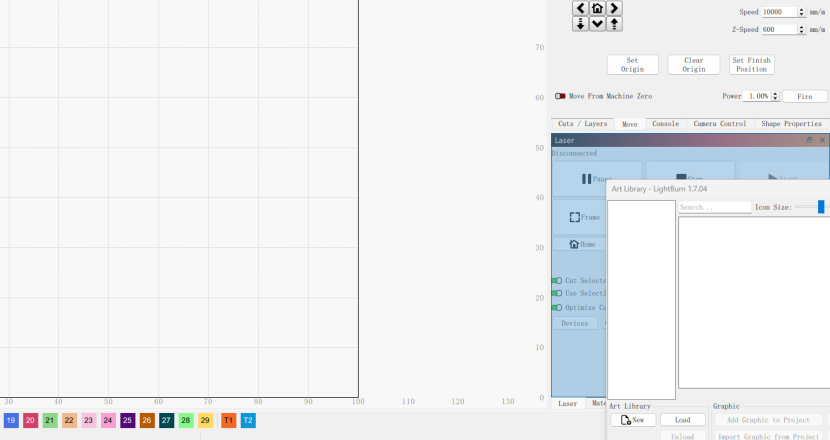
By default, the Art Library panel will appear docked on the left side of the workspace. You can drag it to another location (such as the lower-right area of the screen), and release it when a blue docking guide appears.
Creating a New Art Library
To create a new (empty) library, click the “New” button in the Art Library panel. You will be prompted to select a location and name for the library file. Once created and selected, you can begin adding artwork to it.
Each library is saved on your computer with the file extension .lbart, and contains all stored artwork in a compact format.
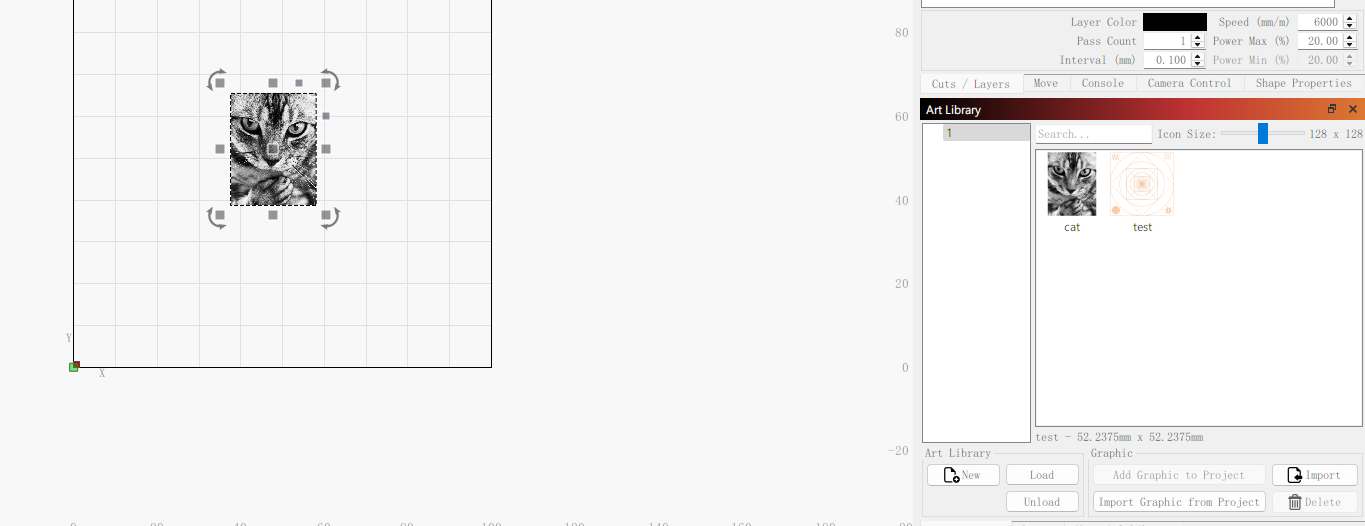
Understanding the Library Layout
The left side of the Art Library window displays all currently loaded libraries.
The right side shows all artwork items contained within the currently selected library.
You can load multiple libraries at once, and organizing them by themes (e.g., holidays, animals) or functions (e.g., test cards, templates, boxes) is a great way to keep your work efficient and tidy.
Importing Artwork into the Library
To add artwork to your library, there are two primary methods:
1. Importing from Files on Your Computer
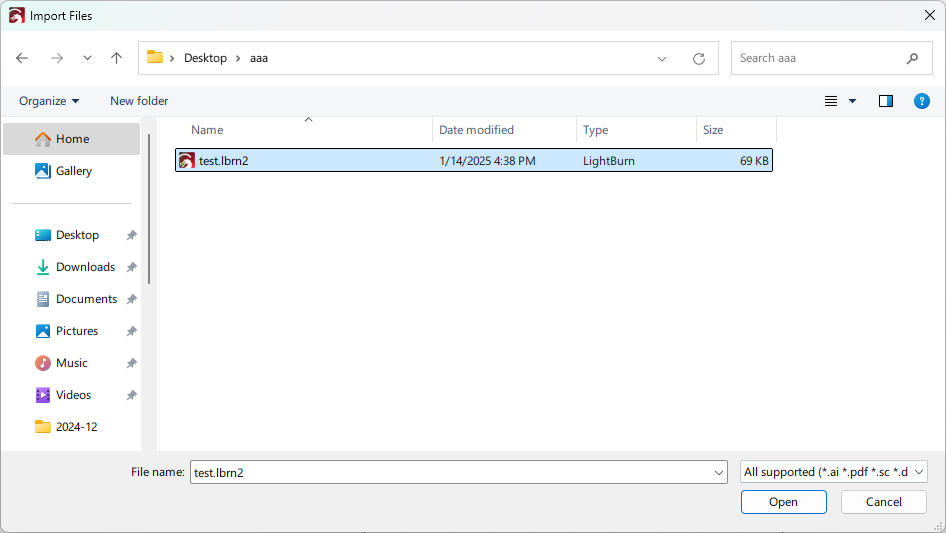
Click the “Import” button to add vector graphics saved on your hard drive into the selected library.
You can select and import multiple files at once, and each file will become an individual entry in the current library.
2. Importing from Your Current Project
If you have artwork selected in your LightBurn project, you can:
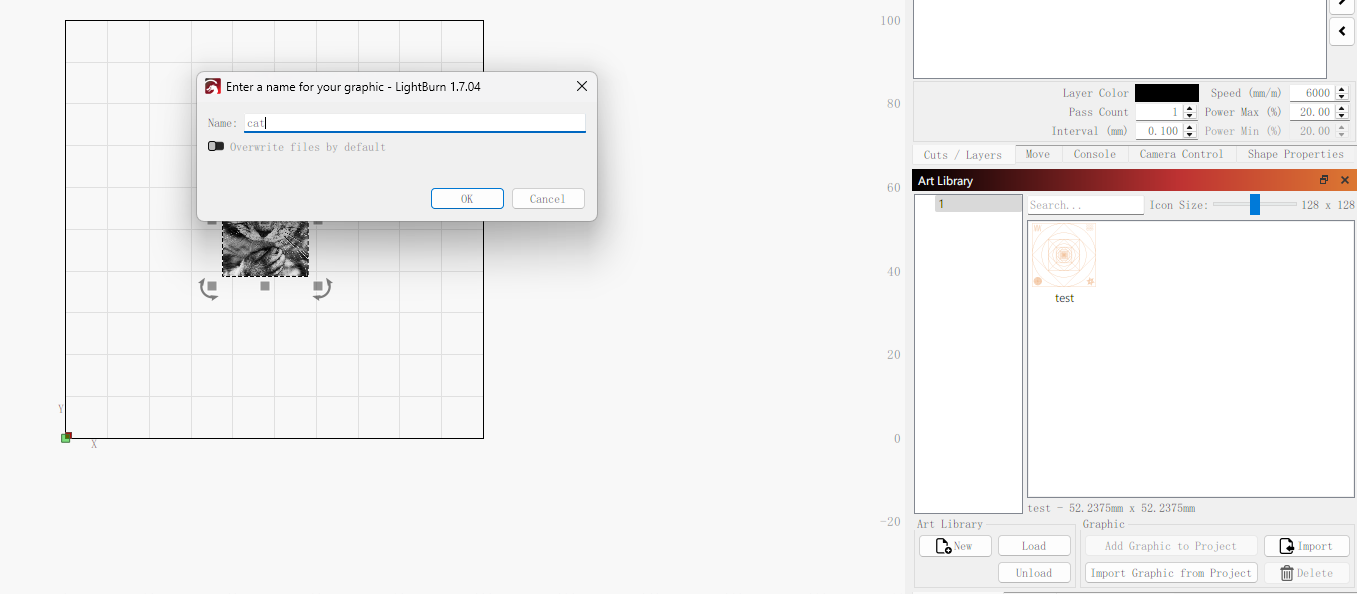
Click “Import Graphic from Project”, or
Right-click within the Art Library panel and select “Add Selection to Library.”

You will be asked to name the item, and once added, it will appear on the right side of the panel.
Using the Art Library in Your Projects
To use artwork from your library:
Simply double-click on an image in the right panel, or
Drag and drop it directly onto the canvas.
The artwork will appear in your current project, ready for editing, scaling, or engraving.

Managing Art Library Content
To delete an artwork item from the library, select the item and click the “Delete” button in the lower-right corner.
To load a previously saved library, click “Load” at the bottom of the Art Library panel and select the appropriate .lbart file.
To unload a library (remove it from the view but not delete it from your hard drive), click “Unload.”
This allows you to manage multiple themed libraries and keep only the relevant ones visible during a project.
Conclusion
The Art Library in LightBurn is an essential tool for efficient, repeatable, and organized laser design work. Whether you're a hobbyist creating holiday gifts or a small business preparing product templates, the ability to store, manage, and reuse artwork will save you time and reduce design effort. By learning to fully utilize this feature, you can significantly enhance your workflow and keep your creative assets just a click away.
Let the Art Library be your personal design vault—easy to access, easy to organize, and incredibly powerful.
- Choosing a selection results in a full page refresh.
!