CONTENTS
Trending searches
Carrello ($0)
Carrello ($0)


ABSTRACT
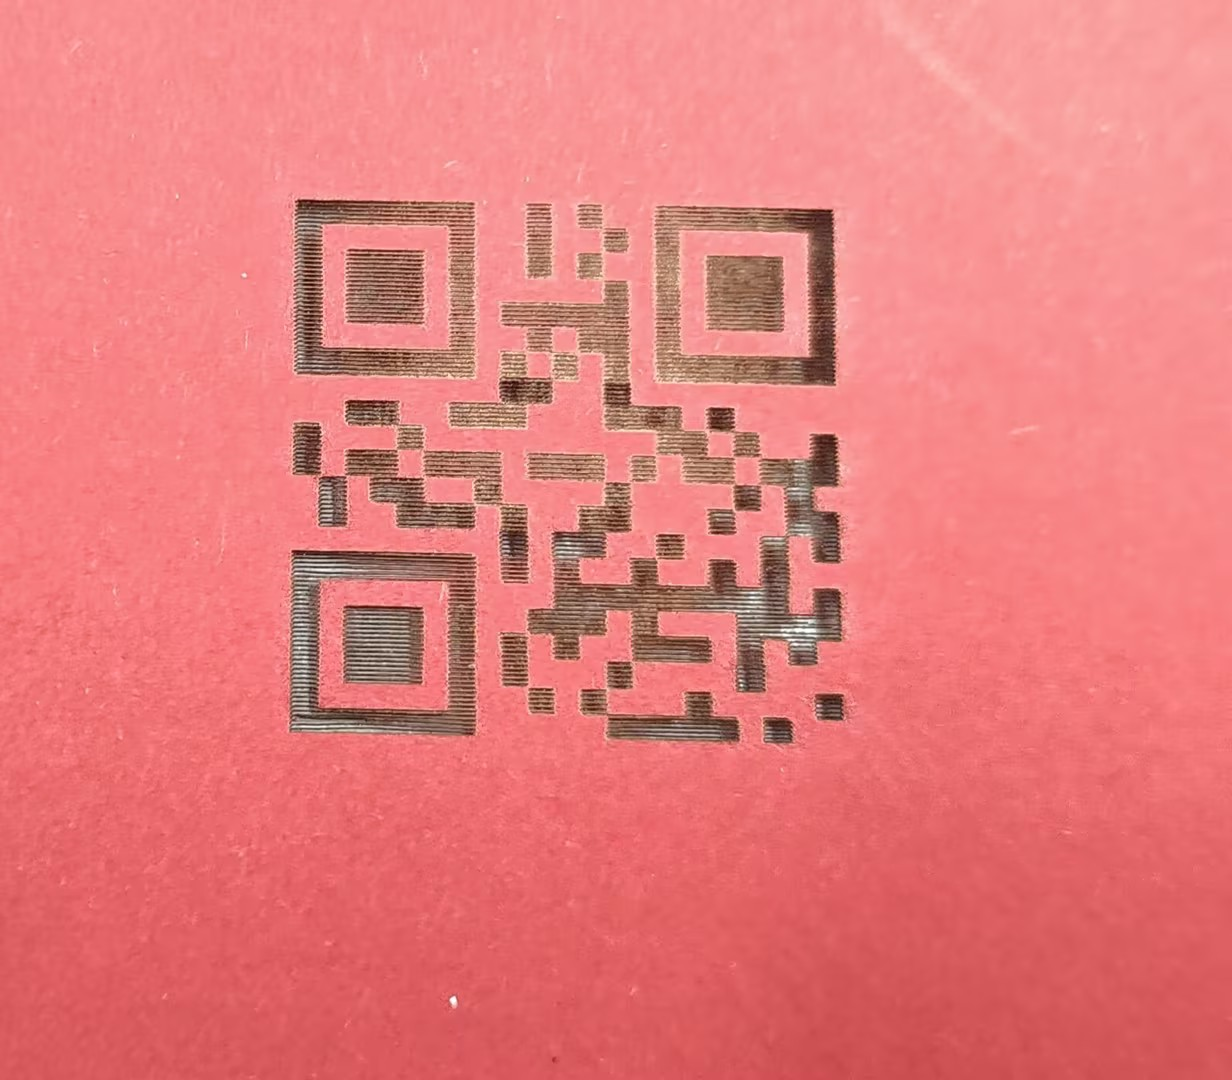
LightBurn is a powerful and widely loved laser engraving software, favored by hobbyists and professionals alike. It’s not only capable of vector design and layout but also includes built-in tools for generating QR codes—perfect for adding personalized touches to your engraving projects. This guide will show you how to do QR code laser marking in LightBurn, from generating the code to engraving it on different materials like wood, acrylic, or metal. The process is beginner-friendly, intuitive, and suitable for users of all experience levels.
LightBurn comes with a built-in QR code generator that supports multiple content types such as URLs, plain text, or Wi-Fi credentials.
Launch LightBurn.
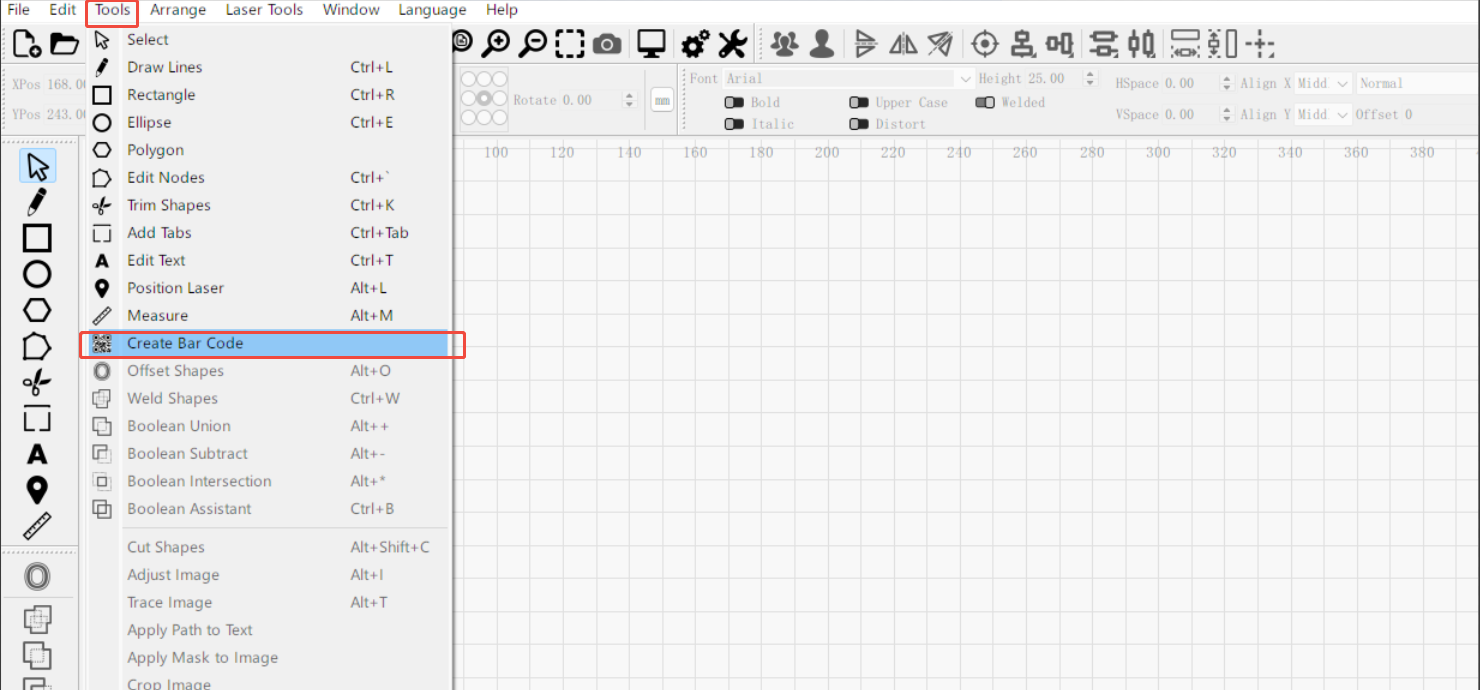
In the top navigation bar, go to Tools → Create Barcode.
Click, hold, and drag on the workspace to define the size of the QR code area.
Release the mouse button to place the code. You can resize it later if needed.
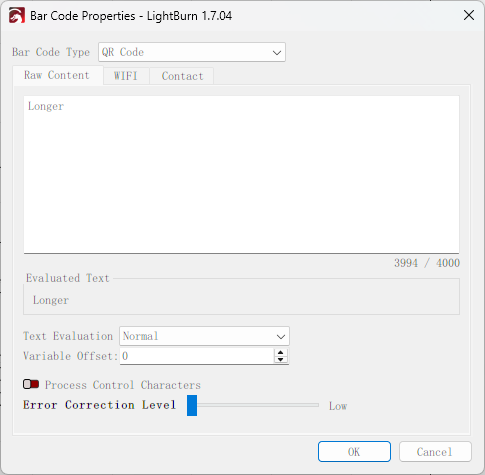
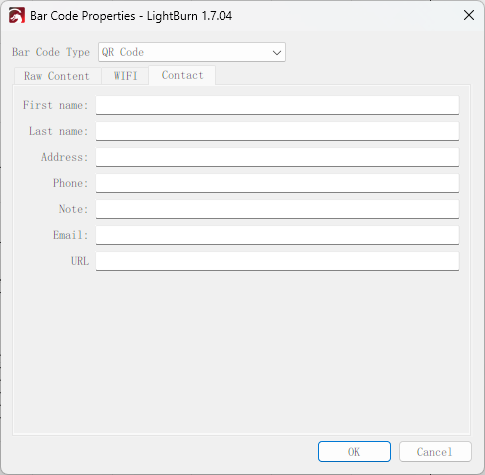
Once you draw the QR code area, a configuration window will appear where you can specify the data you want to encode:
For a website: Enter the full URL (e.g., https://example.com).
For plain text: Type in the exact message or text you wish to engrave.
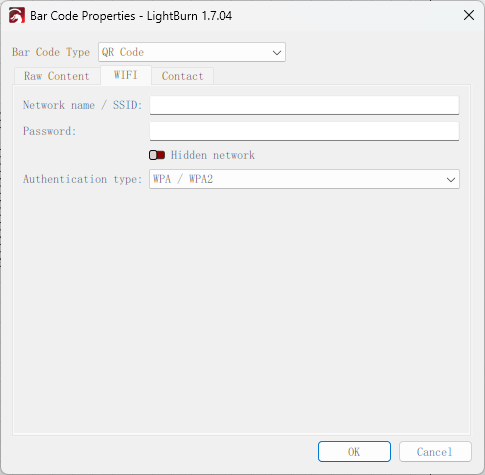
For Wi-Fi information: Select the Wi-Fi mode, then enter your network name (SSID) and password.
When done, click OK to generate the QR code. It will automatically appear in the workspace. Click Cancel if you wish to discard the creation.
Before you start engraving:
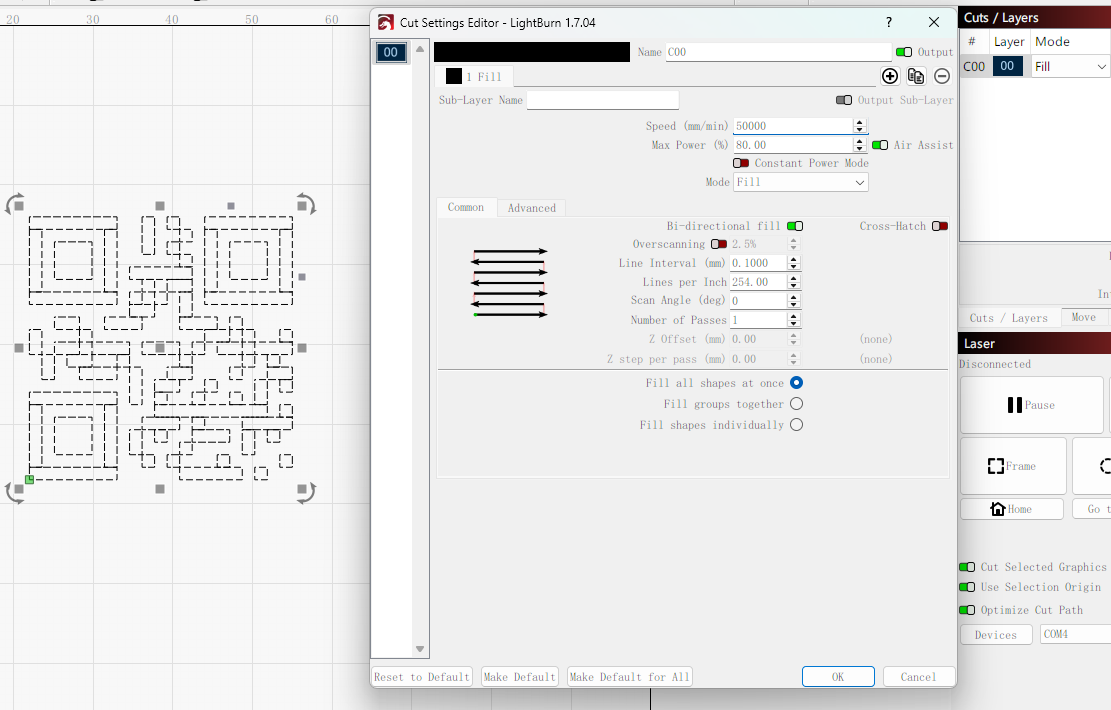
Set the engraving mode to Fill for the best results in QR code laser marking, ensuring the code remains scannable on different materials.
Adjust speed and power according to your material. Refer to your machine’s parameter guide for material-specific settings.
With LightBurn’s built-in QR code generator, creating scannable, personalized designs is fast and simple. Whether you’re engraving links, contact info, or Wi-Fi access on a project, this feature lets you add smart functionality with minimal effort. Try it out and make your laser engravings not only beautiful but also interactive!
RELATED POSTS
Program
Company
Visit
(+1) 888-575-9099
Customer Service: support@longer.net
Brand Cooperation: info@longer.net


!

