Academy

A Hauntingly Exquisite Halloween: 10 Laser Cutting and Engraving Ideas for Halloween 2023 - LONGER
A Hauntingly Exquisite Halloween: 10 Laser Cutting and Engraving Ideas for Halloween 2023

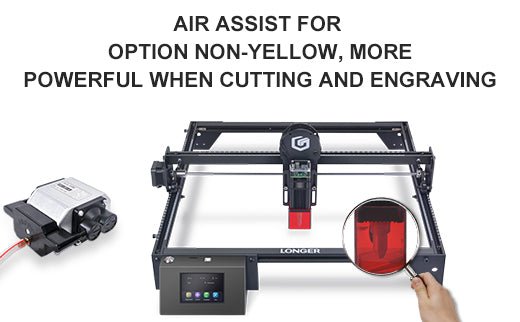
Halloween is coming! You will definitely need some unique decorations. Using a laser engraving machine can efficiently help you create small decorations. In the following sections, we’ll discuss some of the most amazing Christmas themed laser cut crafts that will bring joy this upcoming Halloween.

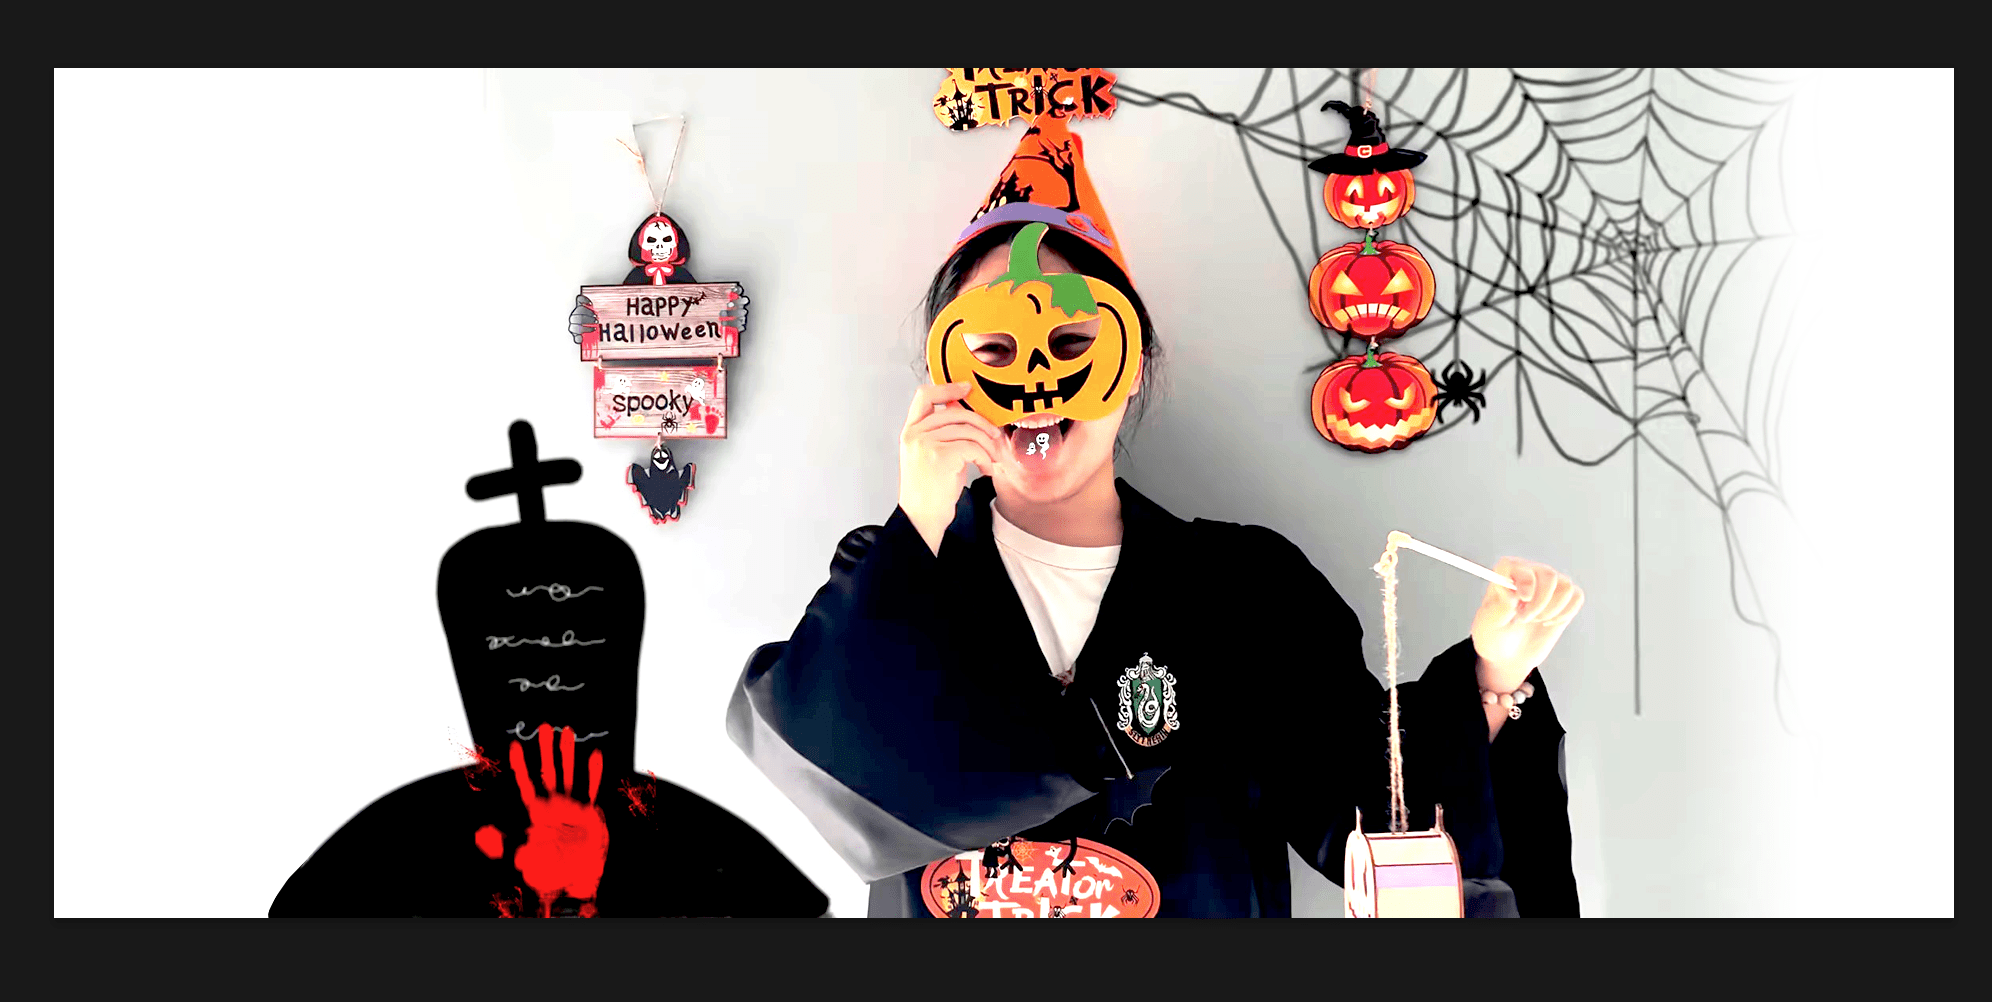
1.Laser-Cut Elegant Masks
When you go to a party or invite others to your party, you must have an elegant mask. With a laser engraver, you can create a variety of laser-cut masks.

Handmade tutorial on how to make exquisite pumpkin masks using laser engraving machine

2. Wooden Signs
People love to stick Halloween wooden signs on doors, houses, and inside offices. It's a great gift for anyone. There are hundreds of ideas and designs to make unique and spooky Halloween wooden signs that will surprise the receiver. You can use wood or acrylic to create these.

Laser Engraving Machine to Make Halloween Signs
3. Vintage Skull Halloween Invitation
The vintage skull invitation is one of the best laser engraving ideas for Halloween. If you want to invite people to your Halloween party in a unique and thrilling way, you can make a skull Halloween invitation with spiders, spider webs, and other ghostly creatures. All you need is a piece of wood and then engrave the whole invitation on it. It will be unique, extraordinary. The recipients will be thrilled to join the party.
LONGER RAY5 Make Halloween Invitations

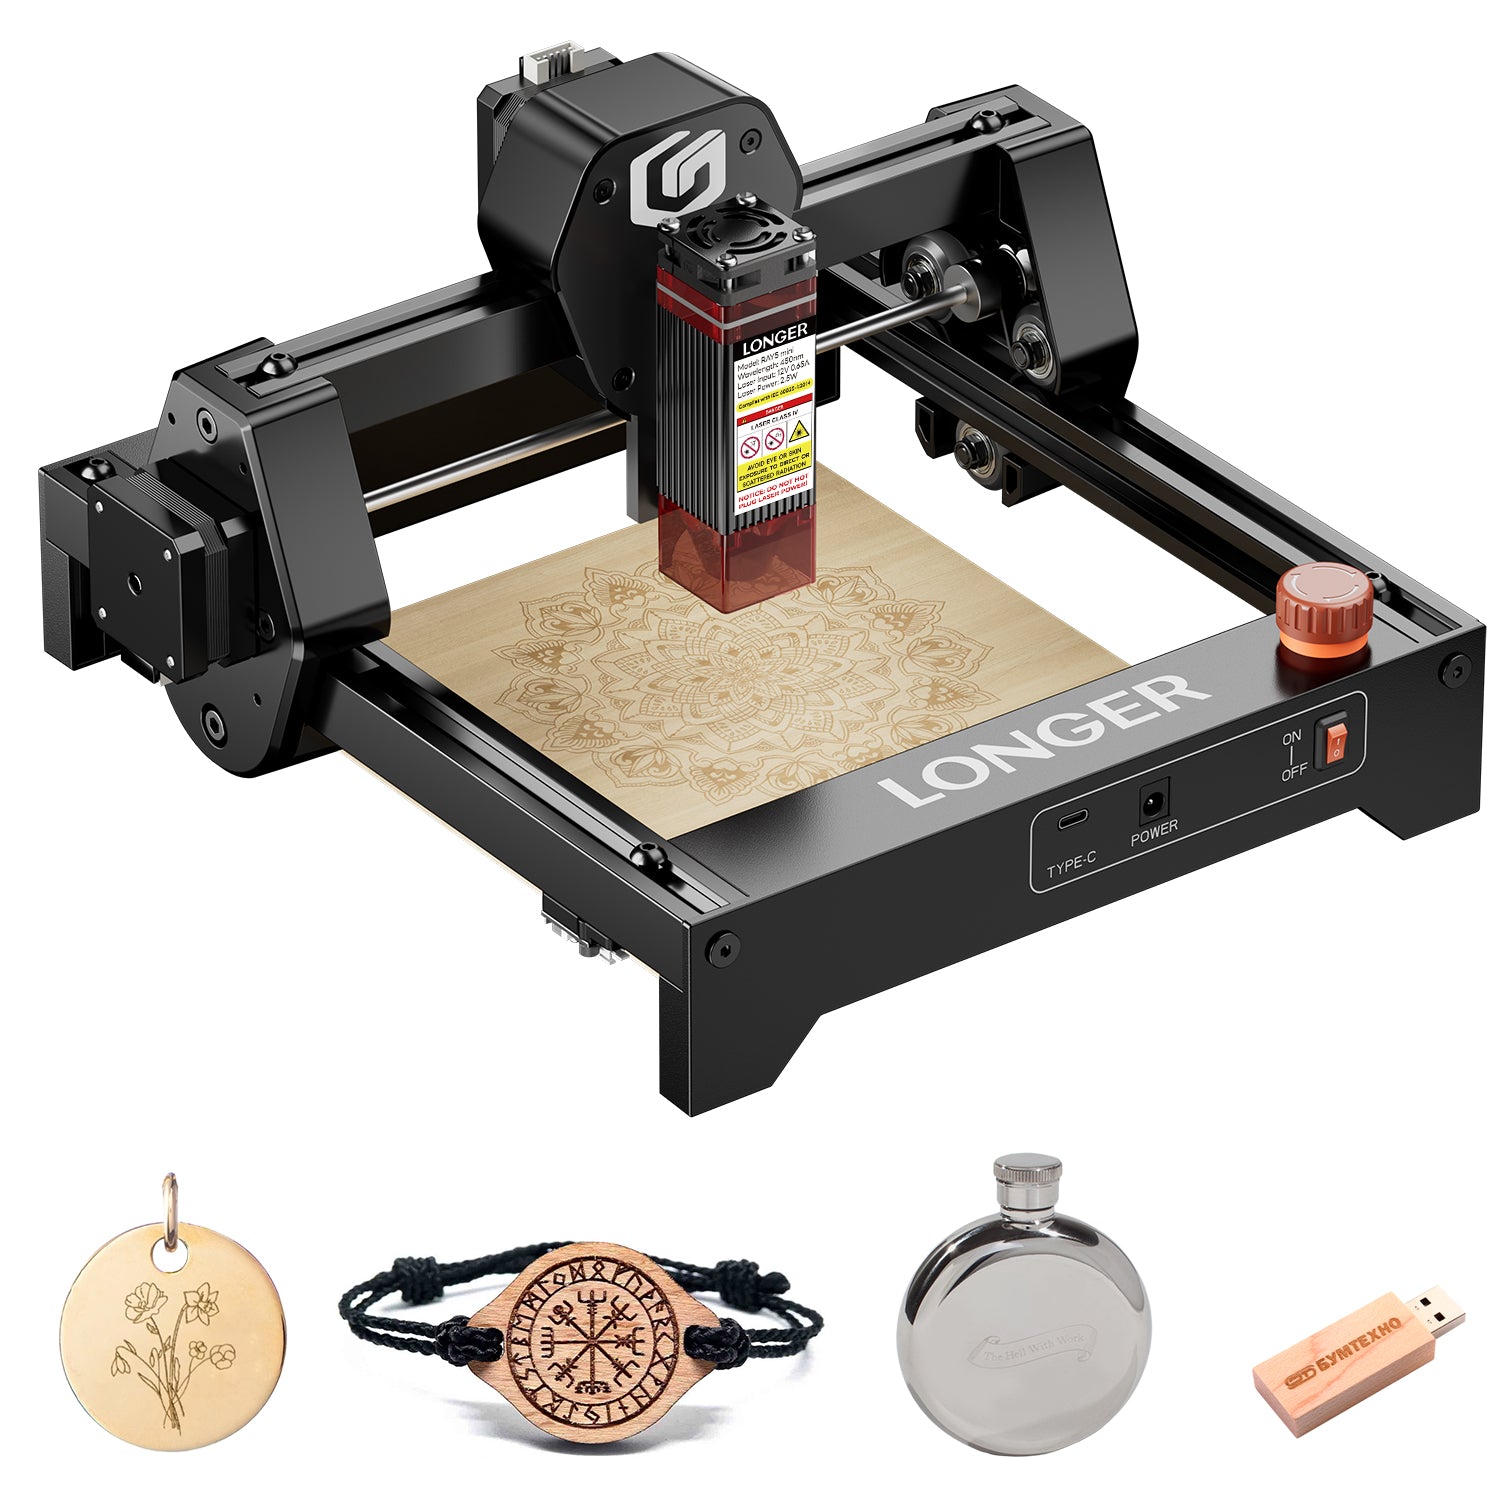
4. Spooky Halloween Jewelry
Jewelry is a woman's first love, even on Halloween. You can wear some ghostly jewelry, such as pumpkin, spooky bat, skull, witch hat, spider, raven shaped earrings. Rings and necklaces can also be made of wood. If your machine can engrave metal, you can engrave any spooky thing on a metal band.

LONGER laser engraving machine for making jewelry necklaces

5. Skull Rock Glass
Halloween wouldn’t be complete without a skull rock glass. Add a rotary attachment to your laser engraver, and you can engrave any design on any glass. We can use the skull rock glass to welcome guests - I believe that everyone will love this idea.

Beautifully handcrafted Halloween skull glasses

6.Halloween Party Banners
Banners can be used for decorating houses and party venues. They are usually made of cardstock or similar material. We can use a desktop laser engraver to engrave party banners with Halloween slogans and good-looking candies, which will make your Halloween party the most creative in town.

Halloween banner made with LONGER Laser B1 40W

7.Halloween Light Box
The light box is another good idea for Halloween. It looks very attractive and is one of the appealing decor ideas. Making a Halloween light box is not so difficult. All you need to do is make four pieces of engraved and cut wood and then connect them to form a rectangle. You can also provide a lamp with the box; it will be a complete set. People will love this surprising item and will be more willing to come to your party.

Halloween light boxes made by laser engraving machine to decorate the house

8. Halloween Cupcake Toppers/Decorations
People gift cupcakes on Halloween and decorate them with toppers. The cake decorations are made of acrylic, paper, or wood. With a laser machine, making cupcake toppers becomes easier. There are hundreds of designs for Halloween cupcake toppers. You can make different types of toppers and package them in dozens on this special day.

Make handmade Halloween cake trays that can be sold

9. Homemade Candles/Candle Holders
Halloween is incomplete without candles. People light candles at home to make the environment even scarier. Using candle holders can make candles more attractive. When you put a candle into the holder, the shadows from the spooky design look more appealing. You could use your laser machine to make various Halloween candle holders. It's a simple project, and people love to put them on candles. Holders can be made from wood, acrylic, or card stock.

Small Businessman Learns to Make Halloween Lanterns and Makes Lots of Money

10. Various Halloween decorations
Once you have a Halloween mask, don’t forget to make a few accessories for yourself. I suggest you carve acrylic into the shape of a skull and turn it into earrings, or carve weird patterns on stainless steel jewelry. So you have the perfect set of Halloween ornaments.

Exquisite Halloween wooden hang tags to decorate your party


With a laser engraving and cutting machine, anything is possible because you can make almost anything you like. You can seize the opportunity of Halloween to make some relevant items that families can use. To make it easy for you, we've shared some astonishing ideas. You can make these items and then share them on social media. I believe all viewers will love these crafts!

Happy Halloween!

By Academy | November 2, 2023
Lens Cleaning for Longer Ray5 10W

Longer Ray5 10W has a laser module capable of engraving and cutting multiple types of materials. However, depending on the type of work that is carried out, it is possible that a fair amount of smoke is produced, which can inevitably settle on the lens of the laser module and therefore blur it. Once the lens of the laser module is dirty or clouded, the laser beam can no longer pass through it, and therefore the emission of the laser module is drastically reduced. As a consequence, more and more power will be needed to engrave the same materials already engraved previously, until it will be practically impossible to engrave any type of material, even setting 100% power. This problem occurs most when an air assist system is not used; in fact, an air assist system allows you to create air pressure in the vicinity of the lens, thus preventing smoke and dust from settling easily on the lens.

Laser lens and Protective lens

In order to solve this problem, it is necessary to proceed to cleaning the lens of the laser module; once the lens is cleaned, the laser beam can pass through it without suffering losses, and therefore the materials will be engraved or cut again to perfection.

To proceed with the cleaning of the lens of the laser module of Longer Ray5 10W, it is necessary first to completely disassemble the laser module, as shown in the figure:

completely disassemble the laser module

The laser module of the Longer Ray5 10W has a factory-installed protective lens, which can be unscrewed and cleaned separately from the laser module. This lens is a simple protective glass and has no focusing function. After removing the protective lens, you can proceed to clean the lens with the use of a cotton swab soaked in alcohol. Be careful to prevent alcohol from entering the inside of the lens.

completely clean and free of dirt

Use one or more cotton swabs soaked in alcohol until the lens is completely clean and free of dirt; at this point, therefore, you can proceed to screw it to the laser module and reassemble the laser module of Longer Ray5 10W. At the end of the cleaning procedure, you can proceed to engrave a sample file contained in the microSD card of Longer Ray5 10W so you can evaluate the total restoration of the functionality of the laser module.

By Academy | July 25, 2023
Text Layout Cutting with Lightburn and Longer Ray5 - LONGER
Text Layout Cutting with Lightburn and Longer Ray5

Longer Ray5 allows you to engrave and cut multiple types of materials. In particular, many users of Longer Ray5 prefer to create a custom text and then engrave or cut it on wood panels or similar material. Engraving a text using the laser beam is not a big problem, as it is sufficient to set the right parameters for the type of material chosen, and the result will be excellent. However, if you want to cut (e.g., on wood or paper) your custom text, then setting the right parameters may not be enough.

In fact, depending on the type of text chosen, it may be necessary to make manual changes to the text so that the cut can take place correctly. Analyzing the issue in detail, assuming you want to laser cut the word "NICE," then there is no problem; however, if the word is "HELLO," then it should be noted that the letter "O" consists of a closed surface, which when cut will fall away from the material and thus change the layout of the letter "O."

Specifically, this problem occurs with all letters that contain a closed surface within them, such as the letters "A – B – D – O – P – Q – R."

Using LightBurn software, you can solve this problem really easily and quickly. In detail, first you proceed with the creation of your own personalized text within LightBurn. After entering the text, you will visually check for any letters that have problems when cutting.

In the example given here, there are some letters that cannot be cut correctly and therefore need to be corrected first. The solution to this problem lies in eliminating the closed surface inside the letter: to do this, just create a "bridge" that connects this closed surface with the rest of the letter.

In this way, after making the cut, this closed surface will remain attached to the cut panel, and therefore the layout of the letter will not be changed.

In particular, you must manually create a small rectangle, which must be pasted inside each problematic letter in order to create a bridge between the closed surface of the letter and the letter itself, as shown in the example below. After that, you have to make a Boolean subtraction between the letter and the rectangle.

We proceed to insert a rectangle for each letter that needs to be corrected, then we proceed with the subtraction (the procedure must be repeated for each letter, one letter at a time). Finally, the end result will look like this:

At this point, you can make a cutting preview or proceed with the export of the G-code on the microSD of Longer Ray5 and perform the cut (always remembering to set the correct parameters first to be able to cut the type of material chosen).

This technique can also be applied when using different text layouts, such as italic text or number format, so that you always eliminate any closed surfaces that prevent you from making a correct laser cut.

By Academy | July 6, 2023
Engraving & Cutting with Lightburn and Longer Ray5 - LONGER
Engraving & Cutting with Lightburn and Longer Ray5

Longer Ray5 allows you to engrave and cut multiple types of materials. In particular, many users of Longer Ray5 prefer to carry out engraving and cutting work at the same time, especially when it comes to working with wood panels; however, engraving and cutting do not necessarily have to be two distinct processes, as using Lightburn, you can perform both machining operations in one operation.

In particular, after opening an image in LightBurn, proceed to set the engraving parameters in the window on the right of the screen. I know that the engraving parameters are those of the model image.

After setting the engraving parameters, right-click with the mouse on the imported image, then select Trace Image.

In the screen that opens, define the quality of the cutting perimeter by increasing or decreasing the Threshold value, then confirm by pressing OK.

The image will be superimposed by a perimeter, as set in the previous screen, and at the same time in the window on the right of the screen will appear a new entry relating to the cut to be made, indicated with Model Line. For Model Line, set image cropping parameters, such as speed, power, and number of passes.

At the end, press Save Gcode to export the working file to the microSD of Longer Ray5, then proceed to start working on Longer Ray5. Alternatively, before exporting the GCode, you can check the simulation of the engraving and cutting process by pressing Preview.

In this way, Longer Ray5 will engrave the selected image, after which it will cut the image following the perimeter set above.


Above is the introduction of the first layer calibration; I hope it can help you. If you still have any questions during the operation, please visit our Support Page. Our knowledgeable staff is happy to assist you and your team with any questions.

Want to learn more about RAY5 Laser Engraver? Check out the video below.

https://www.youtube.com/playlist?list=PLLz1z_0pXsW0rjYbC2V_upO1YlU4HeuAg

Step into a world of precision craftsmanship with LONGER RAY5 Series. These high-accuracy laser engravers and cutters redefine what's possible, effortlessly mastering materials with unparalleled precision and ease. Whether you seek to infuse your home with personalized charm or elevate your professional projects, these versatile machines seamlessly adapt to your needs. Their compact design makes them an excellent choice for home laser engravers and cutters, adding a touch of sophistication to your creative space. Meanwhile, their precision engineering makes them equally at home in the professional arena, where they serve as the quintessential desktop laser cutter, providing industrial-grade precision right at your fingertips. Explore limitless possibilities and unlock your creativity with Longer RAY5 Series.


Read more

By Academy | June 19, 2023
Air Assist Kit installation for Longer Ray5 10W & 5W - LONGER
Air Assist Kit installation for Longer Ray5 10W & 5W

Visible light and laser beam have in common the same nature, as both are composed of photons, however the difference between them is in the fact that visible light has an optically isotropic propagation (that is, it propagates identically in all directions) while in the laser all the energy is concentrated within a single beam of very small section. Therefore, when the laser hits matter, it is instantly able to radiate a great power in a very small area, causing a sudden and rapid increase in temperature that alters the state of matter.

Laser engraving machines, such as Longer Ray5, are able to emit a laser beam that instantly transforms the state of matter by combustion, and the contrast between the laser-subjected surface and the surrounding surface creates the visual effect commonly called Laser Engraving. However, the energy hitting a single point is not limited to that point, but the heat generated is also transmitted to the areas surrounding the point, causing the typical burning effect of laser processing.

In order to avoid or reduce this effect, an air assist mechanism can be used, which consists of a compressor capable of continuously blowing pressurized air directly onto the area subjected to the laser. In this way, the heat exchanged between the laser area and the surrounding area is mitigated by the fresh air of the Air Assist compressor, thus avoiding the burnt effect around the laser engraving. In addition, the air blown on the engraving zone cancels the heat exchange with the surrounding areas but does not damage the engraving ability of the laser beam. A simple example to understand this phenomenon can be this: if on a summer day with the sun high in the sky you go to the sea, if there is wind, then you feel cool, while if there is no wind, then you feel hot, but in both cases the sun causes burns to the skin in the same way.


Longer Ray5 10W Air Assist installation

The longer Ray5 10W has an official Air Assist kit that consists of two parts, the nozzle kit and the air compressor, available at the following link: https://www.longer3d.com/products/air-assist-set .

Installing the Longer Air Assist on the 10W laser module is really easy; just follow the steps below:

  • First, proceed to disassemble the laser module from the rest of the machine


  • Install the metal nozzle on the laser module


  • Connect a rubber hose between the metal nozzle and the pressure regulator, and connect another part of the rubber hose to the regulator inlet


  • Connect the inlet pipe of the regulator to the outlet of the air compressor


    • Finally, install the laser module on the Ray5, activate the compressor switch and start an engraving from the Longer Ray5 display


Longer Ray5 5W Air Assist installation

To proceed with the installation of the Air Assist kit on the Longer Ray5 5W, it is necessary to purchase, as for the 10W version, the kit consisting of the nozzle kit and the air compressor, available at the following link: https://www.longer3d.com/products/air-assist-set . However, the metal nozzle included inside the kit is compatible with 10W module only; therefore, it is necessary to have a 3D printer to print with PLA or PETG the following nozzle:https://www.thingiverse.com/thing:5585296 .


Installing the Longer Air Assist on the 5W laser module is really easy; just follow the same steps as the installing method for the 10W laser module, but install the 3D-printed nozzle on the laser module instead of the metal nozzle. After that, as mentioned, just follow the same steps as shown for installation on the 10W module.


Conclusions

The use of air assist not only increases the engraving quality but can also increase the laser's cutting capacity thanks to the possibility of removing smoke and combustion debris thanks to the continuous breath of air; without air assist, these would end up settling on the laser lens, hindering the output laser beam of the module. Whether for hobbyist or professional use, Longer Air Assist is absolutely recommended if you want to achieve the maximum performance offered by Longer Ray5 10W and Longer Ray5 5W.

https://www.longer3d.com/collections/laser-engraver

By Academy | May 9, 2023
Air Assist Kit installation for Longer Ray5 10W - LONGER
Air Assist Kit installation for Longer Ray5 10W

Visible light and laser beams have in common the same nature, as both are composed of photons; however, the difference between them is in the fact that visible light has an optically isotropic propagation (that is, it propagates identically in all directions), while in the laser all the energy is concentrated within a single beam of a very small section. Therefore, when the laser hits matter, it is instantly able to radiate great power in a very small area, causing a sudden and rapid increase in temperature that alters the state of matter.

Laser engraving machines, such as Longer Ray5, are able to emit a laser beam that instantly transforms the state of matter by combustion, and the contrast between the laser-subjected surface and the surrounding surface creates the visual effect commonly called laser engraving. However, the energy hitting a single point is not limited to that point, but the heat generated is also transmitted to the areas surrounding the point causing the typical burning effect of laser processing.

In order to avoid or reduce this effect, an air assist mechanism can be used, which consists of a compressor capable of continuously blowing pressurized air directly onto the area subjected to the laser. In this way, the heat exchanged between the laser area and the surrounding area is mitigated by the fresh air of the Air Assist compressor, thus avoiding the burnt effect around the laser engraving. In addition, the air blown on the engraving zone cancels the heat exchange with the surrounding areas but does not damage the engraving ability of the laser beam. A simple example to understand this phenomenon can be this: if on a summer day with the sun high in the sky you go to the sea, if there is wind, then you feel cool, while if there is no wind, then you feel hot, but in both cases the sun causes burns to the skin in the same way.

Longer Ray5 10W has an official Air Assist kit that consists of two parts, the nozzle kit and the air compressor. Installing the Longer Air Assist is really easy; just follow the steps below:

  • First, proceed to disassemble the laser module from the rest of the machine


  • Install the metal nozzle on the laser module


  • Connect a rubber hose between the metal nozzle and the pressure regulator, and connect another part of the rubber hose to the regulator inlet


  • Connect the inlet pipe of the regulator to the outlet of the air compressor


  • Finally, install the laser module on the Ray5, activate the compressor switch and start an engraving from the Longer Ray5 display


The use of air assist not only increases the engraving quality but can also increase the laser's cutting capacity thanks to the possibility of removing smoke and combustion debris thanks to the continuous breath of air; without air assist, these would end up settling on the laser lens, hindering the output laser beam of the module. Whether for hobbyist or professional use, Longer Air Assist is absolutely recommended if you want to achieve the maximum performance offered by Longer Ray5 10W.

https://www.longer3d.com/collections/laser-engraver-accessories

By Academy | September 16, 2022