Products
Trending searches
Popular products
Cart ($0)
Cart ($0)


Longer Ray5 adopts an MKS DLC32 mainboard, characterized by USB connectivity, wireless technology, microSD card reading, touchscreen display with graphic interface and total interaction with your smartphone through the MKSLaser application.
The most common method of using Longer Ray5 is to connect the machine to your Laptop via a USB connection, or by exporting a gcode file to be run via the Longer Ray5 microSD. However, there is also an intermediate mode of operation, based on WiFi connectivity, which allows you to use Lightburn and Longer Ray5 without a USB cable.
Connecting the Laptop and Longer Ray5 with a USB cable requires them to be within a short distance of each other, as the maximum extension of a USB cable is about 3 - 5 meters. On the other hand, connecting the Laptop with Lightburn and Longer Ray5 wirelessly allows you to position yourself at a greater distance, so as to obtain good greater security during the engraving process. For this reason, using Lightburn in WiFi mode offers numerous advantages in terms of security and efficiency, thus expanding the user's comfort and versatility of Longer Ray5.
In order to connect Longer Ray5 and Lightburn wirelessly, you first need to complete the WiFi setup process on your Longer Ray5. To do this, proceed as follows.
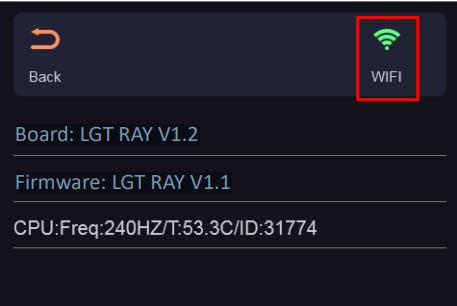
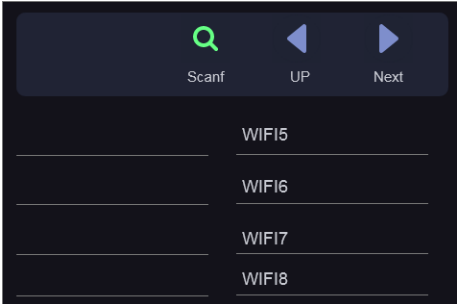
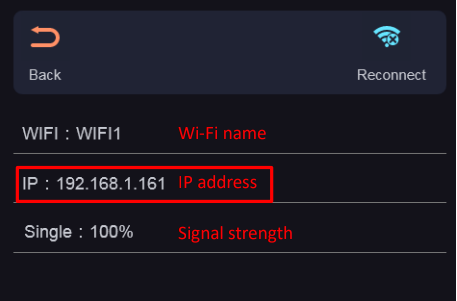
Once the Longer Ray5 has been successfully connected to the WiFi Router/AccessPoint and the IP address has been successfully provided and noted, proceed to open Lightburn on your Laptop. At this point, proceed as follows.

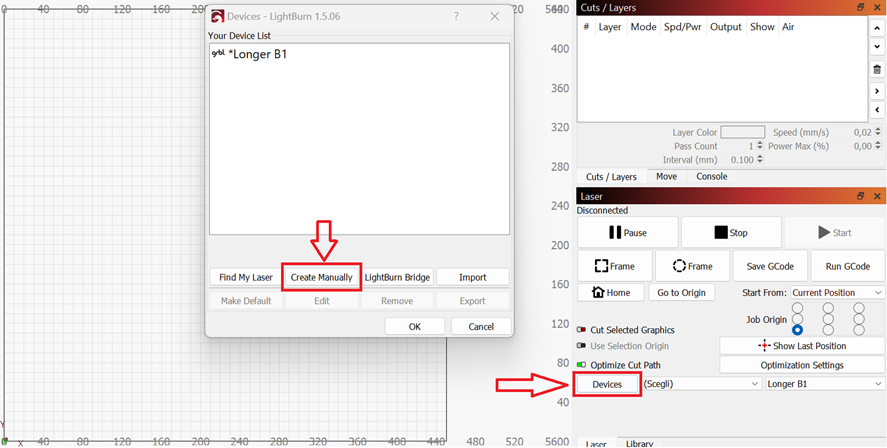
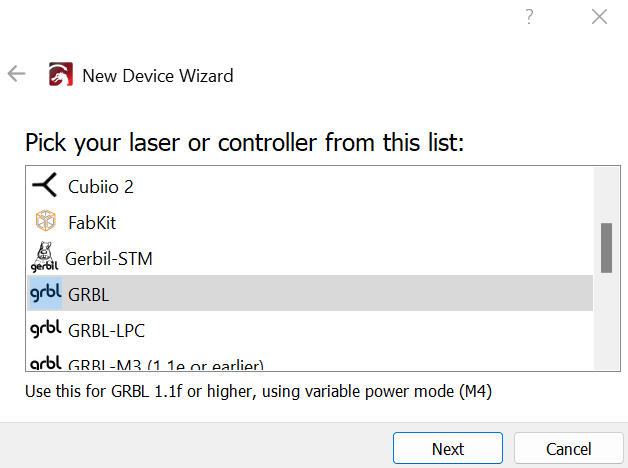
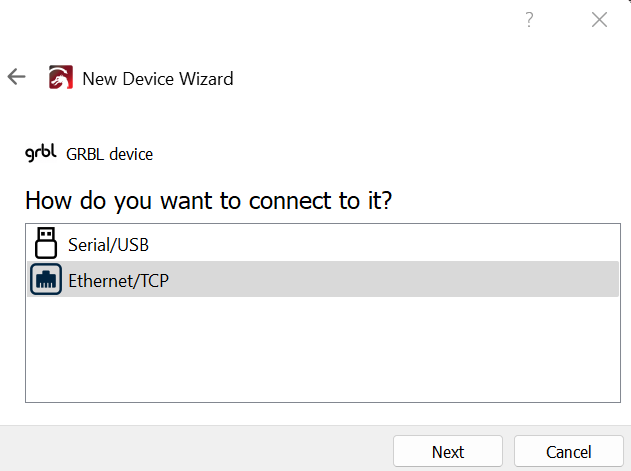
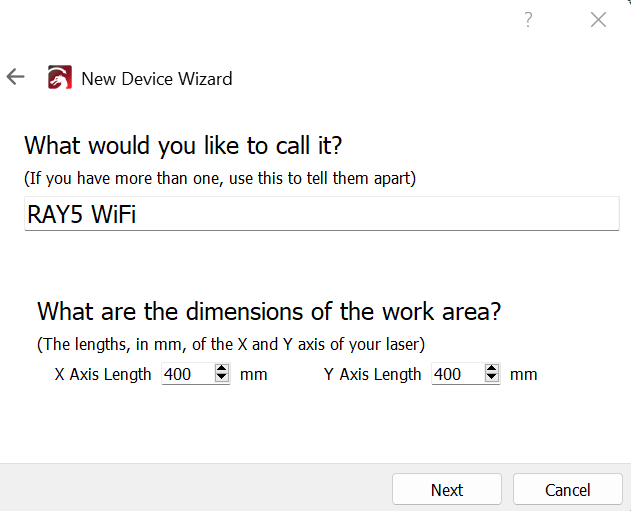
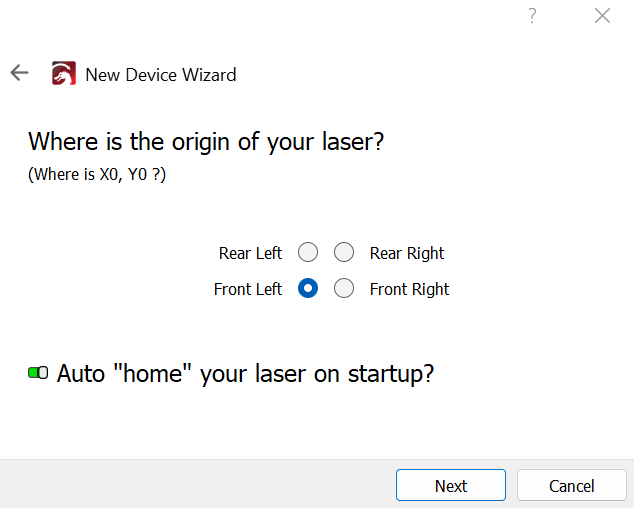
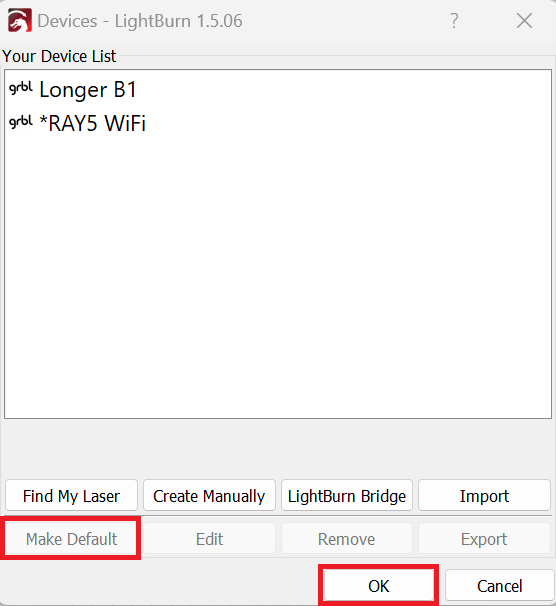
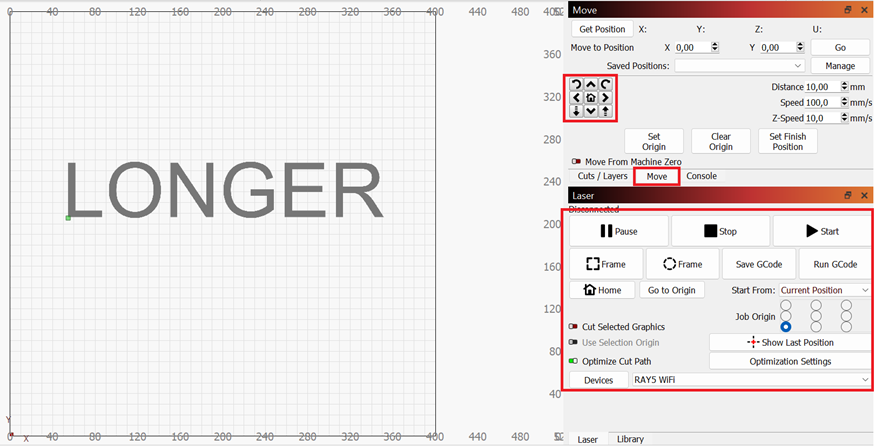
Please note that in order for the WiFi Bridge to work properly, both the Laptop and the Longer Ray5 must be connected to the same WiFi Router/AccessPoint.
RELATED POSTS
Program
Company
Visit
(+1) 888-575-9099
Customer Service: support@longer.net
Brand Cooperation: info@longer.net


!
