


Products
Trending searches

LONGER How To: Make a Custom Rubber Stamp with the Ray5 10W Laser Engraver
A stamp is more than just a tool — it’s a reflection of your personality and creativity. Why not design and create your own personalized stamp? In this guide, we’ll walk through the process of making a custom stamp using the Longer Ray5 10W and 3mm basswood sheets. Let’s get started!
Step 1: Design the Stamp Graphic
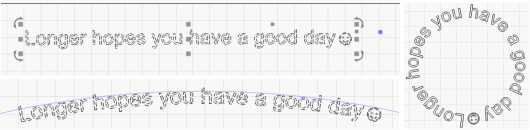
Open your design software (e.g., LightBurn), and use the Text Tool to input your desired text. To shape the text into a circular form, drag the small blue node at the upper-right corner of the text box until the text follows a curved path.
Next, use the Circle Tool to draw a ring around the curved text, adjusting its size to fit neatly around the lettering. Then, select this circle and use the Offset Shapes Tool to create an outer ring offset by 1–2mm, which will define the outer boundary of the stamp.

Important: Since stamps are applied in reverse onto paper, make sure to mirror your design — either horizontally or vertically — to ensure the final impression appears correctly.
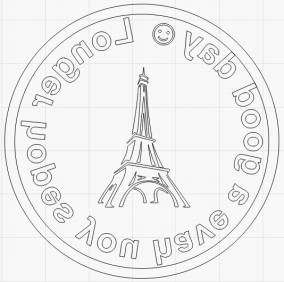
Feel free to add icons or decorative elements to enhance your design and give your stamp a unique character.
Step 2: Set Laser Parameters
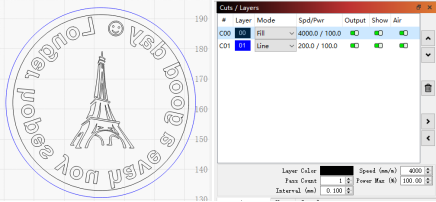
Cutting Layer (Outer Circle): Set the outermost ring to Line Mode and apply cutting parameters suitable for 3mm basswood.
Engraving Layers (Text and Inner Design): Set the rest of the design to Fill Mode. Use engraving settings that allow for deep carving — the deeper the engraving, the clearer the stamped result.
Adjust speed and power based on your machine’s capabilities and material behavior. Test small samples if needed.
Step 3: Engrave and Cut the Stamp
After confirming all design settings:
Preview the project in your software.
Frame the engraving area to ensure alignment.
Start the engraving and cutting process.
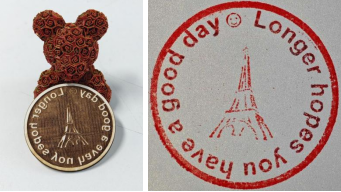
Once complete, remove the stamp from the workbed and optionally mount it on a handle for easier stamping.
Final Result & Application
Your personalized wooden stamp is now ready to use! Simply apply ink to the engraved surface and press it onto paper to test the impression. If engraved deeply and cleanly, your stamp will produce crisp, professional-looking marks — perfect for art projects, packaging, or personal correspondence.
Conclusion
Creating a custom stamp with the Ray5 10W laser engraver is a fun and rewarding project that combines creativity with precision. With the right design and settings, even simple materials like basswood can produce high-quality results. Start with a basic design, experiment with styles, and soon you’ll be stamping your signature on everything with pride.
- Die Auswahl einer Auswahl führt zu einer vollständigen Seitenaktualisierung.
!