Academy

LONGER LK4 X vs. LK5 Pro vs. LK4 Pro vs. Orange 4K, Which 3D Printer is Best for You? - LONGER
LONGER LK4 X vs. LK5 Pro vs. LK4 Pro vs. Orange 4K, Which 3D Printer is Best for You?

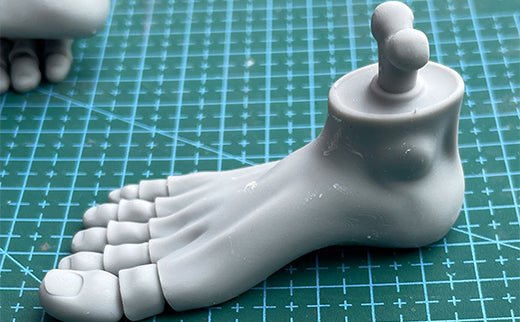
3D modeling significantly impacts vital industries such as medicine, sports, aeronautics, etc. But is also beloved by enthusiasts and hobbyists. Printing them has been made relatively easy if you already have a working digital 3D design of any model. This ease of operation has made consumer flock to buy 3D printers. Are you considering buying a 3D printer yourself but are worried about the high costs and complexity of designing?

Well, now you don’t have to worry as today we have chosen an affordable but professional brand, LONGER, explained in this article. Let’s start!

Defining Features of LONGER 3D Printers

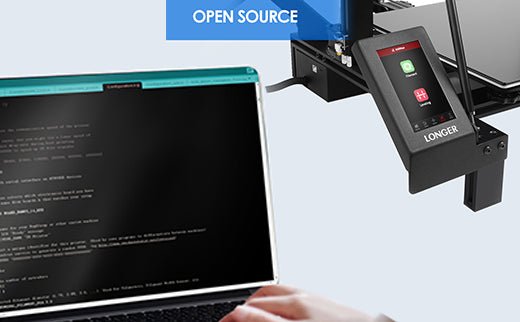
This section will discuss some of the defining features of each 3D printer in this list. It will be followed by the significant differences between each and which is best for you. All these printers are open-source coded, allowing consumers to share their best designs with the community while taking inspiration from others for the best results.

1. LK4 X FDM 3D Printer

LK4 X comes with a 4.3” colored touchscreen helping you choose the best designs and make efficient adjustments. Make your ideas come true with its big bed design and several applications, especially for teaching kids in STEM and other art and design projects.

 LONGER LK4 X 3D Printer

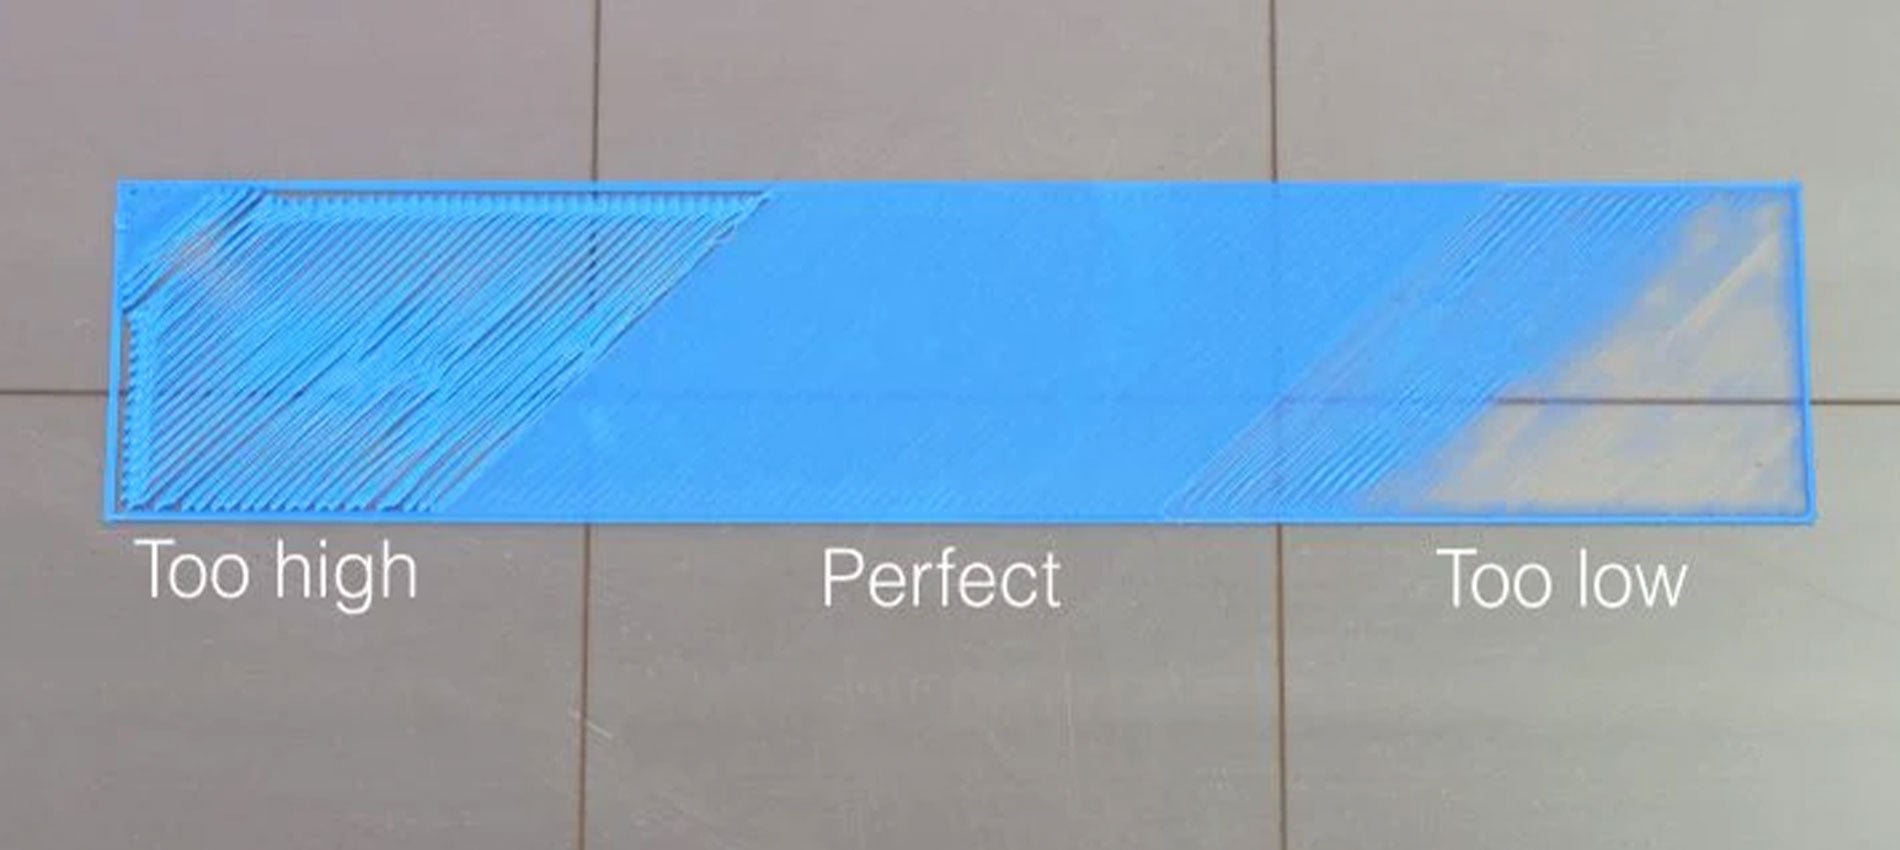
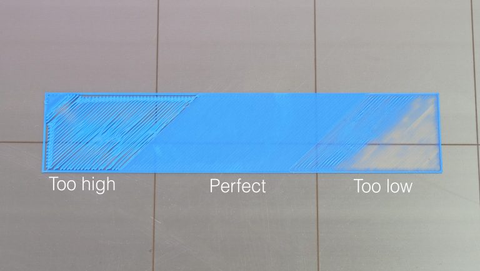
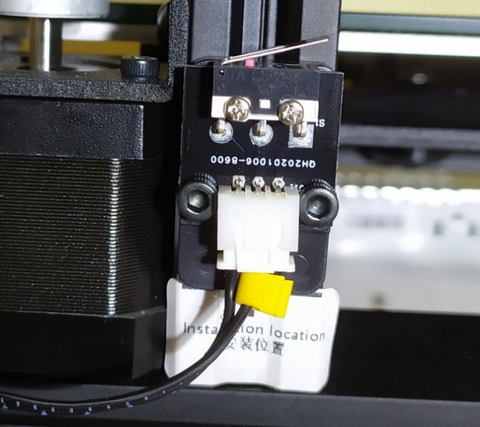
The LK4 X has intelligent 16-point auto leveling supporting your intricate projects, compensating for any unevenness. You get stronger and more accurate filament control with a double-gear extrusion mechanism and direct drive chip. This feature is further enhanced by the premium spring-flexible steel that allows staying power for the adhesion with the printed model.

  • Uses innovative auto-leveling technology to compensate for the unevenness of the hotbed
  • Has building size of 8.66"*8.66"*9.84" (220*220*250mm)
  • Comes with a 32-bit open-source motherboard, a 4.3-inch touchscreen, and a flexible PEI film
  • It comes pre-assembled with 95%
  • Fast shipping available
  • Order today for only $299.99

Consumer Comments

GWS 1205 – At first, I rated it below 3, but eventually discovered that the problem was the misalignment of the z-axes after doing a vast amount of research and watching YouTube videos. After I tuned it in, the machine is now operating perfectly.

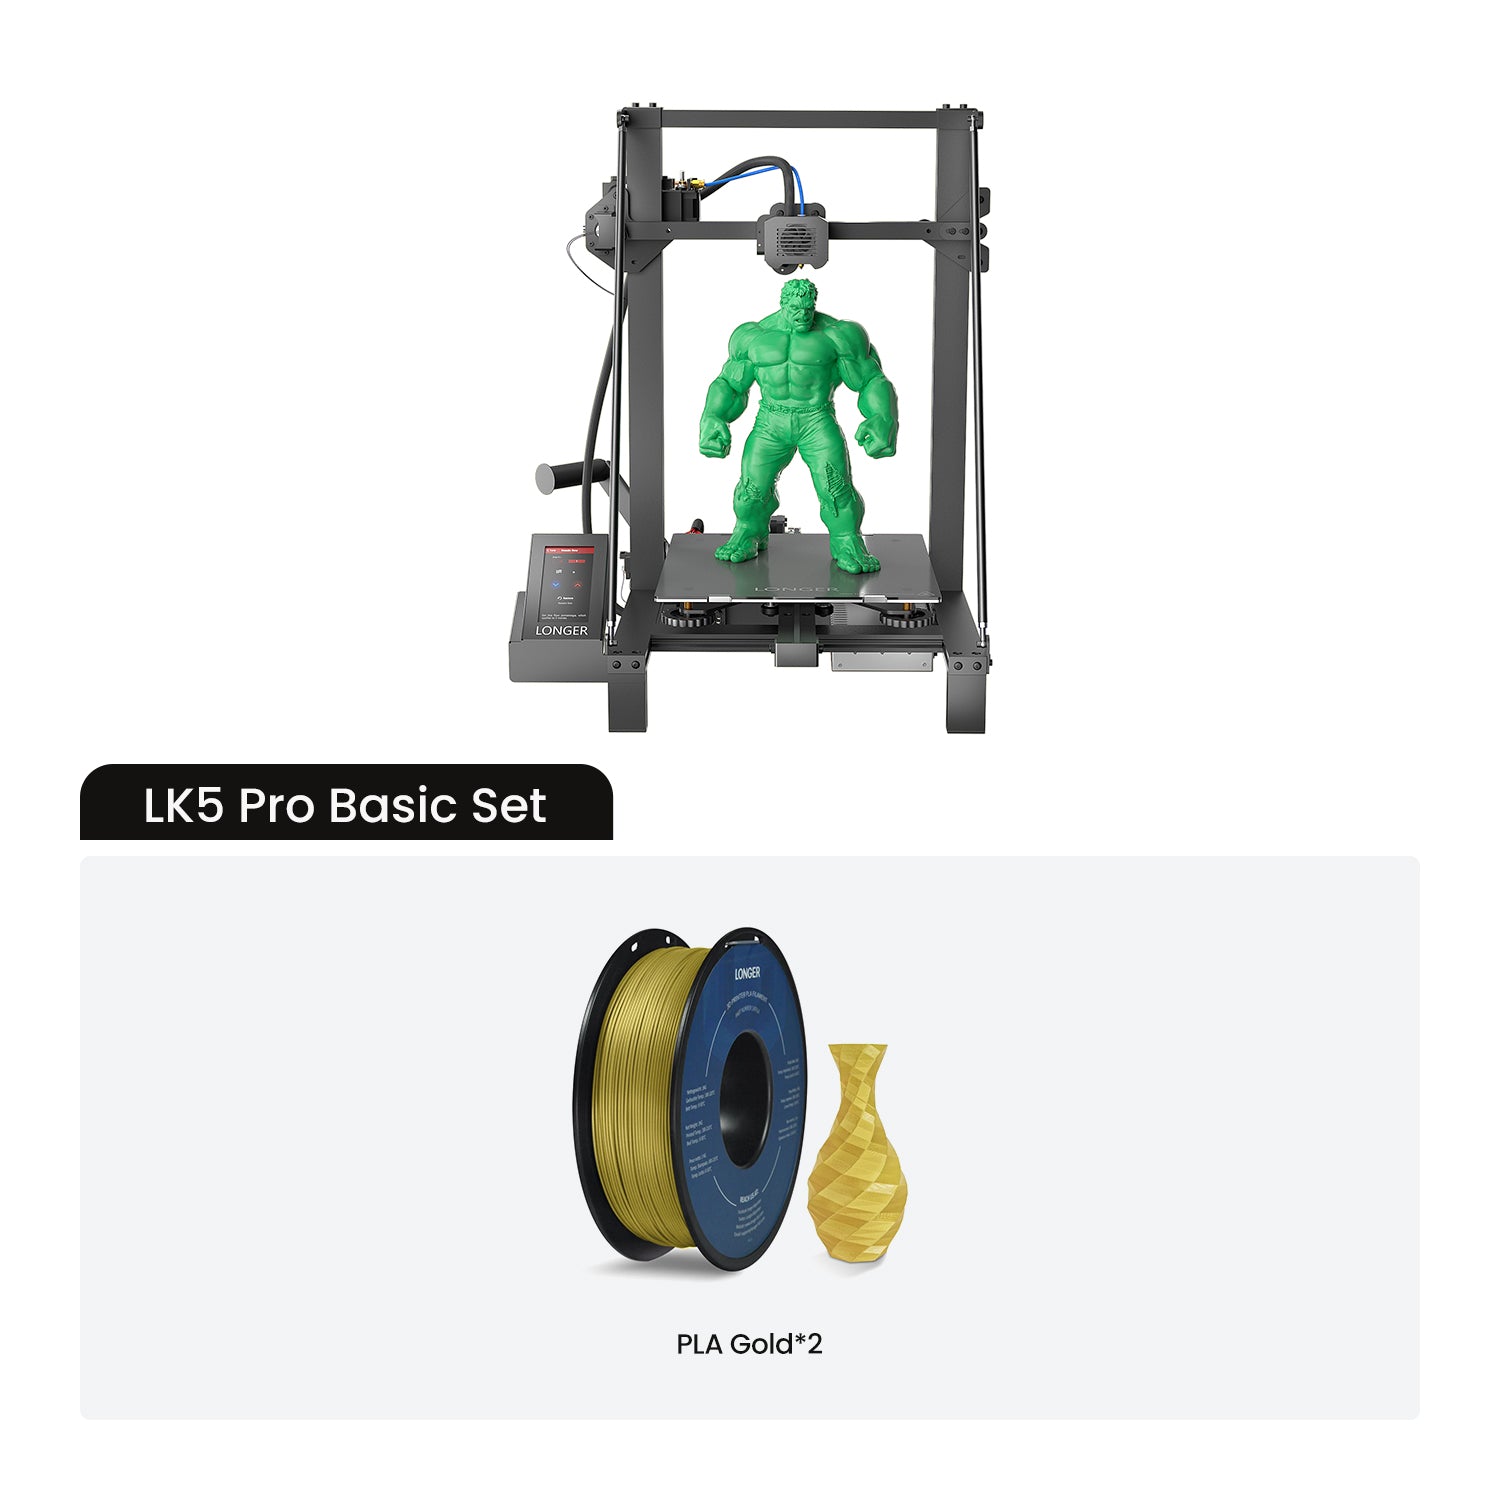
2. LK5 PRO FDM 3D Printer

LK5 Pro has the upgraded Dual Blower kit that cools the filament as the material is being extruded, saving you the trouble of any deformation. The triangle design-build allows you to make stable and perfect projects as it has minimal vibration while working.


LONGER LK5 PRO 3D Printer

This model is for you when it comes to quieter and more enhanced printing due to High Temp resistance tubing.

  • Has exceptional building size of 300x300x400mm (11.8"x11.8"x15.7")
  • Best for high-precision 3D printing
  • Comes with pre-installed 3 TMC2208 ultra-silent chipsets, which are based on open-source coding, making them ultra-quiet
  • Has a Carborundum glass platform for easier mold taking
  • Comes with run protection
  • Excellent price of only $299.99

Consumer Comments

  1. Vantlin –I've just started using 3D printing. I searched for a high-quality printer at a fair price because this was my first foray into 3D printing. I made the right choice by purchasing the LONGER LK 5 Pro!

3. LK4 PRO FDM 3D Printer

The LK4 Pro FDM 3D printing machine has a modest build, a cute form, a new metal frame, a trendy, modern look, a self-developed intelligent system software, a fresh user interface, and standalone manufacturing. It is a popular and inexpensive 3D printer type.

 LONGER LK4 PRO 3D PRINTER

The LK4 printer makes a beautiful present for the creative person in your family, the aspiring designer, or the young person getting ready to enroll in their first technology course.

  • Open-source codes
  • Ultra-quiet and no noise enhances the functionality if you are printing at home.
  • Equipped with a 4.3” touch screen for convenient controlling
  • Enhanced structural rigidity with new Aluminum frame design
  • Built-in Safe Power Supply for efficient power usage
  • Fast shipping available for the purchase of only $179.99

Consumer Comments

  1. Benckert –After the wait for the new touchscreen and the software update, the printer appears to be operating as intended. I have no experience with 3D printing, but after viewing a few Youtube clips about the technology in general and Cura in particular, I am off to a good, trouble-free start. The printer is finally functioning as described, though I intend to add Octopi for further monitoring and control features.

4. Orange 4K Resin 3D Printer

LONGER Orange 4K is the leader in Subpixel technology that can make precision models for up to 4K resolution providing more detail in miniature designs. The in-house slicing software is top of the line that is not just easy to operate, but the slicing feature is three times faster. What more can you want with a 3D printer having minute-level details in a small design?

 LONGER ORANGE 4K Resin 3D Printer

There are tons of 3D printing applications, such as making toys for kids, allowing designs for manufacturing concerns, perfect dental models, and even ultra-detailed architecture designs.

  • Subpixel technology with a fantastic resolution of X 31.5µm Y 10.5µm will give you the best results if you love printing miniatures.
  • Comes with 6480*3840 Resolution, Parallel UV Lighting Sources, and Fast Printing Mono LCD Screen
  • Its four crews make leveling much easier.
  • Features temperature detecting tool for LONGER life span
  • Fastest printing with less exposure time
  • You can purchase the 3D printer today for only $319.99

Consumer Comments

Heath2015 – I've only recently started using this incredible equipment for 3D printing, but I have to admit it does a good job. Even though I had rarely printed anything before, I quickly and easily had the LONGER Orange 30 running in no time.

What are the Biggest Differences among LONGER 3D Printer Models?

The LK4 X model offers sophisticated 16-point accurate levelling for stable working settings when the base plate needs to move, and it is priced the same as the LK5 Pro model. The inclusion of double-gear extrusion for larger and more complex structures distinguishes the LK4 X from competing versions. Finally, even though all 4 versions can have their essential components upgraded, the LK4 X has the most possibilities, making it an excellent modular machine.

Contrastingly, LK5 PRO comes with a triangular design and dual inclined road, which assists in producing optimal printing results. It also comes in handy in eliminating the turbulence and retention of the Z-axis. Its 3Kits TMC2208 for XYZ Axis and larger bed size add to its value.

Coming to LK4 Pro, although this model is similar to the LK4 X and LK5 Pro, its ultra-durable aluminum manufacturing sets it apart from others. Moreover, it has a built-in Safe Power Supply that keeps your machine and investment safe. In our opinion, LK4 Pro is the second largest of the 4 right after LK5 Pro, a great comprise between LK4 X and LK5 Pro.

Orange 4k is your best bet if you want to make small yet intricate designs. It comes equipped with Subpixel technology that distinguishes it from other competitors. No matter if it’s the smallest, it costs the most.

Comparison Chart of LK4 X vs. LK5 Pro vs. LK4 Pro vs. Orange 4k

Please see the following table to understand what each of these printers has for you.

Model Number

LK4 X

LK5 Pro

LK4 Pro

Orange 4k

Printing Technology

FDM 3D Printing Technology

FDM 3D Printing Technology

FDM 3D Printing Technology

LCD Stereo lithography

Working Area

220*220*250mm(8.66"x8.66"x9.84")

300*300*400mm (11.81"*11.81"*15.75")

220*220*250mm  (8.7"*8.7"*9.8")

120*68*190mm  (4.7"*2.7"*7.48")

Printing speed

≤180mm/s

≤180mm/s

≦180mm/s (Suggest 60-80mm/s)

Up to 80mm/h on Mono Version

Printing accuracy

±0.1mm

±0.1mm

-

10 micrometer

Layer thickness

0.1-0.4mm

0.1-0.4mm

0.1-0.4mm

0.01-0.1mm

Support filaments

PLA/TPU/ABS/ PETG/Wood

PLA/ABS/ PETG

1.75mm PLA/ABS/PETG


Direct drive extruder

Direct drive extruder

Bowden Extruder

-

-

Auto leveling

Yes

Optional


-

Filament Detector

Yes

Yes

Yes

-

Resume Printing

Yes

Yes

Yes

-

Hotbed

PEI Flexible Steel

Ceramic Coated Glass


-

Motherboard

32-Bit Open Source & Silent Motherboard

8-Bit Open Source & Silent Motherboard


Connection method

TF card or USB

TF card or USB

TF card or USB

USB

Hot bed Temperature

≤100°C

≤100°C


Nozzle Temperature

≤250°C

≤250°C

190-250℃

-

Rated power

320W

350W


-

Gross Weight

9.78KG

13.5KGS

8.5KGS

11.5KGS

Printer Dimension

485*465*615mm

580*540*663mm

425*402*505mm

230*230*437mm (9.16"*9.06"*17.02")

Package Dimension

540*525*265mm

662*588*193mm

467*412*187mm

310*310*580mm (12.2"*12.2"*22.83")

Nozzle Diameter


0.4mm

0.4mm


Slice Software

-

Cura, Reptier-Host

Cura, Reptier-Host

Longerware / Chitubox / Lychee

File Format

-

STL, G-Code. OBJ

G-code, STL

-

LCD Screen Size

-

4.3 Inch

-

5.5 Inch

Salient Features

· More Height

· Intelligent Auto Levelling

· 5:1 reduction ratio

· Ultra silent motherboard

· Fast and quiet printing

· Affordable printer

· Triangle design

· Silent printing

· Glass upgrade for easy removal

· High Temp resistant tubing

· Amazing tempered glass design

· The printing recovery function is available

· Ultra quiet mode

· Durable aluminum frame design

· Safety in power supply

· Subpixel technology

· Ultrafine precision

· Quick printing with mono screen

· Parallel UV Lighting Sources

· Dual Z-Axis Design

Price

$299.99

$299.99

$179.99

$319.99

Conclusion

That was all about the four amazing printers from the renowned printer manufacturing brand, i.e., LONGER. Hope you find it helpful in making an informed decision about which one you should get.

https://www.longer3d.com/products/lk5-pro-fdm-3d-printer

By Academy | February 3, 2023
An Ultimate Guide to FDM 3D Printer and Its Applications - LONGER
An Ultimate Guide to FDM 3D Printer and Its Applications

There's been a vast technological development, especially if we talk about 3D printing. We use 3D printing almost everywhere. Whether it is for creating engaging business models or construction models, a 3D printer is always the best choice.

Among the leading 3D printer technologies, FDM is very popular. The reason behind the popularity of the FDM printer is that it is not only highly efficient but also ideal for beginners.

Want to know more about FDM printers? You’ve landed in the right place! In this article, we'll provide you with the ultimate guideline for FDM 3D printers and their applications.

By Academy | January 18, 2023
Longer Fanducts for FDM 3D printers - LONGER
Longer Fanducts for FDM 3D printers

All FDM 3D printers are equipped with some fans, each of which performs a different function. For example, one fan cools the mainboard, another fan cools the hotend, and so on.

A fan with relevant functionality is the cooling fan of the printed filament, which is a fan that cools the print, so as to allow the filament to solidify quickly, avoiding deformation in the print due to heat. This fan can not do anything on its own, and in fact it is always associated with a "fanduct", or a duct through which the air emitted by the fan passes, which is concentrated and directed correctly on the print.

Fanducts come in various shapes and sizes, while all maintaining the same function; depending on its design, the fanduct can concentrate more or less air, in one or more directions. Here's a list of official Longer 3D fanducts, each with different features for different purposes:


  • Classic Fanduct


This fanduct is the default model of Longer 3D printers, it allows you to concentrate a large amount of air and cool a large portion of the print at the same time thanks to its round output. It is perfect for prints with large surfaces, prints that are printed at high speed and for prints made with very large nozzles.

Download link:   https://www.thingiverse.com/thing:5585284


  • Squared fanduct


This Longer 3D fanduct is equipped with two rectangular outputs, thus being able to divide the air flow equally in two directions. Depending on the printing direction, this fanduct usually takes care of cooling both the part already printed and the part that is about to be printed; In addition, all the air is concentrated in these two zones, so the cooling inflow is considerable. The disadvantage is that for high-speed prints, the fanduct may not have enough time to cool the print because its airflow is very direct.

Download link:   https://drive.google.com/file/d/1T-tPjxG2hIX5XB63BakLJlfQkH_xQGby/view?usp=sharing


  • Precision fanduct


This Longer 3D fanduct is the one that concentrates the air the most, and then directs it at high pressure and speed at a single point. In fact, due to the great difference in section between inlet and outlet, the air accumulates a great speed at the outlet, thus being able to cool the affected printing part in a few moments. Its main use is for prints with many detailed parts and very thin parts that extend upwards; For example, trying to print a tip, usually the heat causes a deformation due to the collapse of the structure, instead with this fanduct it is possible to dissipate heat quickly, largely solving the problem.

Download link:   https://www.thingiverse.com/thing:4860509


  • Longer Dual Blower Kit


The new Longer Dual Blower has been specially designed to allow a faster and more uniform emission of cooling air, thanks to two bilateral turbo fans and a double ventilation duct; in this way the prints are much more detailed and the bridging printing greatly improved.

  • The installation is very simple, and can be done by consulting this video guide:

https://youtu.be/zEA-eM5sfho

  • The purchase is available on the Official Longer Store:

https://www.longer3d.com/collections/accessories/products/longer-new-dual-blower-fan-kit

The fanducts of the Dual Blower are totally 3D printable, stl files are available if necessary.
Download link:   https://www.thingiverse.com/thing:5585281

https://www.longer3d.com/products/lk5-pro-fdm-3d-printer

By Academy | December 12, 2022
Step-Down Converters & Voltage Regulators - LONGER
Step-Down Converters & Voltage Regulators

Many owners of Longer 3D printers love to customize the machine with additional accessories, LED lighting, and so on. However, each accessory works at a specific electrical voltage and requires a certain current, so attention should be paid to the technical specifications of each of them; in fact, Longer printers generally work at 24V, so it is not enough to simply connect the accessories to the mainboard of the printer or to its power supply, since this could compromise the operation of both the printer and the accessories.

NOTE: This guide is only for an electronically savvy audience! Misinterpretations could cause accidents and damage to equipment. If you don't feel confident, don't try the changes but talk to an expert.


In order to lower the voltage from 24V to a lower one it is necessary to cause a "Potential Difference Drop". The most basic method in physics to achieve this is the use of a resistor, however it dissipates all the current absorbed in the form of heat, so it is an inefficient and unstable method, since it depends on many factors. Nowadays there are various electronic components that can perform this function in an excellent way, and given their really low cost it is really worth considering to be able to operate safely. Here is a description of the best components on the market.


XH-M401

This voltage converter allows you to adjust the potential difference downwards efficiently and supports a high current passage thanks to the presence of two power mosfets. Connected to one of the outputs of the printer's power supply, it allows you to adjust the voltage between 24V ~1V, so it is ideal for connecting 12V & 5V LED lamps that require high current absorption, to connect 12V & 5V fans, to connect camcorders that require a specific voltage, or any other type of accessory.


L7812

This linear voltage regulator allows you to adjust a voltage of 35V max in a voltage of 12V output, however the output current is 1A max and also dissipates in the form of heat; for this reason, the voltage regulator has a hole, as it must be fixed with a screw on top of an aluminum bracket in order to reduce its temperature. Using this regulator, it is possible to reduce the voltage from 24V to 12V, however its use is limited to accessories that require a very low current (for example, a 12V fan), and in any case the regulator must be dissipated by fixing it to the printer frame taking care not to cause short circuits.


L7805

This linear voltage regulator, similar to the L7812 regulator, allows you to reduce the voltage by having a 5V output. It is often used to reduce voltages of 12V towards 5V, however it can also be used to reduce the 24V of the machine in 5V even if the dissipation in the form of heat will be really excessive. It is strongly discouraged to use this voltage regulator allows, preferring in its place the XH-M401 regulator.


SZBK07 300W/20A (for special applications)

This voltage converter can be too elaborate, as it allows both to adjust the output voltage and to limit the max current absorbed by the connected component in output. This turns out to be the best compromise to power driver-free LEDs, battery charging and other applications that require special attention. It is exposed here only for information, as accessories for 3D printers do not require such precautions.

https://www.longer3d.com/collections/3d-printers-1

By Academy | September 30, 2022
3D RESIN PRINTER REVIEW | DON'T UNDERESTIMATE THE MIGHTY ORANGE 30 - LONGER
3D RESIN PRINTER REVIEW | DON'T UNDERESTIMATE THE MIGHTY ORANGE 30
Longer 3D as a company has FDM and Resin printers but also sells laser engraver machines.

Here are some of the specs about the Orange 30.

  • High precision & Uniform Matrix UV lighting
  • 2.8 inch Touch screen & faster printing speed
  • Fast Cooling & high-Temperature warning system
  • Affordable price: $149.99 or £130

This Printer started out on Kickstarter in 2019 and was successfully funded there. The vat has been updated by Longer since it was released and is a plastic one compared to the metal one originally.

So its a 2K LCD screen at 2560 X 1440 resolutions and 47.25µm pixel size, the build plate is 120mm(L)*68mm(W)*170mm(H); With a solid linear guide and special slider design, it will ensure the accuracy and stable of Z-axis.

So I set about unboxing the printer live over at my Twitch channel, it comes well packed in a box with lots of protection for it, one of the first things I noticed about this resin printer is that you need to assemble the UV cover as it is flat picked and has a paper covering both sides of it to protect from scratches.

Assembling the UV cover took the longest to do as the paper that needed taking off was stuck well to the plastic. Once this was done it was a little tricky getting the elastic bands on it to hold it together, but if you don’t wish to use the elastic bands that come with the printer you can find STL files for a system to hold it together a bit better, as I always feel it's going to fall apart in my hands when moving the lid about.

Putting the vat on is straightforward as always and it was a quick process to level the build plate.

Once I've done everything I put the USB drive into the printer and see that there were 4 test files, so I set about printing them all, they all came out fantastic as I would expect from a resin printer, the touch screen is responsive and nicely laid out and easy to navigate it.


I set about slicing some of my own files I wanted to print on it and if you want you can use Longer 3D own slicer for it, but I use Lychee Slicer as my go-to slicer these days. It was easy to add the printer to the slicer, you just need to make sure you save the file to the USB drive as a .lgs30 file for the printer to read it.

Ok so it’s not the biggest of build plates for a resin printer, but don’t let that fool you. I found this printer was able to print everything I was slicing for it, I had one failure out of about 30 prints and that was down to human error as I didn’t add supports correctly. The print quality is good especially for a 2k resin printer, it wasn’t overly loud when it was printing and I didn’t notice any bad smells of resin coming from it, which I do use an air purifier next to all my resin printers just for some added protection.

So who is this resin printer aimed at? That’s a good question, I think that this might just be one of the best entry-level resin printers that you can buy at the moment, resin printing can be expensive if you are starting out in it, printer, wash and cure station, IPA for the wash and gloves, etc, it starts adding up. So if you purchased this as your first resin printer and you found out that resin printing wasn’t for you, it's not a big amount of money spent on the Orange 30 and I’m sure you will find a buyer for it if you put it up for sale.

If you are an experienced resin user already you might possibly have bigger resin printers that you use, like myself, recently I was printing a Wicked3D STL which was a decent size, and I used 3 resin printers to print all the parts for it and the Orange 30 fitted perfectly for printing the small parts for it, in-between my bigger resin printers, some people use resin printers for small tabletop figures and I’m sure you would be able to get a good amount of them on the build plate of the Orange 30.

So in conclusion I think that this resin printer is ideal for all users, especially for the price. I have been printing litho on this printer too and the photo quality is good. if you were to invest in this I think most people would be pleased with the results of the prints.


https://www.longer3d.com/products/orange-4k-resin-3d-printer

By Academy | September 21, 2022
Item’s positioning on the printing bed - LONGER
Item’s positioning on the printing bed

In FDM 3D Printing, during the slicing phase of the project to be printed you can completely choose how to place it on the print bed. In fact, each piece, depending on its geometry, can have one or more positions suitable for printing. The most trivial example is a full cube: whatever its side is placed on the print bed, the result does not change.  Instead, the rectangle printing changes depending on the side placed on the plane, since depending on which side is placed on the plane, the printing of the rectangle can be developed in height or in length.

Another good reason to choose the correct position on the print bed is the possibility of avoiding the use of supports. In fact, for some projects it is possible to avoid cantilevered parts simply by changing the printing orientation: the final piece will be as desired, but its realization will have been much easier and faster.


However, often choosing a position without requires supports is not enough, and sometimes it is also a bad choice. In fact, depending on how the piece is printed, it takes on a different breaking point and a different load capacity. The example shown there are two positions that do not provide supports, but only one is the best one due to the geometry of the object.


In case A, the parts highlighted in green are connected to the part highlighted in black only by a single layer; therefore, by applying an orthogonal force to the parts highlighted in green, they will be easily subject to breakage.
In case B, the parts highlighted in green are connected to the part highlighted in black through many layers; therefore, wherever an orthogonal force is applied, each part will be endowed with increased strength.


Sometimes it is more convenient to choose a location that requires supports rather than a position that does not need supports. An object like the one shown in this example focuses all effort on the part highlighted in blue, so the print between the part highlighted in blue and the part highlighted in yellow must be as strong as possible.


During placement on the print bed, these two positions are usually chosen, where the first does not need supports while the second needs supports.

In case C, the parts highlighted in blue are connected to the part highlighted in yellow only by a single layer; therefore, by applying an orthogonal force to the parts highlighted in blue, they will be easily subject to breakage.
In case D, the parts highlighted in blue are connected to the part highlighted in yellow by many layers; therefore, by applying an orthogonal force to the parts highlighted in blue, each part will be endowed with greater strength. This is a case that shows that despite the presence of supports, printing will be mechanically better.

There are numerous cases where the absence of supports is an advantageous aspect, while in other cases it is absolutely necessary to carefully evaluate how to obtain a strong and durable piece regardless of whether or not you need supports. Each piece will assume a different printing configuration depending on its geometry, so it is always advisable to carefully evaluate the placement of the project on the print bed before starting a slicing, imagining the object in the context in which it will be used.

https://www.longer3d.com/products/lk5-pro-fdm-3d-printer

By Academy | September 5, 2022
Printing Jerk calibration - LONGER
Printing Jerk calibration

During the printing process, FDM  3D printers move axes with a certain speed set during slicing, expressed in mm/s.  However, the set speed is not reached immediately, but occurs by a process of Acceleration (mm/s²) and Jerk (mm/s).

The jerk is the "instantaneous speed" reached by each axis as soon as the engine is set in motion; therefore, by setting a speed of 50 mm/s with a jerk of 10 mm/s, the printer does not immediately reach the speed of 10 mm/s and then accelerates progressively until it reaches 50 mm/s.  The jerk value  can be left as default set within the firmware or it can be set manually by enabling "jerk control" in the slicer settings.  Depending on the jerk value  you set, the printer will be able to resume more or less quickly after a pause (example: layer change, change of direction, angles, and so on), so it is recommended to use a value between 10 mm/s and 20 mm/s to get the best benefits during the printing phase.  To determine the value within this more correct range to be assigned to the jerk it is possible to evaluate the angles of the prints, or if the corners are very rounded and swollen with material then the jerk must be raised, instead if the corners are very sharp and sharp then the jerk must be lowered.

Printing Jerk calibration

Using lower or higher jerk values  than recommended, these can cause different mechanical and quality problems.  Especially:

* If the jerk is too high, the printer will move the axes quickly and quickly, causing oscillations and vibrations that affect the print and the structure of the printer, even causing damage to the structure for jerk values greater than 30 mm/s.

*If the jerk is too low, the printer will take much longer to finish a print, the corners will not be created of the right size and there will be vibrations and bulges wherever there has been a change of direction.


Note that the jerk is friendly referred to as an "instantaneous velocity" in mm/s, as it best represents how the axes move in the first moments of movement. However, from the physical point of view the jerk is a mathematical derivative of acceleration (which is a derivative second of the velocity) therefore it is not a true instantaneous velocity but is actually an "acceleration of acceleration" in mm/s³.

https://www.longer3d.com/products/lk5-pro-fdm-3d-printer

By Academy | August 2, 2022
Installing Octoprint on Laptop/Tablet for 3D FDM printers - LONGER
Installing Octoprint on Laptop/Tablet for 3D FDM printers

Many FDM  3D printer users prefer to use advanced management systems to start and control the printing process, both locally and remotely.  One of these systems is Octoprint, probably the most preferred by users, as it is cheap to make and works in a simple and immediate way; based on an Raspberry, just install the official software to be able to immediately access the world of Octoprint , with all plugins and management and control features available.  For more information visit the official website of Octoprint (https://octoprint.org).

This article aims to present a method to make an OctoPrint system (with or without touch) for free, using an old laptop or a touch tablet; note that tablets based on Android/iOS are NOT compatible, and the guide only works with laptops and tablets that originally worked on the Windows operating system (that is, with an x86/x64 processor).

The guide is recommended for users who have a minimum of computer knowledge, otherwise some steps may be difficult and could create incompatibilities.


Procedure:

1 - In a computer different from the one you intend to transform into Octoprint:


  • Insert the USB drive into the computer, open Raspberry Pi image and click on "use custom image" using the one just downloaded; in this way you can prepare the usb drive with a bootable .ISO


2 - In the laptop/tablet you want to transform into Octoprint:

  • Insert the bootable USB drive prepared above and proceed with the installation of the Raspberry Pi Desktop operating system


Once the procedure is completed, the laptop/tablet will have all the features of an Octoprint on Raspberry, so it will be compatible with all classic Octoprint plugins.  
In addition, using a tablet it will be possible to interact with Octoprint via touchscreen and also implement the camera to be able to remotely monitor the printing process.  
For any other functionality always refer to the official Octoprint guides.

By Academy | July 28, 2022
First Layer Calibration - LONGER
First Layer Calibration

The calibration of the first layer takes place by calibrating the distance between the tip of the nozzle and the surface of the printing plate; in this way the extruded plastic will stick correctly to the plane, being crushed slightly and correctly.

Longer 3D printers are equipped with a menu accessible from a display that allows you to calibrate accurately and precisely, by measuring it at 5 predetermined points. For calibration it is enough to leave the space of a sheet of paper between the tip of the nozzle and the surface of the plate, so that the sheet can move freely but with a slight friction, simply by turning each of the 4 knobs to manually adjust the distance between the nozzle and the plane.

Once the calibration has been carried out correctly, it is possible to make a test print to evaluate the quality of the first layer, which will be perfect if the calibration has been carried out correctly or of poor quality if the calibration has been carried out incorrectly. Proper adjustment ensures a uniform and perfect surface, without gaps between the lines, nor ridges.

An extrusion too far from the printing plane is recognized by round lines instead of crushed, far from each other rather than united; an extrusion too close to the printing plane is recognized by lines crushed completely, too close to each other almost to overlap and create ridges that curl upwards.

In case of incorrect calibration, the following problems may occur: if the nozzle is too far from the print surface, there is a risk that the print will not stick properly, causing a harmful accumulation of material around the nozzle, instead if set too close, an occlusion of the nozzle, excessive adhesion to the printing plate or even permanent damages at the printing plane.

Therefore, it is a good idea not only to accurately calibrate the first layer, several times if necessary, and above all to monitor the printer every time you start a new print until the first layer has been completed correctly.


Sometimes, the first layer may fail to adhere to the print plane despite the calibration being done correctly. In these cases, you can proceed with the thorough cleaning of the printing surface, so as to remove the accumulated dirt; in case the problem persists, you can proceed with the increase of the flow related to the first layer, a topic that will be covered in a future lesson.

Once a perfect calibration has been obtained, this will not be eternal: the first layer calibration will have to be checked periodically, and surely it will have to be done again every time you move the printer to a different place, you make the nozzle replacement, the extruder change, the replacement of the plane or any other modification to one of the 3 axes.

In some case, it could be found that the calibration is impossible to carry out on the 5 points, that is, the 4 corners of the plane are well calibrated while the center is too close to the tip of the nozzle. This could be caused by incorrect placement of the Z endstop. 


Longer 3D printers have a sticker that indicates where endstop Z should be placed. However, if endstop Z is placed too low, as a result it will be necessary to lower the printing plane as well, screwing more the 4 adjustment knobs; on the other hand, excessively screwing the corners inevitably causes a deformation of the aluminum top, which takes on a curved shape with the highest center of the corners.


In these cases, it is possible to place endstop Z higher, so as to be able to raise even the 4 corners of the plane and cancel the curvature. On the other hand, it is advisable not to exceed the positioning of endstop Z at the top, as this would cause an instability of the printing plane due to insufficient screwing of the 4 levelling knobs.


Above is the introduction of the first layer calibration, hope it can help you. If you still have any questions during the operation, please visit our Support Page. Our knowledgeable staff is happy to assist you and your team with any questions.


After mastering the above information, why not take a look at our exceptionally outstanding laser engraving machine, the Longer Laser B1 40W ?Unlock the pinnacle of laser engraving and cutting prowess with the B1 40W. Where precision meets versatility and innovation, seize the power to transform your visions into tangible achievements. With its powerful engraving and cutting capabilities, it transcends boundaries to become the best engraving machine and best laser cutter for a variety of materials. From wood, metal, acrylic, glass to leather and more, there are no limits to your creativity.

By Academy | June 16, 2022
Printing Flow Calibration - LONGER
Printing Flow Calibration

In 3D printing, extrusion flow is a key aspect to consider if you want to obtain not only quality prints, but also dimensionally correct prints.

The flow is closely related to the speed of rotation of the gear wheel attached to the extrusion motor; the faster it rotates in a certain time interval, the more filament will be extruded during that interval. For this reason it is necessary to set the correct amount of flow, corresponding to the exact amount of molten material needed to correctly compose the printed object.

Depending on the amount of flow per unit of time, 3 scenarios can occur:

  • Underextrusion(too low flow), which occurs when little material is extruded and has prints with small gaps that appear between two layers or between two perimeter lines
  • Extrusion(correct flow), which when the right amount of material is extruded and has prints free of external defects
  • Overextrusion(too high flow), which occurs when too much material is extruded and features blobs prints on the outer walls and accumulation of unnecessary material on the upper layers


If the prints are affected by underextrusion, then it will be necessary to increase the print flow; instead, in case of overextrusion it will be necessary to decrease the print flow. In order to determine the exact amount of decrease/increase in flow, empirical tests can be failed to provide accurate reference data.

Starting from the premise that a underextrusion produces prints smaller than expected while an overextrusion produces prints larger than expected, in order to empirically verify the amount of flow we proceed as follows:

  • Download the following calibration cube.stl:

https://thingiverse.com/thing:5118535 

  • Import the cube.stl into Cura and apply the following slicing settings:


  • Print the cube, which will have only one perimeter wall, empty and without a top layer


  • When printing is complete, proceed to the measurement of the walls with a gauge


Each wall will have a certain size, which may be less, equal or greater than 0.4mm; from the average of these values, the flow is calculated by applying the following formula:


Therefore, assuming that the average of the measured walls is 0.5mm wide despite it should be 0.4mm, the flow to be set turns out to be:


The result obtained must be set in the following Cura menu:

However, you have to pay close attention to the flow set, because even if it is the result of mathematical calculations, it is not always absolutely correct. In fact, the calculated flow can be to include errors due to a bad measurement with the caliber, from a bad leveling of the printing plane, and so on; therefore, it is a good idea to repeat the printing of the test cube several times to check for any variations, and above all it is necessary to verify that the prints do not yet have defects despite the new flow has been set correctly.

This means that, if, for example, mathematical calculations have returned a value of 80% as the correct flow, perhaps the best value for prints is that of an 85% stream. Then once the new flow is set, we proceed by increasing/decreasing the new value based on any aesthetic defects of the prints.

We proceed by applying a visual method:

  • Restore Cura to default settings
  • Print the cube.stl normally, with infill
  • Visually examine the print quality of the cube

  • If the flow has been set correctly, the upper layers will be smooth, shiny and without scarring or filament accumulations near the perimeters, with the layers perfectly joined.
  • If there is too much material near the perimeters, slightly decrease the flow value and rerun the test.

If there are visible gaps between the layer lines, slightly increase the flow value and run the test again.

https://www.longer3d.com/collections/3d-printers-1

By Academy | June 16, 2022