FDM printer bridging printing tutorial - LONGER
FDM printer bridging printing tutorial

The FDM 3D printing consists of a series of layers of molten material placed on top of each other; in this way, complex objects are created through a succession of layers. However, often some layers must be placed in areas without a base, so the layer is printed literally in a vacuum and it will inevitably fall down, but to overcome this problem it is possible to use supports, which act as a temporary scaffolding and can be removed once the print has been completed.

In some special cases it is possible to print suspended layers, without the use of supports. It may seem like an impossible feat, but over short straight distances you can print in a vacuum by instantly solidifying the layer using the air from the printer fans, thus creating a solid connection. This phenomenon is called Bridging and can be accomplished by means of some key print settings, such as flow, print speed and cooling.

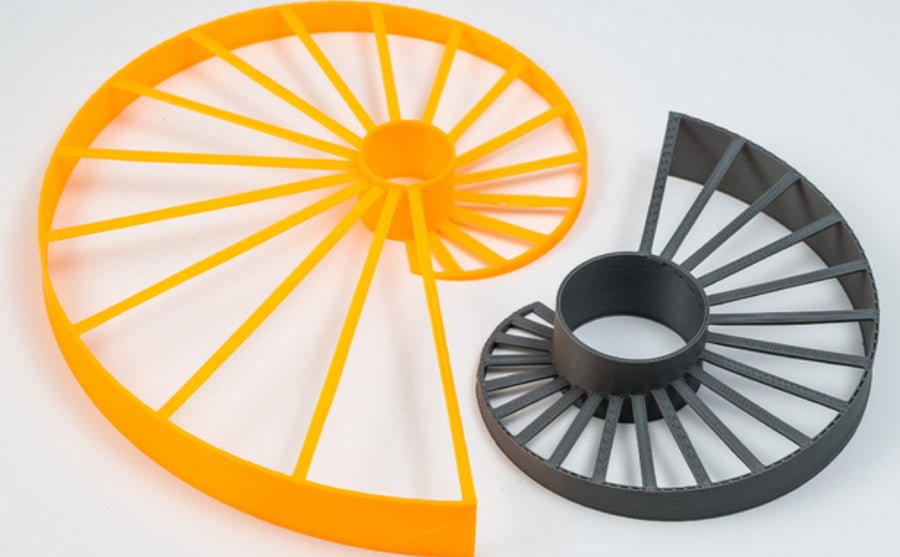
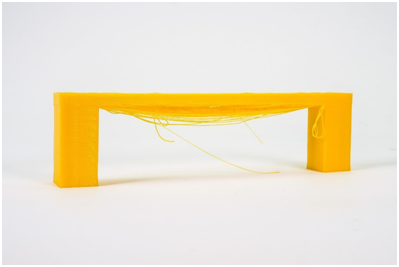
Depending on the settings used, the solidification of the layer may occur too slowly, thus causing it to sagging or lowering, as seen in the following photo.
FDM printer bridging printing tutorial

By the way, below are some tips on how to improve bridging printing.
For tests you can download this sample, which can be printed several times depending on the settings chosen, until you find a satisfactory result:
https://www.thingiverse.com/thing:476845

First you need to make sure that the print stream has been calibrated correctly; in this regard, it is possible to consult the previous lesson, relating to the "Printing Flow Calibration".

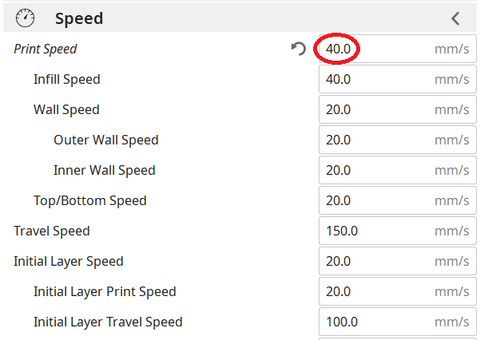
At this point, proceeding with the printing of the sample, if the bridging has unsatisfactory quality, it is possible to decrease the printing speed; progressively reducing the speed by about 5 mm/s it is possible to carry out various tests, until the ideal value is found.
FDM printer bridging printing tutorial

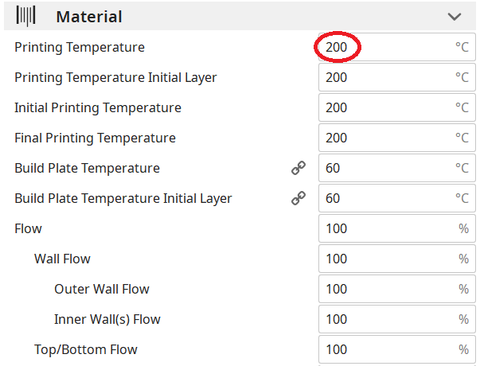
Printing temperature also plays a key role in bridging; in fact, the hotter the layer, the longer it takes for its solidification, thus causing a sagging. For this reason, by progressively reducing the printing temperature by about 5 ° C it is possible to carry out various tests, until the ideal value is found.
FDM printer bridging printing tutorial


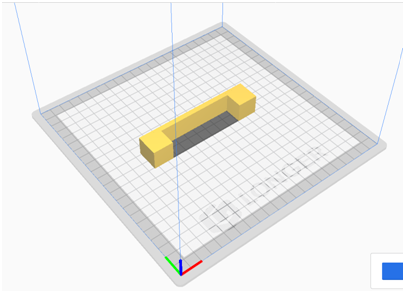
If the bridge is very long and the geometry of the object allows it, it is often possible to rotate the object until the suspended part disappears completely, as shown in the figure. However, in most cases this is not possible (including the case of printing the sample), so it is a solution that can be counted on very rarely.
FDM printer bridging printing tutorial


Longer Dual Blower Kit

As mentioned from the beginning, for bridging the quality of air emitted by the cooling fan is fundamental, which must be able to instantly solidify the layer; for this reason, if changing the slicing settings is not enough, then the new Longer Dual Blower can help.

Dual blower kit LONGER 3D


The new Longer Dual Blower has been specially designed to allow a faster and more uniform emission of cooling air, thanks to two bilateral turbo fans and a double ventilation duct; in this way the prints are much more detailed and the bridging printing greatly improved.

The installation is very simple, and can be done by consulting this video guide: https://youtu.be/zEA-eM5sfho

Original post: https://www.longer3d.com/blogs/academy/fdm-printer-bridging-printing-tutorial

 https://www.longer3d.com/products/lk5-pro-fdm-3d-printer

By Academy | November 27, 2021
LONGER New Dual Blower Kit installation tutorial - LONGER
LONGER New Dual Blower Kit installation tutorial

Last mont LONGER 3D release a new accessories for FDM 3D printers.

This dual blower kit perfectly fit for LONGER LK4/LK4 PRO/LK1/LK5 PRO and compatiable with U20/U30/U30 PRO 3D Printer, improves the quality of printing, have strong power on cooling nozzle to get a better and smooth surface of model.

And installation steps, some 3D printers fans didn’t know. Now you can follow our turorial step by step.

https://www.youtube.com/embed/zEA-eM5sfho

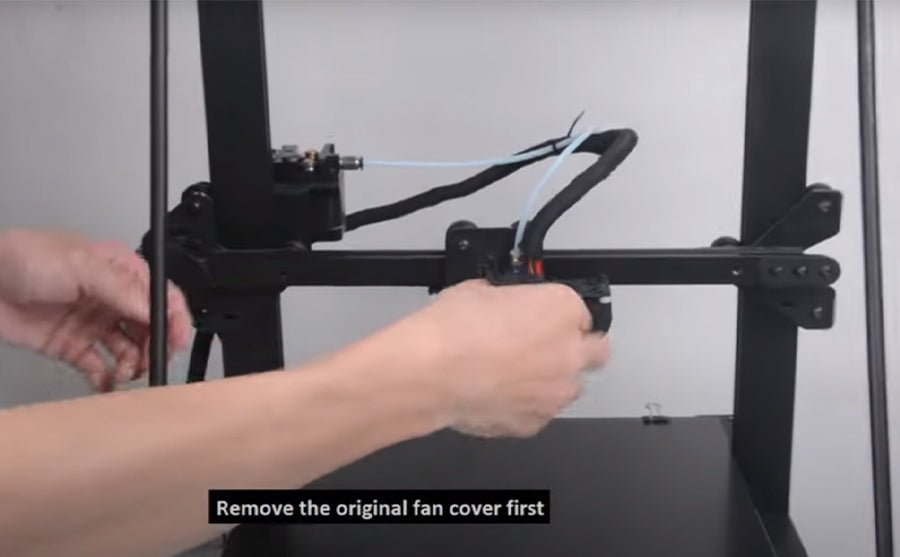
So install new dual blower kit for your FDM printer, you need remove the old hot end fan cover and sheet metal first, the fixed the new dual blower kit in the gantry beams, connect the fan wires in order, then done.

Ps: The plugs do NOT get replaced the same as the stock fan, they must be switched exactly opposite. (Former red/black gets new blue/yellow & visa versa.) 

If you going to install BL touch, please download support bracket for the BL Touch

Longer 3D collect all 3D printers coupon in discount  page. If you need 3D printers or upgrade part from LONGER 3D, check the link and find out coupon code you need.

Original post: https://www.longer3d.com/blogs/academy/longer-new-dual-blower-kit-installation-tutorial

https://www.longer3d.com/products/lk5-pro-fdm-3d-printer

By Academy | November 8, 2021
Description in Longerware vs Lychee Slicer vs Chitubox - LONGER
Description in Longerware vs Lychee Slicer vs Chitubox

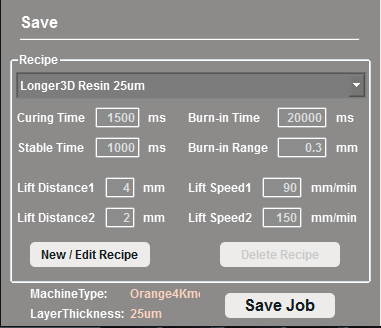
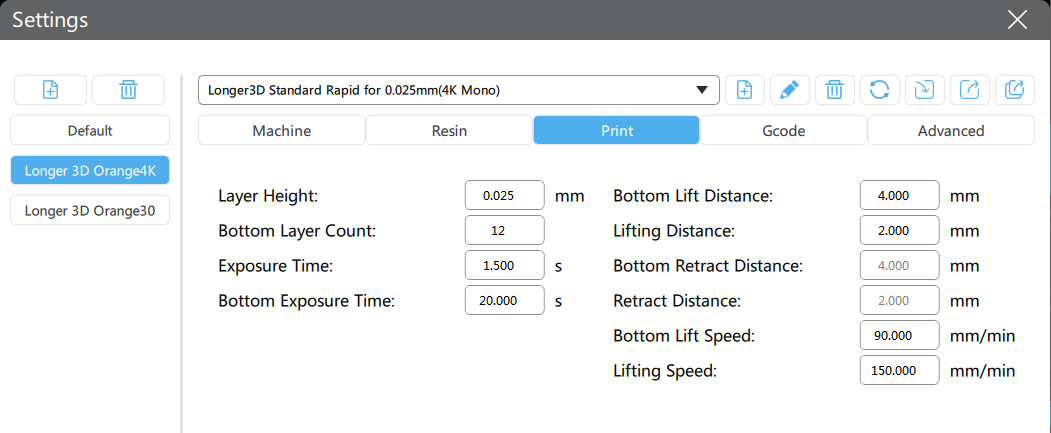
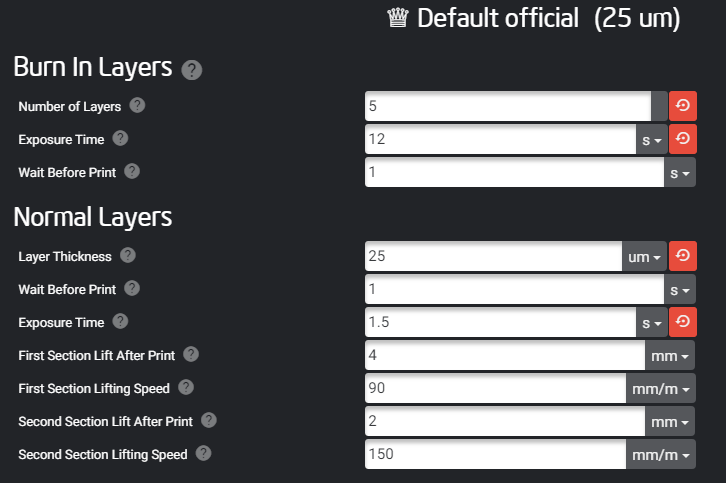
By using the same Longer resin 3d printer but different slicer, what's the meaning of each parameter in slicing software? Which is better, Lychee or Chitubox or longerware?

We attached Longerware vs Lychee Slicer vs Chitubox with default 25um printing parameter to make the comparison. 

LONGERWARE

Chitubox

Lychee

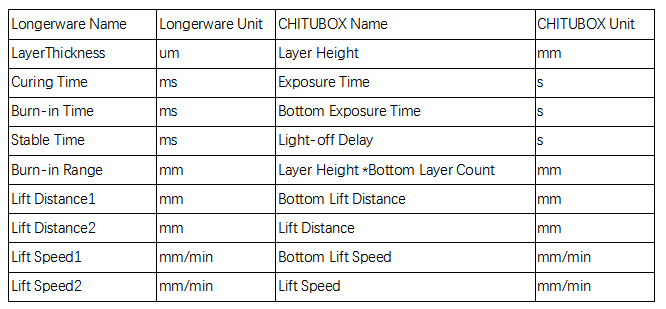
Regarding the different description between Longerware and Chitubox, please reference this image in different.

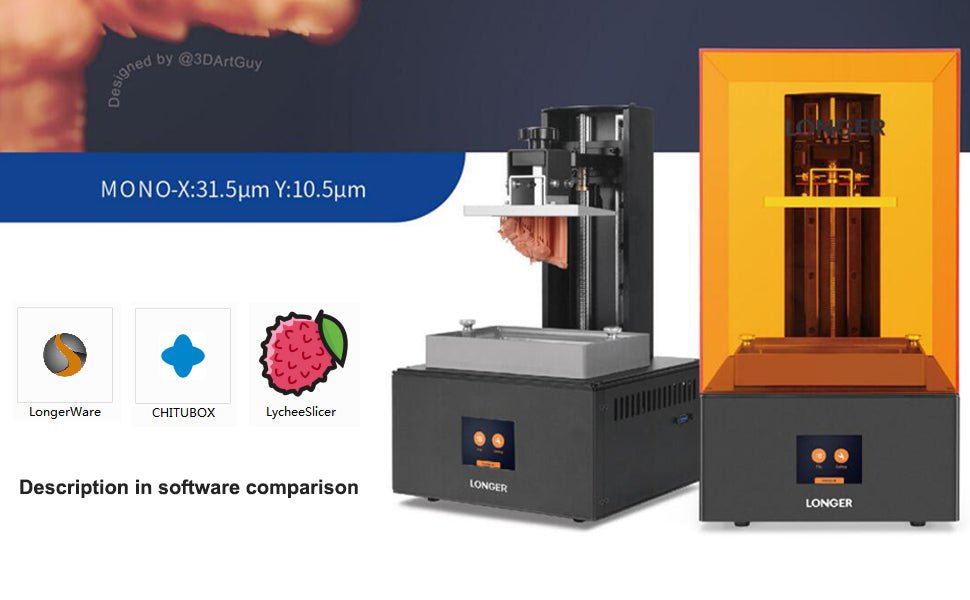
Longer Orange 4K is reaching 6480*3840 in resolution at 10.5/31.5um of subpixel and it's the finest LCD 3d printer in market right now. More information please reach this page to check >>> Orange 4K 

https://www.longer3d.com/collections/3d-printers-1

By Academy | August 25, 2021
LONGER LK4, LONGER LK5 PRO Upgrades【Firmware Update】 - LONGER
LONGER LK4, LONGER LK5 PRO Upgrades【Firmware Update】

A Detail Guide about LONGER LK5 Pro Upgrades and How to Upgrade LONGER LK4 Pro in Easy Steps

1.Since the motherboard of the LK4 Pro, LK5 Pro printer is an open source motherboard, use electrical tape to paste the pins on the side of the USB cable socket before connecting to the computer to isolate the computer from supplying power to the printer motherboard. If the pins are not attached, the printer will not work properly use.


2.To connect the computer to the printer, you need to install the driver, which can be installed on the LONGER official website. The official website link is as follows:

https://www.longer3d.com/blogs/news/printer-download-guildelines


LONGER 3D firmware download


3.After pasting the pins of the USB cable with tape, you can connect the printer to the computer, and then you need to update the printer's firmware through the slicing software cura.


4.Cura software version 4.8 or 4.9 does not add a LONGER printer by default. You need to add it manually. The following link is the video of adding a LONGER printer to cura4.8 or 4.9. Refer to the video in the link to add a LONGER printer;

MAC OS: https://www.youtube.com/watch?v=XKqRb434USw&t=6s

WINDOWS: https://www.youtube.com/watch?v=jdLYBYFEBlQ&t=9s


If the computer cannot connect to the printer, please refer to the video operation in the link below.

https://www.youtube.com/watch?v=KwmKZmtTOPw&t=10s


5.Next, you need to save the firmware to your computer. The firmware link of the corresponding model is below:

https://drive.google.com/file/d/11X1MZV4ll47kG4dhw2PgXniOwwo7UkmP/view?usp=sharing


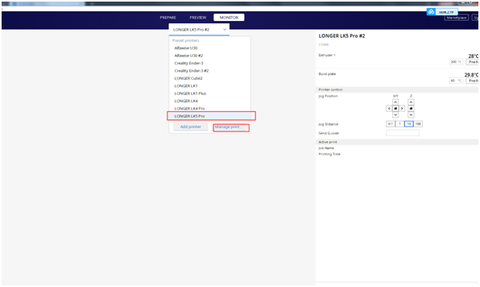
6.After the firmware download is complete, please turn on the printer power, connect the printer to the computer, open the cura software, and select the "MONITOR" page to control the printer. And the firmware update is also completed on this page.

longer 3d - cura solfware

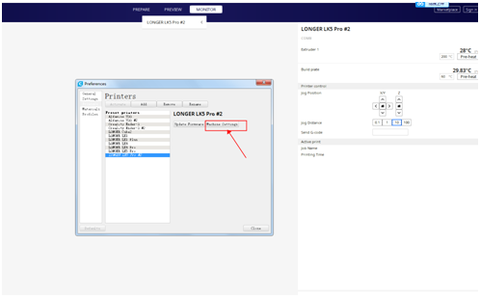
Next, on the "Monitor" page, select the corresponding model to update the firmware, and then click "Manage Printers", the operation is as follows


Click "Update Firmware" in the pop-up "Preferences" option box, refer to the figure below.

Firmware upgrade- LONGER 3D


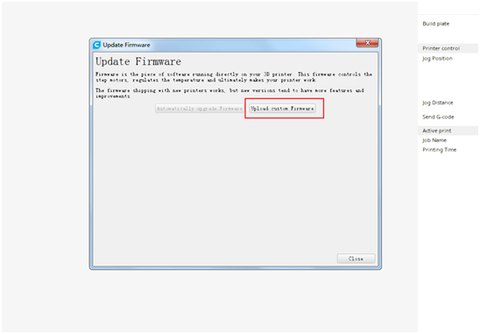
In the pop-up "firmware update" prompt box, click "upload custom firmware"

upload custom firmware


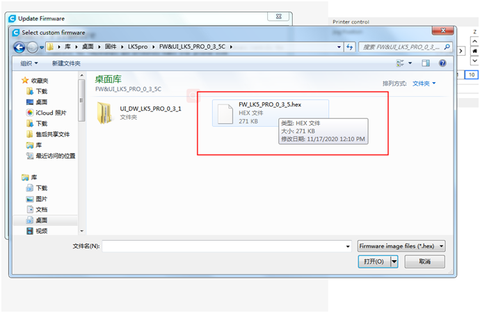
Then select the file with the suffix format ".hex" in the firmware installation package to upload, and you can start to update the printer's firmware. Do not cut off the power of the printer or turn off the computer during the firmware update process, and also ensure that the USB cable is properly connected.

Then select the file with the suffix format ".hex"

LONGER LK5 Pro FDM printer base on 300x300x400mm printed size, if you interested, check the page get more detail: https://www.longer3d.com/blogs/academy/longer-lk4-pro-lk5-pro-3d-printer-firmware-update


Article source: 

By Academy | July 23, 2021
FDM 3D printer loss parts, do you know this? - LONGER
FDM 3D printer loss parts, do you know this?

3D printer aways work days and night, as I know, some one have print a model, it cost very long time, funny. for high strength work, some part of FDM 3D printer, will loss. let me show you some part easy loss, you can check while you going to print big project, make sure every thing well before printing.

More than 1000 hour printing?

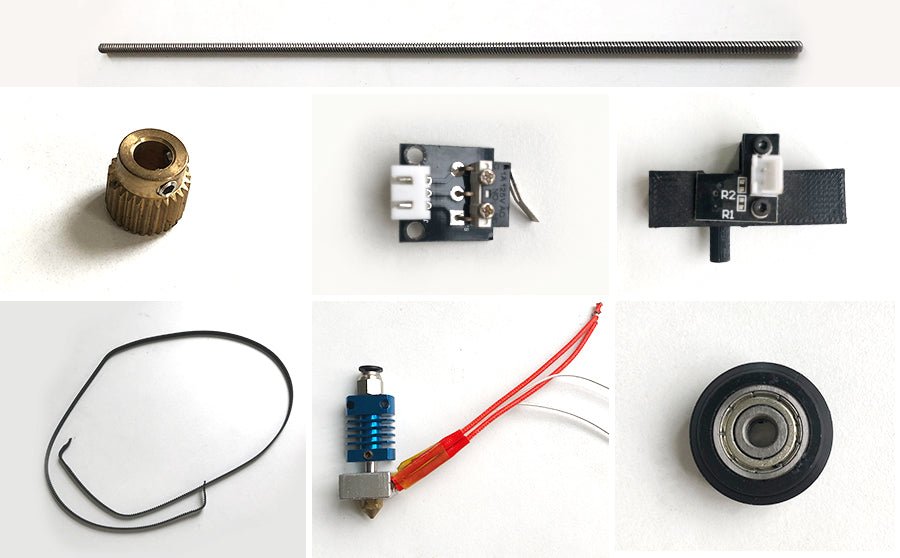
1, Nozzle kit

nozzle kit of 3d printers

The nozzle kit is installed on the hot end of the printer. There are generally two failure conditions:

  1. The nozzle or blue heat sink is blocked

There are many reasons for being blocked by the filament. For example, if the nozzle is too close to the print bed, the filament cannot be squeezed out. Or when you replaced the new Teflon tube, you did not insert the Teflon tube to the bottom, causing the filament to get stuck in the gap between them.

  1. The thermistor or heating rod is damaged

Generally, their cables are broken. But if the machine is used for a long time, it will naturally wear out.

Buy Longer 3d Printer nozzle kit here: https://www.longer3d.com/products/longer-nozzle-kit-for-lk1-lk4-lk4-pro-lk5-pro


2, Limit switch

limit switch of 3d printer

The iron plate on the limit switch will loosen after many collisions. So when your machine has been used for a long time, you need to check whether the limit switch is still working properly.


3, Filament sensor

The filament sensor is a part that is very easy to wear. Its function is to detect whether the filament is used up. So that the printer will not print air when the filament runs out when you are not next to the machine.

filament sensor of 3d printer
After the machine has been used for a long time. The filament sensor may not be able to sense the filament even when there is a filament. So when your printer’s touch screen shows that the filament cannot be sensed, please check your filament sensor.


4, Extruder gear

The brass gear on the extruder may wear out after a long period of filament extrusion. So when your machine has been used for a long time, you need to check whether your extruder gear is worn.

extruder gear


5, Z axis screw

Z-axis screw

After using the machine for a long time, you need to check whether the grease on the Z-axis screw is still enough to keep it working normally.

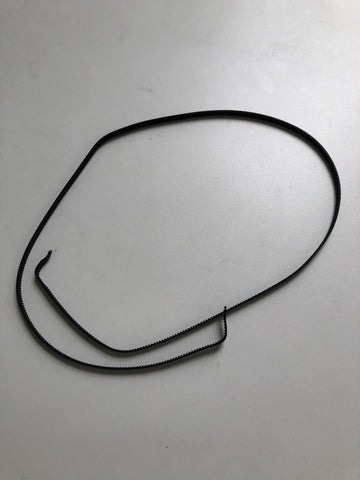
6, Synchronous belt and Synchronous wheel

Synchronous beltSynchronous wheel

When there is a layer shift in your print or your XY axis cannot move normally. It is very likely that the belt or wheel is worn out (there may be other reasons). You can try a new belt or wheel.

There is a possibility of wear on the surface of the synchronizing wheel and the bearings inside.

 https://www.longer3d.com/products/lk5-pro-fdm-3d-printer

By Academy | June 10, 2021
How to fix extruder in abnormal - LONGER
How to fix extruder in abnormal

When there's issue of exturder from Longer LK1/LK4/LK4 PRO/LK5 PRO 3d printer, how to fix it? There are usually two reasons in which the extruder works abnormally.


1. Clogged nozzle
In this case, you can refer to the method of cleaning the nozzle above.
2. Damaged extruder
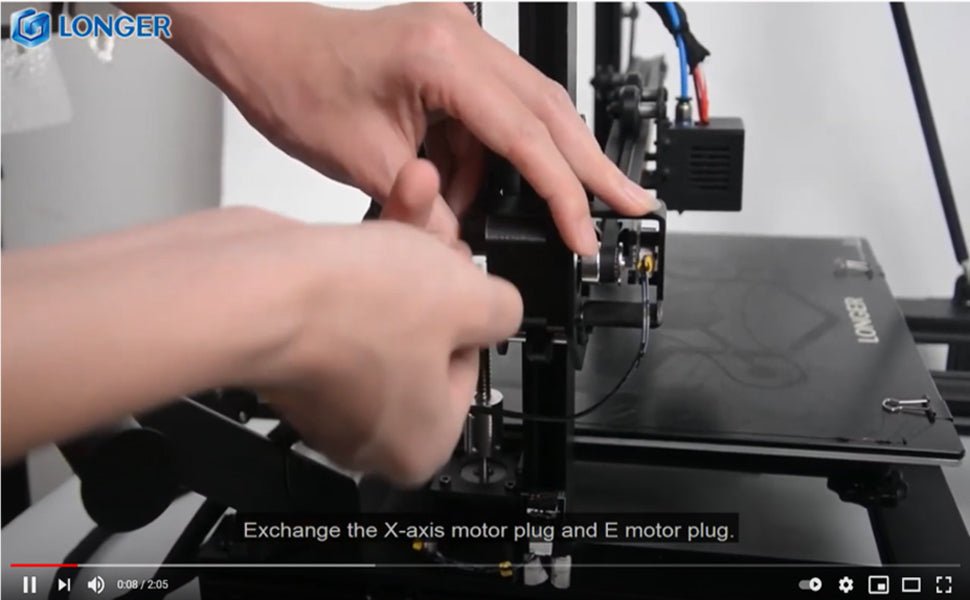
You can exchange the extruder cable with the X-axis cable. Start the machine, control the X axis, and let the extruder work. Observe if they work. If the X-axis is working properly, then the extruder motor is malfunctioning. At this time you can only replace with a new motor.
But if the X-axis does not work after the cable is exchanged. It may be a cable or motherboard failure. At this time, change the Y-axis cable to the extruder, and the motherboard's extruder port cable to the X-axis. If the X axis is working properly, then the cable is intact. If the X-axis still does not work, it means that the motherboard and cable need to be replaced with a new one.
You can refer to the video in the link below.


Watch video get more detail: https://youtu.be/XCjrieoyZ1c

https://www.longer3d.com/products/lk5-pro-fdm-3d-printer

By Academy | March 29, 2021
LONGER LK4 PRO check by yourself guidelines - LONGER
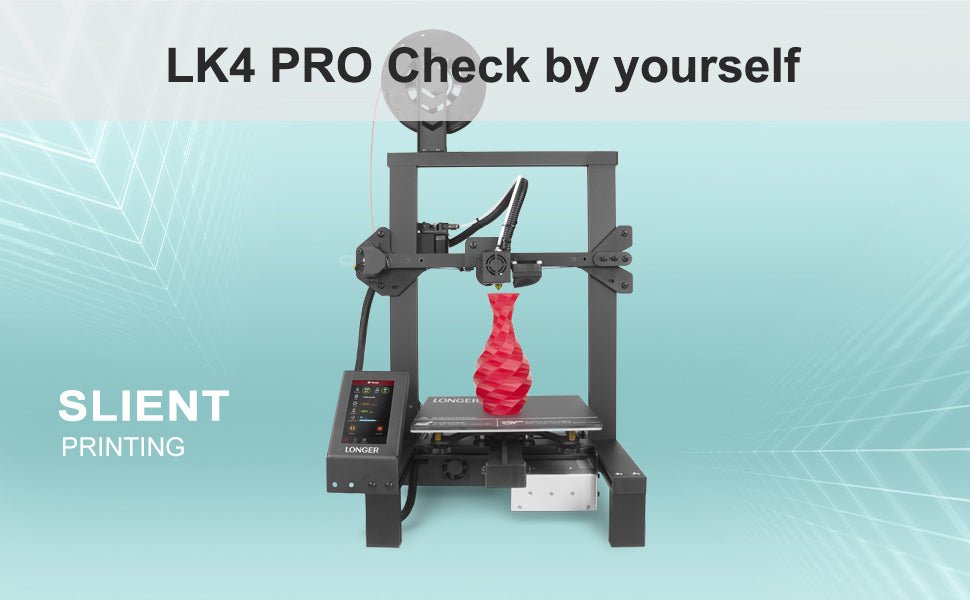
LONGER LK4 PRO check by yourself guidelines
By Academy | February 5, 2021
How to Add LONGER 3D Printers into Cura 4.8 Version - LONGER
How to Add LONGER 3D Printers into Cura 4.8 Version

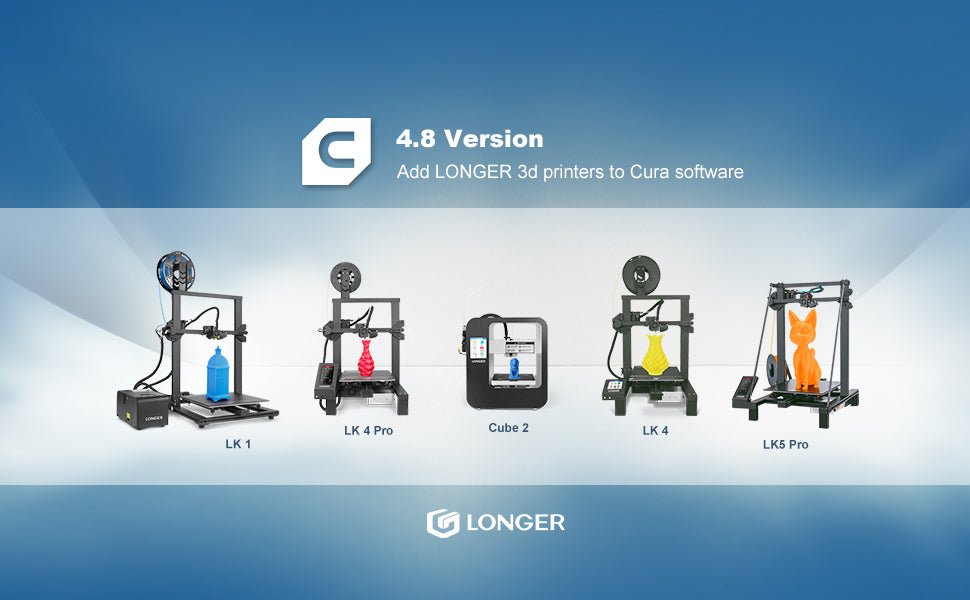
Reach this link to watch how to add LONGER 3D Printers into latest Cura software. And get more knowledge about longer lk4 pro cura settings, longer lk4 cura settings, and longer lk5 pro cura settings.

Add Longer 3d printers into Cura 4.8

To download the resources files of LONGER >>[Resources files]<<, with latest printing parameter, the quality of printing will be perfect on conifguration. 

https://www.longer3d.com/products/lk5-pro-fdm-3d-printer

By Academy | February 5, 2021