LONGER How to: Batch Engraving Business Cards with LONGER Nano Series: A Smarter Way to Personalize Your Brand

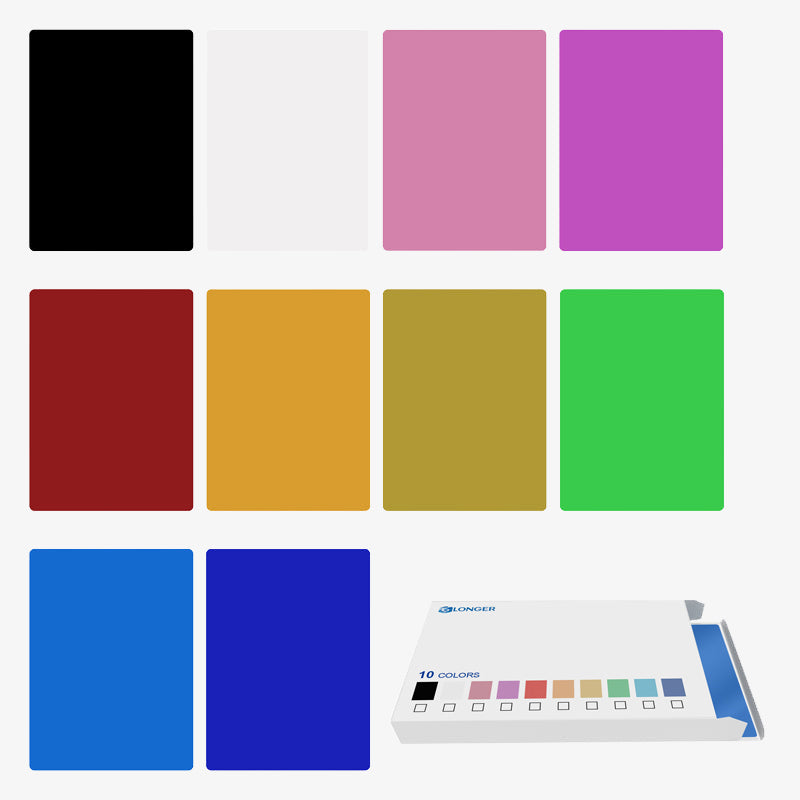
Batch engraving anodized aluminum business cards has never been easier or more precise. With the LONGER Nano Series laser engraving machine, creative professionals and business owners can produce sleek, customized cards that leave a lasting impression. This guide walks through the complete process—from setup and positioning to design import and laser parameter adjustment—ensuring efficient and professional-grade results every time.

By Laser Engraver Blogs | April 23, 2025
Safety First: Exploring the Advanced Safety Features of the LONGER Nano Series Engraving Machines

LONGER’s Nano Series laser engravers combine precision and safety with features like real-time temperature monitoring, tilt detection, and flame-retardant shielding. This article details how these safety systems work together to deliver a secure and reliable engraving experience for creators at all levels.

By Laser Engraver Blogs | April 23, 2025
Protective Lens Replacement for Longer Ray5 10W

When engraving with the Longer Ray5 10W, smoke buildup can cloud the protective lens, reducing laser power. This guide shows you how to replace the protective lens to restore performance. Regular replacement or cleaning ensures efficient cuts and extends the life of your laser. If the lens is damaged or remains blurry after cleaning, a new one can be purchased directly from the official LONGER website.

By Laser Engraver Blogs | April 19, 2025
LaserBurn 1.2.0 Official Release|LONGER Launches Smart Engraving Across All Models

LONGER officially releases LaserBurn 1.2.0—its smart engraving software now supporting Nano Duo, Nano Pro, Nano, and B1 series. Featuring AI-powered functions like auto-positioning, real-time preview, text-to-image design, and batch sync, this update transforms how creators work. The Ray5 series will join soon with future firmware support. With smarter control, advanced design tools, and flexible connectivity, LaserBurn 1.2.0 marks the next step in LONGER’s evolving ecosystem for laser engraving.

By Laser Engraver Blogs | April 19, 2025
How to Enable Framing Mode on Lightburn for Longer Laser Engravers

LightBurn Framing Mode is essential for accurate laser engraving with Longer machines like Nano, B1, and Ray5. It lets users preview the engraving area before starting the job, minimizing material waste and errors. This guide walks you through enabling Framing Mode in LightBurn—just activate the laser fire button, set framing power to 2%, and you're ready to frame with precision. Perfect your setup and avoid costly mistakes with this simple yet crucial step in the engraving process.

By Laser Engraver Blogs | April 18, 2025
How to Get Colored Shades Engravings with Longer Ray5 & B1

Longer laser engravers like Ray5 and B1 series can create brilliant multicolor engravings on metal, starting from just 10W of power. Using LightBurn's Material Test, users can easily identify the best settings to unlock vibrant shades. Even with lower-power lasers, up to 90 distinct colors are possible, making metal engraving both creative and accessible. Learn how to test, tweak, and master color engraving with your Longer machine.

By Laser Engraver Blogs | April 18, 2025
Fan Recovery & Replacement for Longer B1

Longer B1 20W & 30W & 40W has a laser module that can engrave and cut various types of materials. However, depending on the type of work that is carried out, it is possible that a fair amount of smoke and wood dust is produced, which will inevitably settle on the fan of the laser module and suck into it. In fact, due to the high power of the laser beam, the laser module tends to heat up and for this reason it is necessary that there is a high-speed cooling fan; however, during its operation the fan sucks in the surrounding air and, if this is rich in smoke and dust produced during engraving, inevitably the fan and the laser module will soon be full of smoke and dust as well. When the laser module is saturated with dirt, cooling becomes ineffective, so you need to clean the laser module. 
In some cases, as a result of prolonged use, the fan may stop working, and in these cases, it is necessary to replace the fan as soon as possible, otherwise the laser module will be damaged.
To proceed with recovering or replacing the fan of the laser module of the Longer B1 20W & 30W & 40W, it is first necessary to completely disassemble the laser module from the rest of the machine. Therefore, disconnect the power cable of the laser module, then remove the connection with the air assist, and finally physically remove the laser module from the rest of the machine. Now, unscrew the 4 screws of the laser module cover and remove the cover.

After removing the metal cover, gently lift the fan, then gently disconnect its connector from the rest of the laser module, as shown in the figure.

At this point, proceed to clean the fan thoroughly.
In the event that the fan is damaged or faulty, it can be replaced with a 60mm x 60mm fan, specification 24 Volt - 0.40 Ampere, like the type shown in the figure.

After the fan cleaning or replacement procedure is complete, proceed to connect the fan connector to the rest of the laser module; Then, position the fan and proceed to close the metal cover, following the steps followed at the beginning backwards. Finally, install the laser module on the machine, carefully connect all the connectors, and carry out ignition and engraving tests, so as to verify that everything is working correctly.

By Laser Engraver Blogs | March 4, 2025
Shaking Effects Solving for Longer Ray5

Longer Ray5 is an innovative and powerful laser engraver, available in 5w, 10w, 20w and now even 30w versions. Depending on the type of laser module with which it is equipped, Longer Ray5 can perform various types of processing on various materials, but one feature is always in common, namely the absolute accuracy in the execution of the processes. 
Sometimes, however, strange effects can occur, similar to those present in the image below; in these cases, it is necessary to fine-tune your machine, so as to obtain maximum performance. 

Usually, this problem is due to a poor installation of the belts and eccentric wheels, so it is necessary to proceed with a more accurate installation. 

First, completely disconnect all the connectors of the Longer Ray5, then remove the connection cable. 

Once this is done, squeeze the belt as shown in the figure. The belt must be hard, resistant to pressure. If, on the other hand, it is soft, then it is necessary to put it under tension. 

In order to tension the belt, unscrew the T-nut as shown in the figure, then pull the belt with your hand. Keeping the strap under tension with your hand, continue to pull and simultaneously screw the T-nut tightly to secure the strap in place. 

Repeat the belt tension operation in the same way for the other side of the Longer Ray5 frame. 

Finally, make sure that the sync wheel is perfectly in line with the belt. To do this, unscrew the Sync Wheel latch as shown in the figure, then put the Sync Wheel in line and secure the latch. 

At this point, check the wheel eccentrics as well. The wheels equipped with an eccentric nut are the lower ones. With your finger, try to rotate the wheel; If but wheel slip, you need to tighten the eccentric nut of the wheel. 

Gradually tighten the eccentric nut of the wheel, gradually checking that the wheel no longer slips. Do not tighten the eccentric nut too much, but stop as soon as the wheel no longer slips. 

Do these for both the left and right sides of Longer Ray5. 

At this point, the installation has been successfully completed for the Y-axis of Longer Ray5. However, you also need to check the status of the X-axis, which is the axis that moves the laser module. 

Following the steps above, first check the X-axis belt, tightening it if necessary. After that, also check the eccentric nut of the wheel, as shown above. 

Once the tuning has been successfully completed for both the Y-axis and the X-axis, Longer Ray5 will have correctly acquired its reliability and accuracy, and therefore it will be possible to obtain precise and dimensionally correct engravings and cuts for a long time.  
Periodically, always check the belts and eccentric nuts, so as to keep the reliability of Longer Ray5 constant over time. 

By Laser Engraver Blogs | March 4, 2025
Longer Camera Installation Guide

Longer Camera is a really useful and functional device, capable of making spectacular video recordings of your laser engravings, and it is also fully compatible with Lightburn for complete professional functionality. Longer Camera is fully compatible with the Longer Ray5 & Longer B1 Laser Engravers, and requires only a small setup before it can be used to its full potential. 
The installation of Longer Camera is really simple, and essentially consists of two parts. The first part is about assembling and physically installing the Longer Camera, while the second part is about properly setting up the Longer Camera on Lightburn laser engraving software.
 Once the Longer Camera package has been opened, place the 4 parts on a work surface and start assembling. 

First, open the camera bracket into a cross shape. 

Once this is done, secure the bracket to the bottom mounting bracket using the hand – tightening set screws. 

At the other end of the mounting bracket, attach the camera module to the camera bracket.

Once the assembly of the Longer Camera is complete, you can proceed to install the Longer Camera on the frame of the Longer Ray5 / Longer B1. Therefore, attach the bottom mounting bracket to the frame of the RAY5 or B1 as shown in the figure. 

Finally, using a tape measure, make the distance between the working plane and the camera lens to 450mm. This distance is very important and must be accurate, as it represents the correct focus of the Longer Camera with respect to the recording plane. 

At this point, the first part of the setup has been successfully completed. Now it is necessary to proceed with the second part, concerning the correct configuration of the Longer Camera on the Lightburn laser engraving software. 

Configuring the Longer Camera on Lightburn software requires precise steps and articulated in various steps, so it is difficult to report the procedure by text. For this reason, we have made a demonstration video regarding the configuration of Lightburn, which can be followed more easily, and is available at the following link https://youtu.be/7K7Vrr1YR7Q  on our YouTube Longer channel. 

Longer Camera is available for purchase on the official Longer website, at the following link: https://www.longer3d.com/products/laser-engraver-camera-kits   

By Laser Engraver Blogs | March 4, 2025
Longer B1 Enclosure Installation Guide

Longer B1 is an innovative and powerful laser engraver, capable of engraving and cutting multiple types of materials. However, a fair amount of smoke can develop during the manufacturing process, which can disturb the user and pollute the home environment. In order to avoid this phenomenon, we have decided to release an Enclosure equipped with a smoke extractor, so that the smoke can be conveyed to the outside and prevent it from spreading into the home environment.
Installing the Longer B1 Enclosure is very simple, just follow the steps below. Mounting Brackets can be divided as “Beam 1”, “Beam 2” and “Beam 3”. Please take note of this, because you need to use them as described in the next steps. 

First, connect all the various “Beam 1” with a respective “Beam 2”.

Once this is done, take 4 x "Beam 1+2" and connect them together using the appropriate corner clips, forming a square as shown in the figure.

Vertically, engage 4 x "Beam 3".

Now, connect the appropriate corner clips and form another square using 4 x "Beam 1+2" as shown in the figure.

Once this is done, take a "Beam 3" and attach a hook clip to each of its ends. Repeat this procedure 4 times.

Connect the 4 x "Beam 3 with hooks" as shown in the figure.

Connect the hook clips to the ends of 2 x "Beam 1+2", then attach them to the frame as shown below.

Attach two metal clips to the ends of the lamp. 

Connect the lamp to the structure, adjusting the distance of the two vertical "Beam 3" if necessary.

At this point, install the cover paying attention to the position of the fan outlet. 

Install the Fan brackets. 

Install the silicone rubber sheet and Fan in order outside the cover. After installed the Fan, insert another silicone rubber sheet.

Install the plastic connector, then connect the exhausted pipe. 

Congratulations, at this point the installation process has been successfully completed, and you can place the Longer B1 inside the Enclosure. 
Remember to connect the Exhaust Tube to an air intake facing outwards, so as to dissipate the fumes to the outside of your home, thus being able to enjoy a healthy and pollution-free home environment. 

By Laser Engraver Blogs | March 4, 2025