Lasergravierer-Blog

Lens Cleaning for Longer B1 30W & 40W

Longer B1 30W & 40W has a laser module capable of engraving and cutting multiple types of materials. However, depending on the type of work that is carried out, it is possible that a fair amount of smoke is produced, which can inevitably settle on the lens of the laser module and therefore blur it. Once the lens of the laser module is dirty or clouded, the laser beam can no longer pass through it and therefore the emission of the laser module is drastically reduced. As a consequence, more and more power will be needed to engrave the same materials already engraved previously, until it will be practically impossible to engrave any type of material even setting 100% power. This problem occurs most when an air assist system is installed but not enabled; In fact, an Air Assist system allows you to create air pressure in the vicinity of the lens, thus preventing smoke and dust from settling easily on the lens. 

In order to solve this problem, it is necessary to proceed to cleaning the lens of the laser module; Once the lens is cleaned, the laser beam can pass through it without suffering losses and therefore the materials will be engraved or cut again to perfection. 


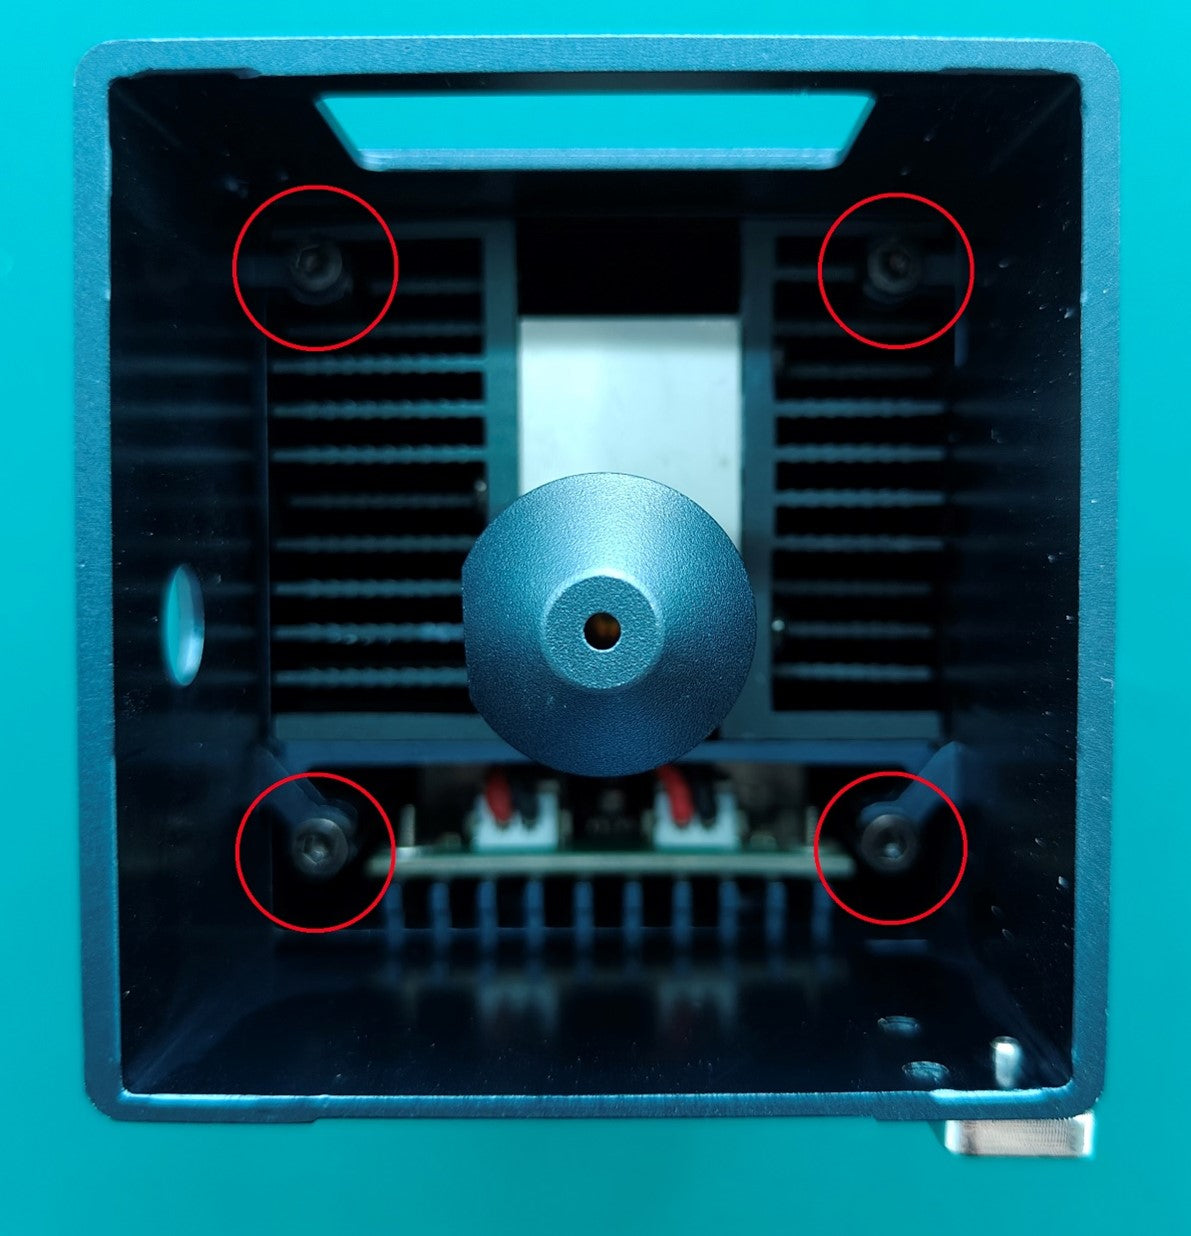
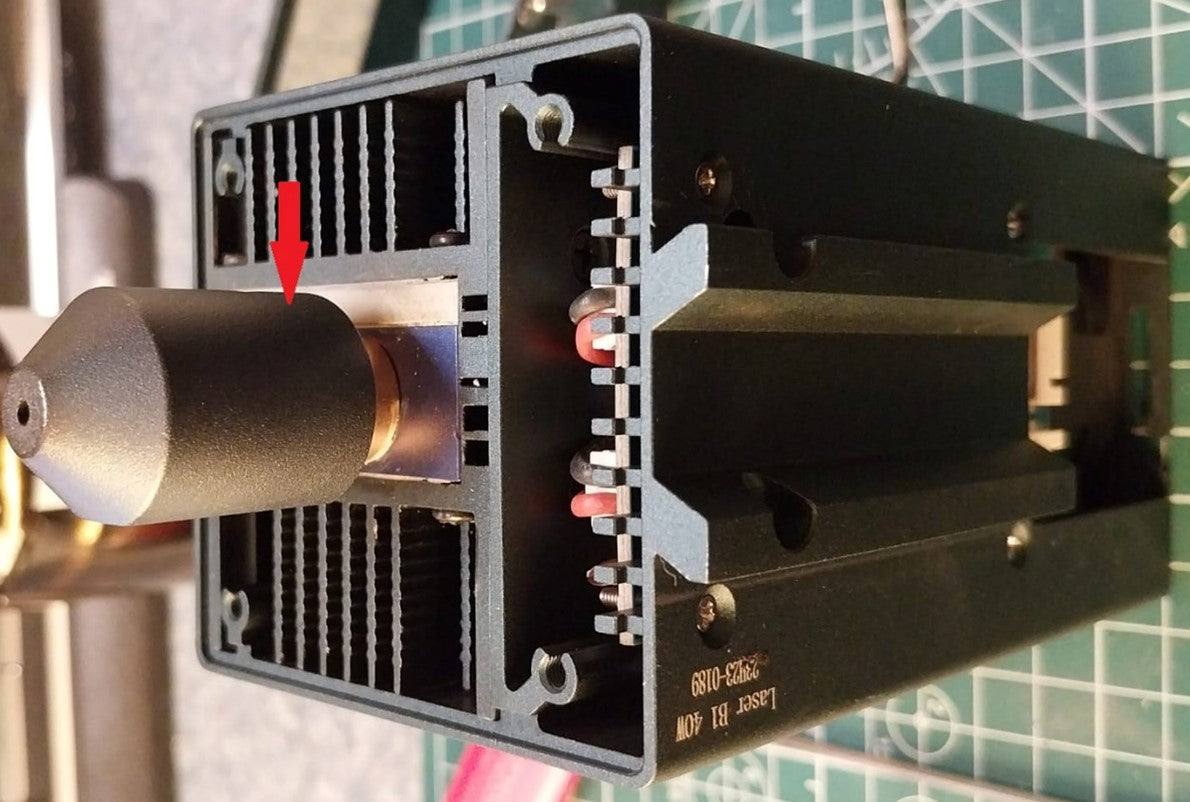
To proceed with the cleaning of the lens of the laser module of Longer B1 30W & 40W it is necessary first to completely disassemble the laser module. After separating the laser module from the rest of the machine, remove the four screws shown in the figure:

Once the four screws have been removed, the protective shield will be removed from the laser module, which will appear as shown in the figure. At this point, to remove the air assist nozzle, unscrew the small screw located on the side of the nozzle.

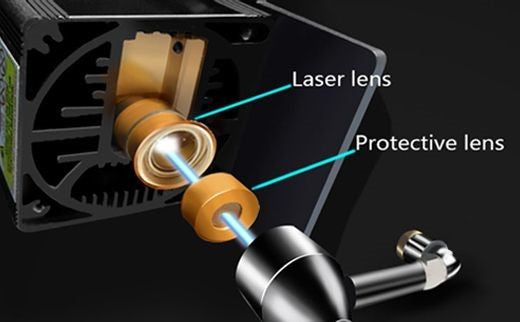
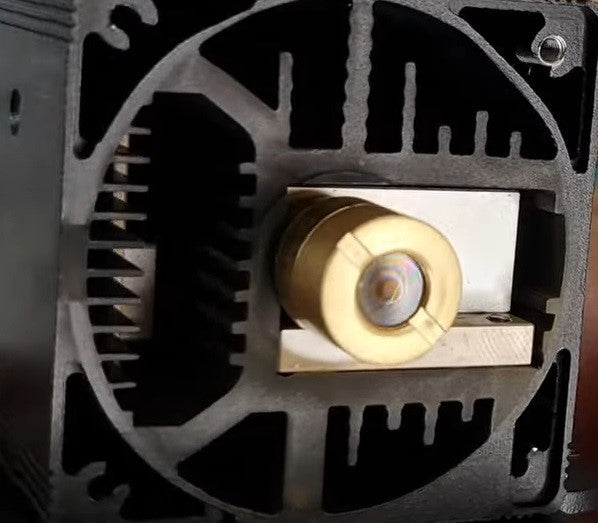
The laser module of the Longer B1 30W & 40W has a factory-installed protective lens, which can be unscrewed and cleaned separately from the laser module. This lens is a simple protective glass, and has no focusing function, for this reason it can be removed and cleaned/replaced. After removing the protective lens, you can proceed to clean the lens with the use of a cotton swab soaked in alcohol. Be careful to prevent alcohol from entering the inside of the lens. 

Use one or more cotton swabs soaked in alcohol, until the lens is completely clean and free of dirt; at this point, therefore, you can proceed to screw it to the laser module and reassemble the laser module of Longer B1 30W & 40W. At the end of the cleaning procedure, you can proceed to engrave a sample file contained in the microSD card of Longer B1 30W & 40W, so you can evaluate the total restoration of the functionality of the laser module. If the lens is too much dirty and cannot be cleaned, you can contact us for buying a replacement spare part. In order to keep the lens always clean, remember to keep enabled the air assist, this will help the engraving quality. 

By Lasergravierer-Blog | May 15, 2024
Lightburn WiFi Bridge - Longer Ray5

Longer Ray5 adopts an MKS DLC32 mainboard, characterized by USB connectivity, wireless technology, microSD card reading, touchscreen display with graphic interface and total interaction with your smartphone through the MKSLaser application. 


The most common method of using Longer Ray5 is to connect the machine to your Laptop via a USB connection, or by exporting a gcode file to be run via the Longer Ray5 microSD. However, there is also an intermediate mode of operation, based on WiFi connectivity, which allows you to use Lightburn and Longer Ray5 without a USB cable. 


Connecting the Laptop and Longer Ray5 with a USB cable requires them to be within a short distance of each other, as the maximum extension of a USB cable is about 3 - 5 meters. On the other hand, connecting the Laptop with Lightburn and Longer Ray5 wirelessly allows you to position yourself at a greater distance, so as to obtain good greater security during the engraving process. For this reason, using Lightburn in WiFi mode offers numerous advantages in terms of security and efficiency, thus expanding the user's comfort and versatility of Longer Ray5. 


In order to connect Longer Ray5 and Lightburn wirelessly, you first need to complete the WiFi setup process on your Longer Ray5. To do this, proceed as follows. 

1.    Tap the tool icon on the touchscreen's home page

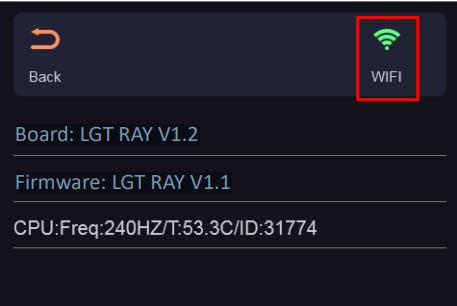
2.    Tap Wi-Fi icon on the top right corner of tool page

Tap the tool icon on the touchscreen's home page


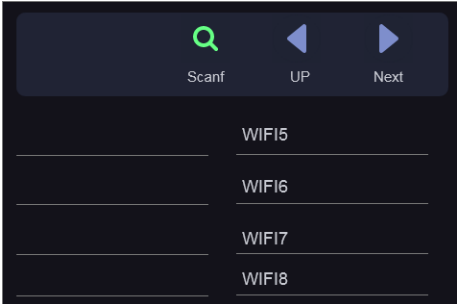
3. Select Wi-Fi name on Wi-Fi list page and enter password and waiting for connect to the WiFi Router/AccessPoint you selected

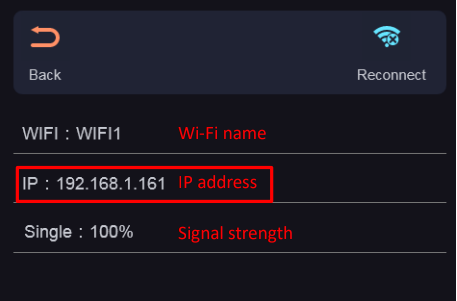
4. Check the current connected Wi-Fi status and take note of the IP address provided on the touchscreen

Once the Longer Ray5 has been successfully connected to the WiFi Router/AccessPoint and the IP address has been successfully provided and noted, proceed to open Lightburn on your Laptop. At this point, proceed as follows. 

1. Connect your Laptop to the same WiFi Router/AccessPoint to which you have connected Longer Ray5

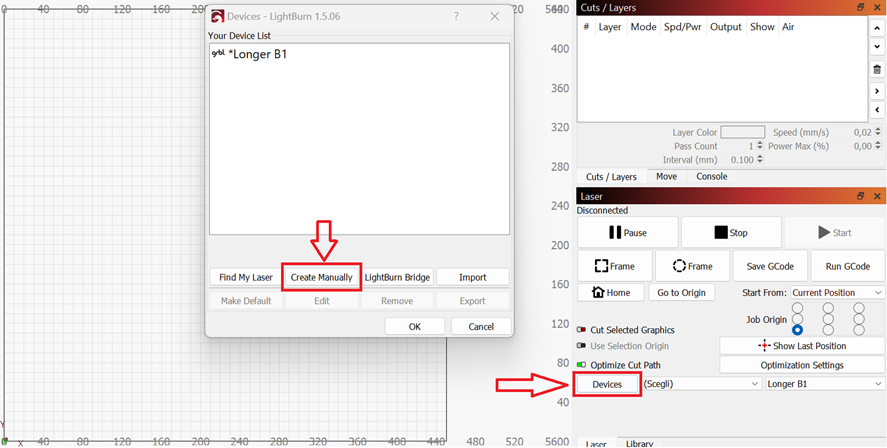
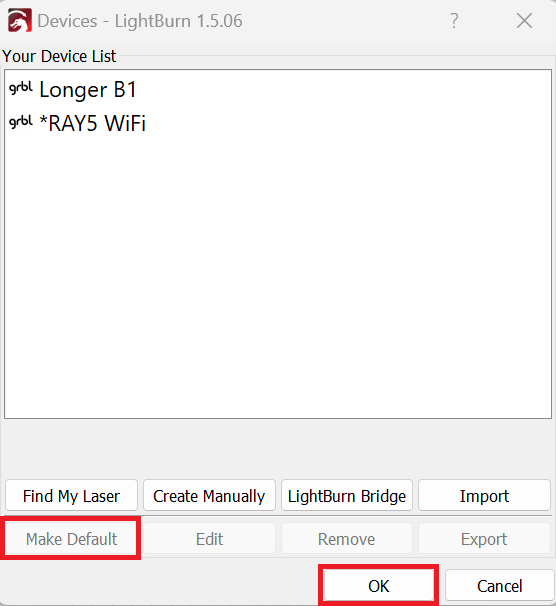
2. Click on "Devices", then click on "Create Manually" to add a new device

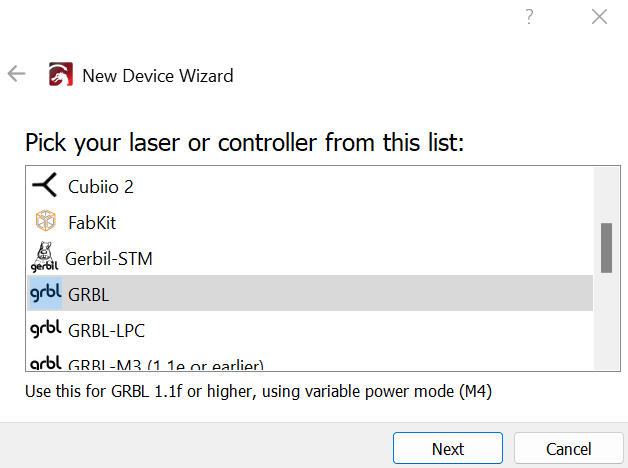
3. Select GRBL form the list, then click "Next" button

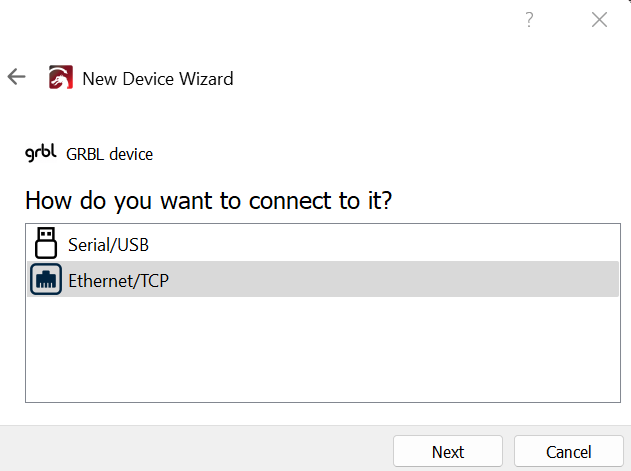
4. Select Ethernet/TCP and press "Next" button

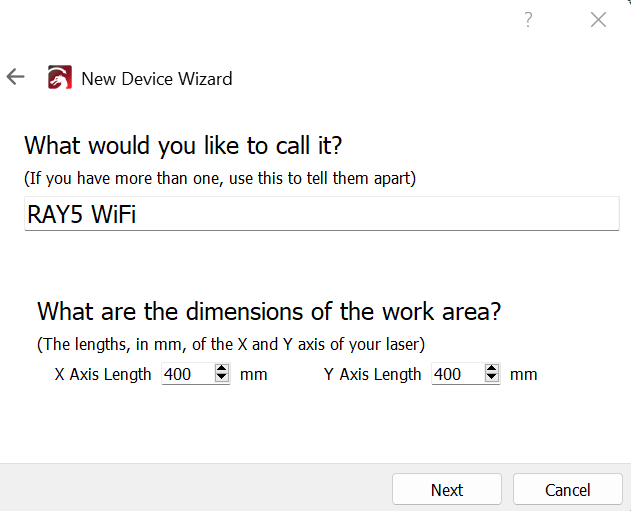
5. Enter the following data - Name: RAY5 WiFi / X = 400 / Y = 400

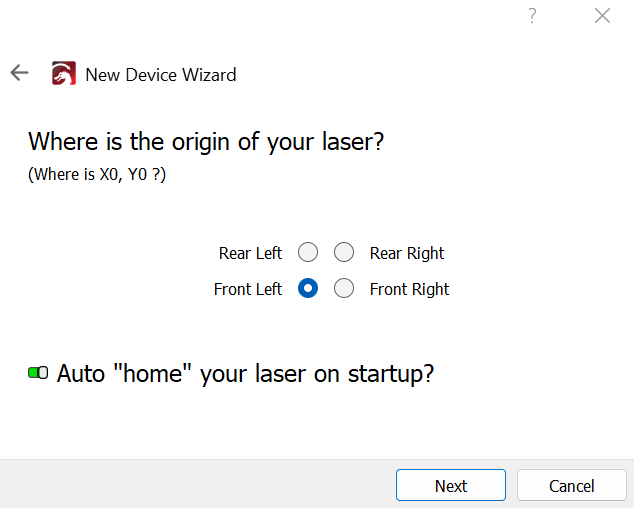
6. Select "Front Left" as your Origin and activate "Auto Home", then click "Next" button

7. In the next window, press "Finish" to complete the setup, then select "RAY5 WiFi" and press "Make Default". Your RAY5 is ready to be used in LightBurn software in WiFi mode

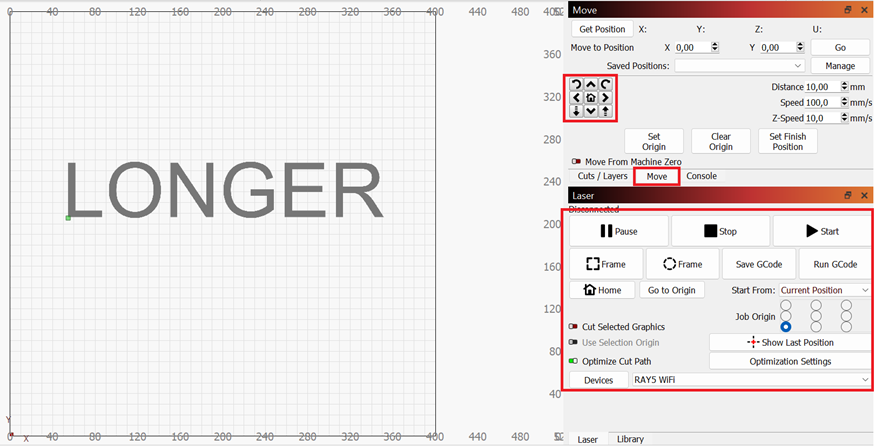
8. At this point, if everything has been done correctly, the connection status will change from "Disconnected" to "Ready", and it will be possible to move the laser module through the appropriate menu and start a laser engraving using the "Start" button, all without having to use any USB cable, but simply using the WiFi connection of your router/access point.

Please note that in order for the WiFi Bridge to work properly, both the Laptop and the Longer Ray5 must be connected to the same WiFi Router/AccessPoint.

By Lasergravierer-Blog | May 14, 2024
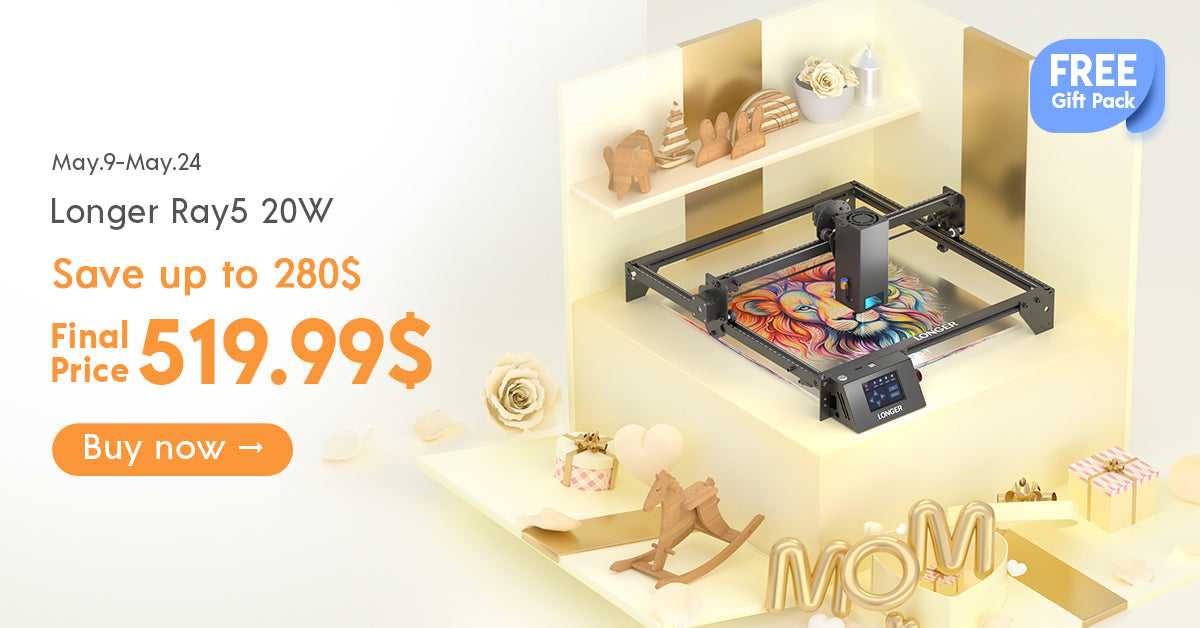
Celebrate Mother's Day with the Longer Ray5 20W Personalized Gift

As Mother's Day approaches, it's the perfect time to express our love and appreciation for the extraordinary women in our lives with LONGER. What better way to do so than with a heartfelt, personalized gift that reflects the depth of our gratitude? This Mother's Day, make your gift truly special with the Longer Ray5 20W Laser Engraving.


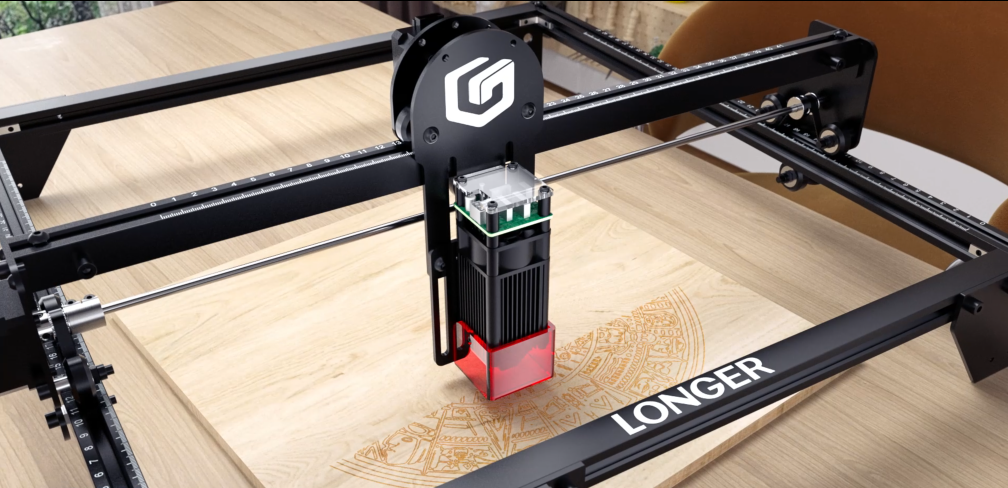
Laser engraving is a versatile and precise technique that has revolutionized the world of crafting and personalized gifts. With the Longer Ray5 20W laser engraving, you can etch designs, text, or images onto various materials with incredible precision, unmatched accuracy, and detail.


One of the key advantages of laser engraving is its versatility. It can be used on a wide range of materials, including wood, glass, metal, acrylic, leather, and more. This means you can create personalized gifts for Mom in a variety of mediums, from elegant wooden plaques to delicate glassware or custom jewelry.

The Longer Ray5's rapid working speed allows you to complete projects quickly and efficiently, making it perfect for creating last-minute Mother's Day gifts or handling bulk orders with ease.


Additionally, laser engraving offers incredible customization options, including multi-color designs on metal surfaces, ensuring that Mom's gift is as unique and special as she is.

With the Longer Ray5 20W Laser Engraving Machine, you can turn your heartfelt sentiments into a tangible expression of love. Featuring a Quad-Core Diode Laser with 22-24W output, ultra-fine 0.08 x 0.1mm focus point, multi-color engraving on metal, and a spacious working area, it's perfectly suited to your needs.

Overall, laser engraving is a powerful tool for expressing your love and appreciation for Mom in a truly personalized way. Express your sentiments with precision and detail, creating a gift that will be cherished for years to come.


The laser engraving machine is not just a piece of equipment; it is a tool for you and your mother to create beautiful memories together. Imagine being able to etch your precious moments with your mother permanently onto a beautiful material, making this gift a treasure trove of memories for both of you.

This Mother's Day, make your gift truly unforgettable with the Longer Ray5 20W Laser Engraving Machine. And don't miss our exclusive Mother's Day promotion from May 9th to May 24th, where you can enjoy discounts of up to 48% off. Order yours today and elevate your Mother's Day celebration to new heights of creativity and love.


By Lasergravierer-Blog | May 9, 2024
Crafting Love: The Perfect Mother's Day Gift with Longer LaserB1 40W

As Mother's Day approaches, the familiar question arises: what gift will truly capture the essence of our appreciation for Mom? A beautiful dress? Or perhaps an exquisite watch? While these gifts are undoubtedly popular, have you ever felt that they're too commonplace to fully express your gratitude and love for your mom on Mother's Day?


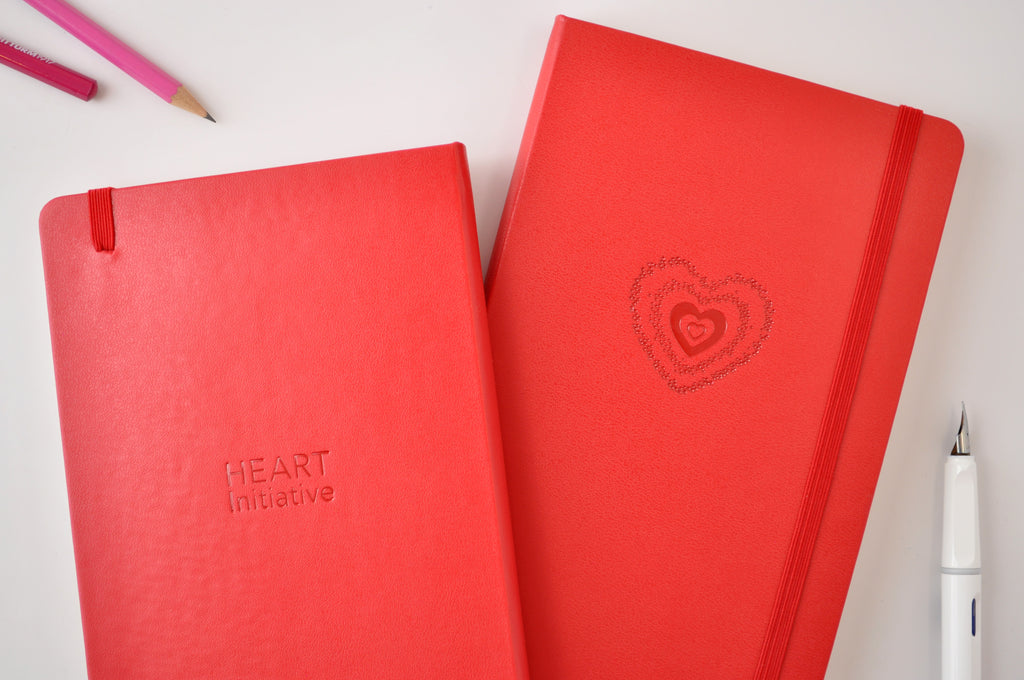
In fact, no matter how exquisite store-bought gifts may be, they can't compare to the significance of handmade gifts from children in a mother's heart. Whether it's a handmade three-dimensional photo, a ceramic mug, or a handcrafted necklace, these gifts can make a mother feel something beyond monetary value—your love can be fully showcased before her.

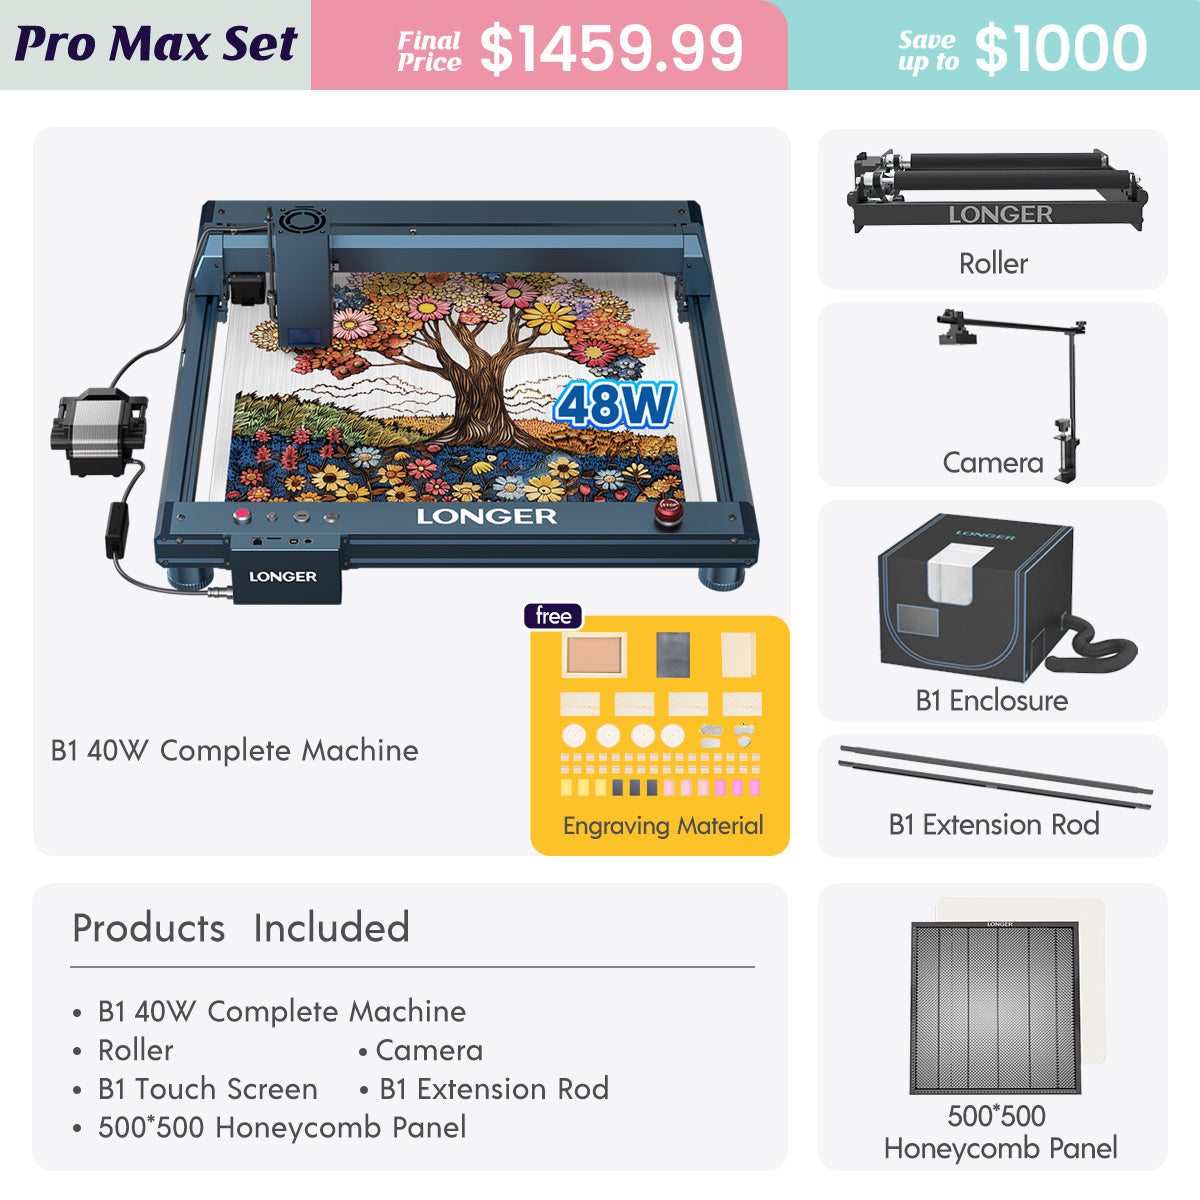
And now, the Longer LaserB1 40W is a product that perfectly caters to your needs. Improved with the latest spot compression technology, it can effortlessly engrave on materials like 0.15mm thick stainless steel plates or 50mm thick black acrylic. With an engraving speed of up to 36,000 millimeters per minute, it can help you swiftly complete tasks while maintaining quality. The engraving area reaches 450mm*440mm, 27% larger than before, allowing your creativity to flourish whether it's a big or small gift. You can also use it together with your mom to create gifts, enjoying the collaboration between parent and child and crafting pieces that embody mutual effort, adding even more sentimental value. And rest assured, the LongerB1 40W boasts eight layers of safety protection, with a sturdy framework ensuring high safety standards.

Mothers often play the role of selfless givers in our lives, offering unwavering support and love.  When we sincerely offer gifts made with our thoughts and time, her happiness at that moment will likely surpass anyone else's.

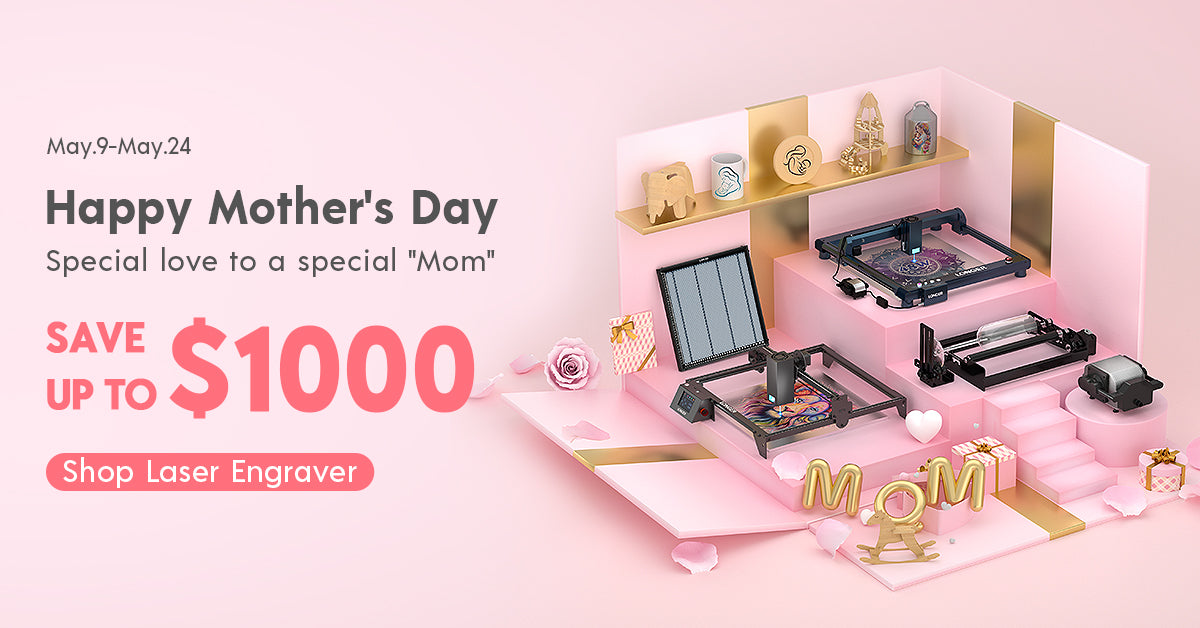
In summary, the Longer LaserB1 40W won't disappoint you, and your mom won't be disappointed either. If you're interested in purchasing, don't miss the LONGER Mother's Day event from May 9th to May 24th. Apart from the LongerB1 40W, there are more laser engraving and 3D printing machines that will bring happiness to both you and your mom, with discounts of up to $1000! Give her a gift that will be remembered for many years, letting your mom feel your most unique sincerity.


On Mother's Day, let us take the time to appreciate the hard work and sacrifices of our mothers. Whether it's through a special gift or a warm message, let's express our deep love and respect for them. May all mothers feel our boundless love and admiration on this special day, as they are the most precious beings in our lives. Let your creativity shine with the Longer LaserB1 40W, and celebrate the love and appreciation you hold for your mother in a truly unforgettable way.

By Lasergravierer-Blog | May 9, 2024
LONGER Fans share: Restore postpartum mood with Ray5 20W

As Mother's Day approaches, it's a time to celebrate the unconditional love and resilience of mothers everywhere. And for this special time, LONGER's support mailbox received a healing message from Sarah in Spain, which a powerful women beat postpartum depression. For one extraordinary mother, her journey through postpartum depression was transformed into a tale of love, healing, and creativity.

After the birth of their daughter, Emma, Sarah found herself struggling with the weight of postpartum depression. Every day felt like a battle, and the once-vibrant colors of motherhood seemed to fade into darkness. As an craft painter, her once dexterous hands became bloated and she could no longer do delicate carvings. Desperate to find a way to comfort his wife, Sarah's husband, Jack, decided to gift her something special – the Longer Ray5 20W laser engraving machine.


At first, Sarah was skeptical. How could a machine help her overcome the overwhelming feelings of sadness and anxiety? However, Jack gently encouraged her to give it a try, assuring her that it might offer a creative outlet and a sense of purpose. And so, Sarah tentatively began her journey with the Ray5 20W. 

With each engraving, she poured her love and affection for Emma into every piece she created – from personalized spoons and pencil holders to intricate bookshelves adorned with whimsical designs. The act of crafting these items became a form of therapy for Sarah, allowing her to channel her emotions into something tangible and beautiful.


As the years passed, Sarah's skills with the engraving machine grew, and so did her confidence. She found solace in the rhythmic hum of the machine and the delicate dance of light as it etched her designs into wood and metal. Slowly but surely, the fog of postpartum depression began to lift, replaced by a newfound sense of purpose and joy.

But perhaps the most profound moment came when Emma, now is in the kindergarten, decided to use the Ray5 20W with her father Jack to create a special Mother's Day gift for Sarah. With careful precision and unwavering love, Emma crafted a pair of jeans for her mother, adorned with designs ‘The best mother in the World‘. It was a testament to the bond between mother and daughter, a symbol of love and resilience that had endured the test of time. As Sarah slipped into the jeans, she realized just how far she had come – from the depths of despair to the pinnacle of happiness and fulfillment. And it was all thanks to the enduring love of her family and the transformative power of creativity.

By Lasergravierer-Blog | May 9, 2024
10 Personalized Presents with LONGER Ray5 20W in Mother's Day

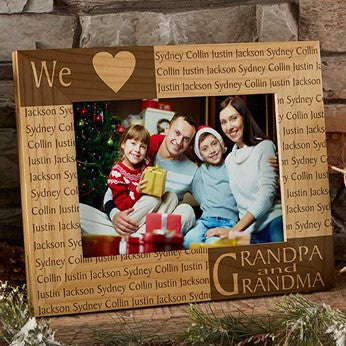
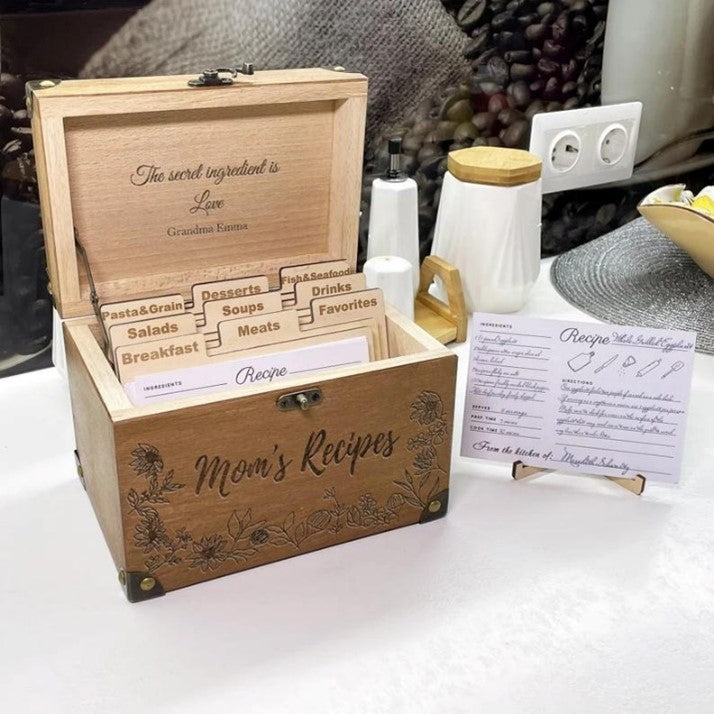
Engrave a wooden cutting board, jewelry, photo frame, recipe box, wine glasses, phone case, coasters, tablet stand, wall art, or keychain with your mother's name or message to customize her cooking journey. Engrave a necklace or a bracelet with her initials, birthdate, or a meaningful symbol. Make a unique photo frame which incorporate a special photo and a sincere note of appreciation. Carve a wooden coaster with your mom's initials or a decorative design to fit with her interior.

Introduction
Mother's Day is the time to add sweetness to this beautiful bond by letting your mother know how much you love and cherish her. One our cake can be the most memorable thing, would be to include Laser Engraver instead short as an item because of its ability to craft personalized gifts. With this superb laser engraver, you can explore and create groovy designs, leave mark on multiple materials, and make-you-gifts-stand-out-from-the-crowd. Here are 10 personalized present ideas that you can make with the LONGER Ray5 20W Laser Engraver for Mother's Day:

Personalized Wooden Photo Frame: 

Engrave a sentimental message and/or your mother’s name on the base of the wood framed picture to display a memorable family picture.

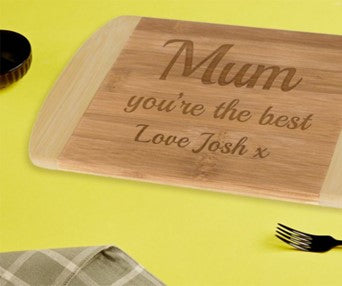
Customized Cutting Board: 

Becoming involved in a DIY project by engraving the name of your mom or a special message on wood or acrylic plate is a great idea.

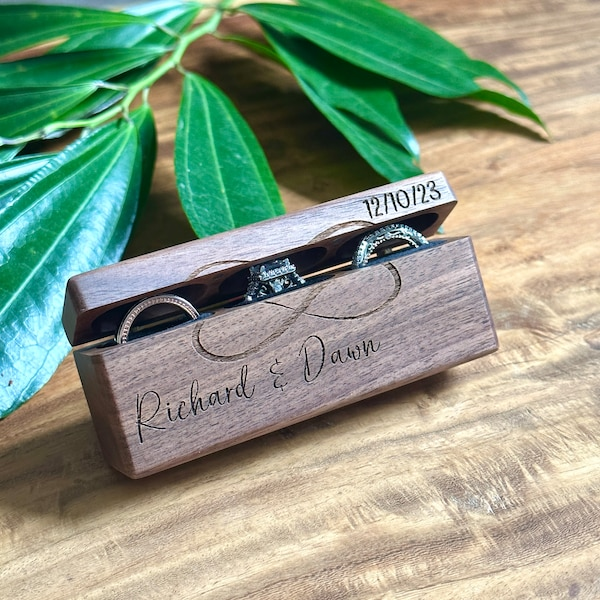
Engraved Jewelry Box:

Come up with a jewelry box for your mom inscribed with her initials and/or an inscription on the lid image.

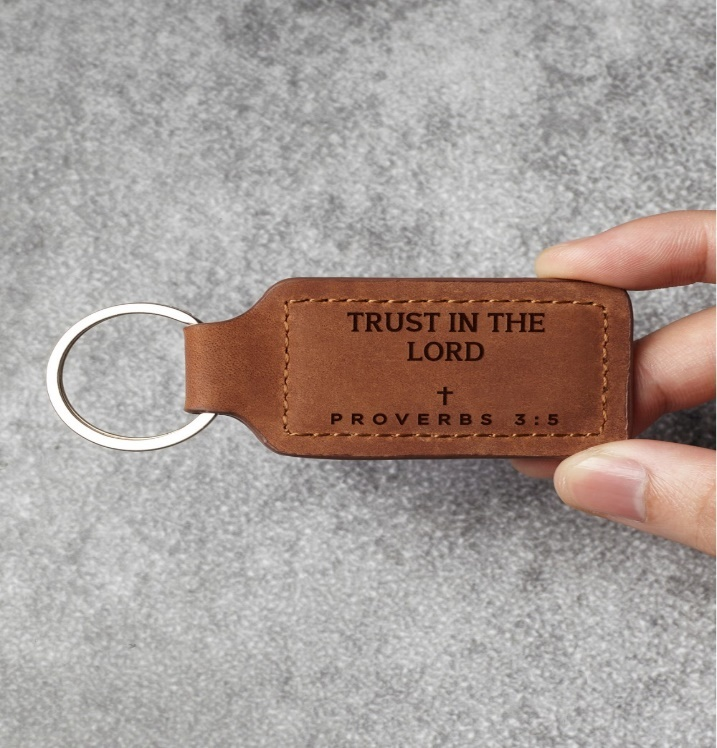
Customized Leather Keychain:

Engrave your mom's initials or a short message for her on a leather key chain with the Ray5 20W Laser Engraver.

Personalized Wine Glasses:

Delineate in a chic manner wine glasses with either your mum's name or a heartfelt message by having the line engraved on the glass. 

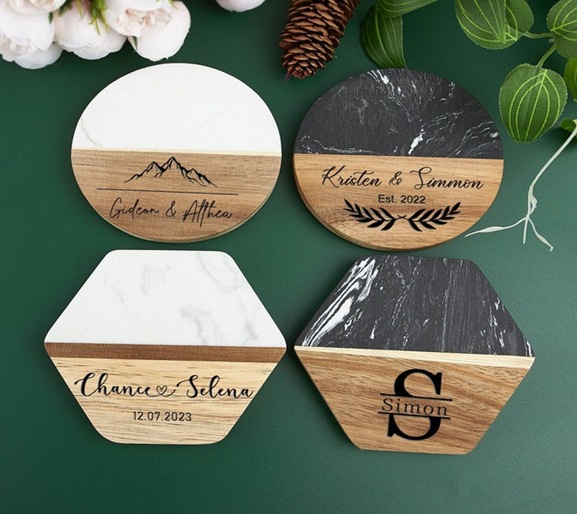
Engraved Wooden Coasters:

Personally designed wooden coasters incorporating your mom's monogram or a stunning pattern through the engraving.

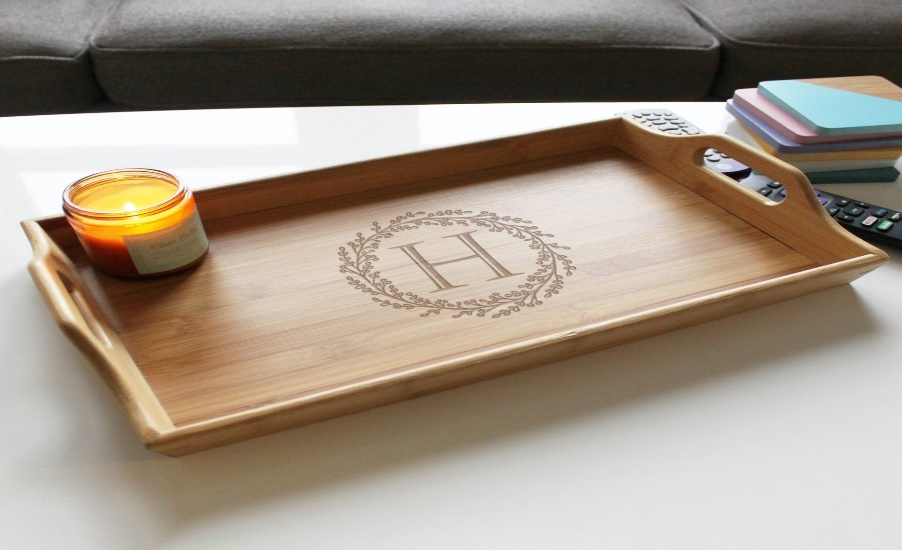
Customized Wooden Serving Tray: 

Design and engrave a personal gift on the LORGER Ray5 20W Laser Engraver's surface and decorate the wooden serving tray with a vibrant message or unique design.

Personalized Leather Journal: 

The mother can have a leather-based journal with a tattoo of the name or the special message imprinted on the top.

Engraved Acrylic Wall Art: 

Make a wonderful surprise to your mom by engraving her favorite quote or a lovely design on the acrylic sheets with the LONGER Ray5 20W engraver this year, a glorious piece of wall art for her everyday life.

Engraved Jewelry: 

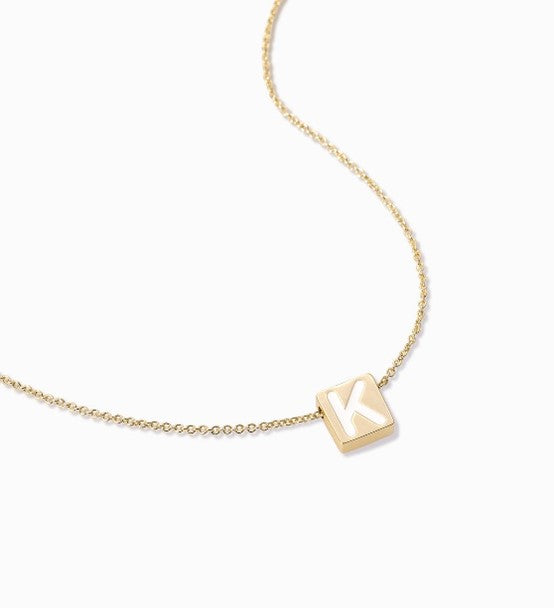
Have a special piece of jewelry made with your mother's initials or a special message engraved on a pendant, bracelet, or ring.

Summary: 

The Dioser Technology Ray5 20W laser engraver is the perfect tool for creating custom Mother's Day gifts. With its compact size of 400 x 365 mm (15.7 x 14.4 inches) and powerful 20W laser, it can easily engrave on various materials such as plywood, pine, acrylic, and even stainless steel with precision. Compatible with LaserGRBL, LightBurn, and MKS APP software, it supports a wide range of file formats including JPG, PNG, BMP, GIF, SVG, AI, etc. Whether it's engraving heartfelt messages or intricate designs, the Ray5 20W offers versatility and reliability to create personalized gifts that will be cherished on Mother's Day and beyond.


Do not forget to use all necessary security measures while using the laser engraver, it's crucial to prioritize safety. Along with wearing protective eyewear, the machine itself comes equipped with several safety features to ensure a secure working environment. These include Flame detection, Movement detection, Motionless protection, and an Emergency Stop Button, providing added layers of protection during operation. Remember to adhere to the manufacturer's guidelines for safe usage. Happy Mother's Day!


By Lasergravierer-Blog | May 8, 2024
Longer Laserburn App – Multiple Work Layer

Using LaserBurn multiple work layers is one of the easiest ways to speed up laser projects and combine different operations into one workflow. Instead of running separate engraving and cutting jobs, LaserBurn allows users to create multiple tasks inside a single project using layers.

For Longer B1 users and beginners learning laser workflows, this feature can reduce setup time, improve efficiency, and simplify project management.


Table of Contents


Quick Answer

LaserBurn multiple work layers allow you to assign different operations to different objects inside the same project. Each layer can use its own processing parameters and operation type, such as engraving or cutting, so the machine can automatically complete multiple jobs in sequence during one run. LaserBurn supports up to 10 layers.


What This Guide Covers

This tutorial explains:

  • What LaserBurn work layers do
  • How to assign multiple layers
  • How to combine engraving and cutting jobs
  • How Longer B1 processes layer-based tasks
  • Common issues and solutions
  • Helpful tips for beginners

Why LaserBurn Multiple Work Layers Matter

Laser projects often contain different operations.

For example:

  • Engraving logos
  • Cutting outlines
  • Creating text effects
  • Producing multi-color metal engravings
  • Combining decorative elements with cut shapes

Without layers, users would typically:

  1. Run engraving
  2. Stop the machine
  3. Reload files
  4. Reposition materials
  5. Run cutting

This takes more time and increases the possibility of alignment errors.

With LaserBurn multiple work layers:

  • Multiple jobs run continuously
  • Material stays in place
  • Workflow becomes easier
  • Production time decreases

LaserBurn was designed specifically for LONGER laser machines and includes integrated layer management functions.


Before You Start

Requirements

Hardware:

  • Longer B1 laser engraver
  • Compatible LONGER laser machine
  • Suitable engraving material

Software:

  • LaserBurn application
  • Existing design file or imported artwork

Knowledge:

  • Basic LaserBurn navigation
  • Understanding of engraving and cutting operations

If additional machine settings are required:

Follow official machine specifications or instructions.


Precautions

Before beginning:

  • Verify that the laser is properly focused
  • Confirm your material is secured
  • Ensure airflow or air assist functions properly
  • Double-check object placement
  • Review assigned layer settings before starting

Common beginner mistake:

Assigning multiple objects to the same layer unintentionally can apply incorrect processing parameters.


Step-by-Step: How to Use LaserBurn Multiple Work Layers

Step 1: Create or Import Images

Action:

Open the Creation menu and create or import the images you want to process.

The example workflow uses:

  • "Longer"
  • "B1"

Expected Result:

Both designs appear in the project workspace.

Important Notes:

Objects can be newly created or imported from existing files.


Step 2: Open the Layers Menu

Action:

Locate the Layers menu.

For each imported image, select a different layer.

Click different layer colors to assign unique layers.

Expected Result:

Each object changes color according to its assigned layer.

Important Notes:

Layer colors are visual indicators that help distinguish operations.

LaserBurn supports up to 10 separate layers


Step 3: Assign Processing Parameters

Action:

Set processing parameters for each layer independently.

Example:

  • "Longer" → wood engraving parameters
  • "B1" → wood cutting parameters

Expected Result:

Each layer now contains independent settings.

Important Notes:

Different layers can contain:

  • Engraving settings
  • Cutting settings
  • Speed settings
  • Power settings
  • Processing behaviors

Do not modify settings unless your material specifications require changes.

Follow official machine specifications or instructions.


Step 4: Position Material Under the Laser Module

Action:

Place the wooden panel beneath the Longer B1 laser module.

Expected Result:

Material is positioned and ready for processing.

Important Notes:

Do not move the material after setup.

Movement may affect alignment between operations.


Step 5: Start the Job

Action:

Start the created project in LaserBurn.

Expected Result:

The machine processes tasks automatically:

  1. Engraves "Longer"
  2. Cuts "B1"

The operations run continuously without interruption.

Important Notes:

The machine processes operations according to layer sequence.

Do not interrupt the machine unless necessary.


LaserBurn Multiple Work Layers for Metal Color Engraving

One useful application of multiple layers involves colored metal engraving.

Laser interaction with metal can create different visible colors depending on:

  • Laser power
  • Speed
  • Processing conditions

Multiple layers allow different settings to be applied across sections of the design.

This creates multi-tone visual effects while remaining inside a single project.

If processing metal materials:

Follow official machine specifications or instructions.


Common Problems and Solutions

Problem Requirements Solution
Objects use identical settings unexpectedly Check layer assignment Verify objects are assigned to separate layers
Design colors do not change Review Layers menu Reassign layer colors
Engraving starts but cutting does not Verify operation settings Confirm cutting parameters are assigned correctly
Alignment appears incorrect Material positioning Do not move material after setup
Wrong parameters applied Check selected layer Review settings before starting the job

Tips for Better Results

1. Use descriptive project organization

Name files clearly before saving projects.

Examples:

  • Wood_Engrave_Cut
  • Metal_Color_Test

2. Keep engraving and cutting separated

Assign different operations to different layers rather than mixing them.

This improves workflow clarity.


3. Start with simple projects

Beginners should first test:

  • Text engraving
  • Basic cutting shapes

Complex designs can be introduced later.


4. Double-check material placement

Multiple operations rely on consistent positioning.

Even small movements can affect results.


5. Preview work before processing

Review layer assignments and processing order before starting.


Frequently Asked Questions

Q: How many LaserBurn multiple work layers can be used?

A: LaserBurn supports up to 10 layers, allowing up to 10 independent jobs in one project.


Q: How do I use LaserBurn multiple work layers for beginners?

A: Create or import objects, assign different layers using layer colors, and configure parameters separately for each layer.


Q: Can engraving and cutting happen in one project?

A: Yes. LaserBurn can engrave and cut sequentially during the same process.


Q: Can I assign different parameters to each layer?

A: Yes. Each layer supports separate processing settings.


Q: Can multiple layers be used for metal engraving?

A: Yes. Multiple layers can help create varying engraving effects on metal materials.


Q: Why are all my objects using the same settings?

A: Objects may have been assigned to the same layer accidentally.


Q: Is LaserBurn available for LONGER laser machines?

A: LaserBurn is designed specifically for compatible LONGER laser engravers.


Related Tutorials

For building a complete LONGER workflow, explore:


Final Thoughts

LaserBurn multiple work layers make project creation significantly easier by combining several operations into one workflow. Instead of separating engraving and cutting into individual runs, users can create a single project and allow Longer B1 to process everything automatically.

For beginners, mastering layer management is one of the fastest ways to improve workflow efficiency and reduce project setup time. Continue exploring LONGER guides and tutorials to build more advanced engraving skills. 

By Lasergravierer-Blog | May 6, 2024
Design File, Calibration and Focus to LONGER Laser engraver

LONGER laser engravers are equipped with advanced technology that enables precise cutting using focused laser beams. This process is essential in both development and production phases. To achieve effective laser cutting, it's imperative to understand key principles, select suitable materials, design appropriately, operate the machine correctly, and adhere to safety protocols. The LaserB1 and Ray5 series are highly regarded for their exceptional performance in laser cutting. Operating a LONGER laser cutting machine involves a series of important steps:
 

Design File Preparation:


Theming relies on the accuracy and replicability of the design. Whether designing in software like Illustrator or CorelDRAW, vector formats like AI or DXF are crucial for preserving geometry and dimensions. Determine cutting speed and power levels, considering material details simultaneously.
 

  • Use compatible design software such as Adobe Illustrator, CorelDRAW, or Inkscape.
  • Save files in SVG or DXF formats.
  • Develop a comprehensive design concept from sketches or design software.
  • Maintain design style and line detail integrity.
  • Utilize laser processing for color or layer applications.
  • Organize layers or groups for easy navigation.
  • Ensure fonts are in vector format for versatility.
  • Follow technical documentation for dimensions and scale.
  • Avoid confusing file structures.
  • Double-check design files for accuracy before laser processing.


Machine Calibration and Focus

Machine calibration and focus are critical aspects of ensuring optimal performance from your LONGER laser cutting machine. Before beginning any cutting operation, it's essential to calibrate the machine properly. This involves adjusting the laser beam focus and aligning the mirrors according to the LONGER's guidelines or user manual instructions. Using a focus tool to determine the focal plane and adjusting the focal point based on material type, thickness, and processing goals can help optimize cutting performance.


In addition to calibration, beam alignment is another crucial step in the setup process. Properly directing the laser beam along the intended path is essential for achieving accurate cuts. Utilizing alignment tools provided by the LONGER’s and regularly inspecting and adjusting the laser beam alignment can help maintain cutting precision over time.


Furthermore, conducting test cuts or sample runs on scraps and test materials allows you to fine-tune the focus settings and ensure the quality of the cuts. By recording the best focus setting based on the results of these test cuts, you can streamline future cutting operations and minimize material waste.


Regular maintenance and monitoring are essential for preserving the performance and longevity of your LONGER laser cutting machine. Cleaning and inspecting optical components regularly, monitoring machine performance and consistency, and following manufacturer-recommended maintenance and calibration procedures are essential practices for ensuring continued cutting precision and efficiency.

By Lasergravierer-Blog | April 26, 2024
Setup LONGER Laser engraver and material selection

LONGER laser engravers employ highly accurate technology, using focused laser beams to cut various materials with precision. This process is vital in both development and production. To effectively execute laser cutting, one must understand the principles, material selection, design, machine operation, and safety measures. The LaserB1 and Ray5 series, are renowned for their performance in laser cutting. Operating a LONGER laser cutting machine involves several key steps:

Machine Setup: 
Start with put LONGER laser engraver in right place. Make sure the area can provide sufficient space for air access to the device and that it also stands on solid ground. The device can go on working at full capacity under such conditions. Attach the machine to the power source and test any fail-safe features like the emergency stop button and guard lock by pressing the emergency stop button and confirming the machine's reaction. 


The laser must be placed in an acceptable environment to reduce unintentional or unplanned disasters. The environment should be well-ventilated, stable, and clean to prevent shaking/vibration of the machine. The electrical source should be a per the maker's standards whereas it has to be earth and insulation grounded. The machine set up process should be carried out within the actual configuration of its laser beam deliver components and these components should be cleaned regularly. Software such as LaserGRBL LaserBurn LightBrun, MKS app and controls need to compatible to the operating system. First step of calibration and test of machine should be performed by adopting steps defined in machine manual.

Material Selection and Preparation: 
Choose the most compatible option out of many options for your laser cutting task in a proper way. The laser cutter machine (WEED) is very versatile since it can handle different materials like wood, acrylic, leather, metal, and fabric, just to name a few. The initial step involves preparing the front assembly by removing dust, smoothing out any imperfections, and securely mounting it onto the operating area board. Utilize masking tape to protect the surface and the soot from accidental damage.


The rectification of laser machining involves defining the material's characteristics, including its reaction to laser wavelength and energy level, and ensuring safety measures. Material properties like hardness, melting point, and thermal conductivity influence the process outcome. Thicker materials may require multiple passes. Proper material surface preparation, such as cleaning and degreasing, is crucial for effective laser processing. Safety considerations include adherence to laser safety protocols, the use of approved personal protective equipment (PPE), hazard awareness, and implementing ventilation or filtration systems. Refer to the LONGER laser machine's specifications, guidelines, and standards for material selection and processing operations.


By Lasergravierer-Blog | April 25, 2024
LONGER Research: Exploring Home Laser Engraving Machines

Home laser engraving machines have transformed from specialized industrial equipment into practical tools for creators, hobbyists, DIY makers, educators, and small businesses. Whether you want to customize gifts, engrave artwork, create products for online sales, or explore hands-on projects, modern home laser systems provide a compact and accessible solution without requiring industrial experience.

As laser technology becomes more affordable and user-friendly, users now have more flexibility, portability, and creative freedom than ever before. LONGER research demonstrates how compact laser systems are opening new opportunities for home manufacturing and personalized production.


Table of Contents


What Are Home Laser Engraving Machines?

Quick Answer

A home laser engraving machine is a compact laser-based device designed to engrave patterns, text, graphics, and designs onto different materials using concentrated laser energy. These machines are intended for personal creative projects, workshops, education, and small-scale production environments.

Unlike traditional industrial laser systems, home machines prioritize:

  • Smaller footprints
  • User-friendly operation
  • Software compatibility
  • Lower entry barriers
  • Creative flexibility

They are suitable for:

  • DIY enthusiasts
  • Designers
  • Artists
  • Small businesses
  • Educators
  • Beginners entering laser engraving

Key Features and Benefits of Home Laser Engraving Machines

Compact and User-Friendly Design

LONGER home laser engraving machines are designed with portability and accessibility in mind.

According to LONGER research:

RAY5 Series dimensions

  • 61 × 67 × 20 cm
  • 24.0 × 26.4 × 7.9 inches

LaserB1 dimensions

  • 727 × 668 × 239 mm
  • 28.6 × 26.3 × 9.4 inches

LONGER Nano offers an even more portable design and can be handheld.

Why this matters:

  • Easier transportation
  • Less workspace requirement
  • Better flexibility
  • Suitable for home environments

User benefits:

  • Work from home
  • Move equipment between locations
  • Create projects wherever inspiration appears

Broad Material Compatibility

Modern home laser engravers support a wide range of materials.

Supported examples include:

  • Acrylic
  • Leather
  • Fabric
  • Glass
  • Wood
  • Curved surfaces
  • Irregular surfaces

LONGER machines support engraving on curved and non-flat materials, expanding customization opportunities.

Benefits include:

  • More project possibilities
  • Personalized products
  • Expanded business opportunities

Examples:

  • Customized tumblers
  • Wooden signs
  • Leather wallets
  • Decorative artwork
  • Personalized gifts

Software Compatibility and Connectivity

One of the major barriers for beginners is software complexity.

LONGER laser engravers support compatibility with:

  • LaserGRBL
  • LightBurn
  • MKS
  • LONGER LaserBurn app

Users can import designs and begin engraving efficiently.

Benefits:

  • Reduced learning curve
  • Easier workflow
  • Faster design transfer

Built-In Safety Features

Safety is critical when operating laser equipment.

LONGER home laser engravers include:

  • Flame detection
  • Movement detection
  • Motionless protection
  • Emergency stop button
  • Eye protection

These safety systems help create safer operating environments.

User advantages:

  • Reduced risk during operation
  • Better protection for beginners
  • Improved reliability

Compatible Models and Applications

Supported LONGER Models

According to the source research:

RAY5 Series

  • Compact desktop design

LaserB1 Series

  • Larger working structure

LONGER Nano

  • Portable handheld option

Follow official product specifications for detailed compatibility information.


Material Applications

Home laser engravers can be used with:

  • Acrylic
  • Leather
  • Fabric
  • Glass
  • Wood
  • Curved objects

Follow official product specifications for material compatibility limits.


Usage Scenarios

Common applications include:

For creators

  • Artwork
  • Personalized gifts
  • Decorations

For small businesses

  • Product customization
  • Batch personalization
  • Handmade product sales

For education

  • Design learning
  • Engineering projects
  • STEM activities

For home users

  • DIY projects
  • Decorations
  • Hobby crafting

Why Users Need Home Laser Engraving Machines

Improve Creative Freedom

Traditional manufacturing methods often limit personalization.

Laser engraving allows:

  • Custom names
  • Unique graphics
  • Personalized products
  • Artistic experimentation

Improve Workflow Efficiency

Laser systems automate detailed work.

Benefits include:

  • Faster production
  • Repeatable results
  • Reduced manual labor

Support Small Businesses

Many creators use laser systems to sell:

  • Personalized gifts
  • Wedding decorations
  • Product labels
  • Handmade products

Home manufacturing trends continue growing because compact systems reduce barriers to entry.


Reduce Space Requirements

Industrial machines require large spaces.

Home systems:

  • Occupy less room
  • Fit workshops
  • Fit studios
  • Fit apartments

Expand Material Possibilities

Instead of limiting projects to paper or printing, users can create:

  • Wood products
  • Acrylic designs
  • Decorative items
  • Custom accessories

How to Use a Home Laser Engraving Machine

The original workflow from LONGER emphasizes software compatibility and safe operation.

Step 1: Prepare Your Design

Create or import artwork into supported software:

  • LaserGRBL
  • LightBurn
  • MKS
  • LaserBurn app

Expected result:

Design ready for engraving.


Step 2: Position Material

Place material securely in the machine workspace.

Expected result:

Stable positioning for accurate engraving.


Step 3: Configure Settings

Adjust:

  • Speed
  • Power
  • Position

Expected result:

Machine prepared for operation.


Step 4: Start Engraving

Begin processing using the selected software.

Expected result:

Laser transfers design onto material.


Step 5: Monitor Safety Features

Watch for:

  • Flame detection alerts
  • Motion detection
  • Emergency situations

Expected result:

Safer operating conditions.


Common Questions and Issues

Question/Issue Explanation Recommendation
Software not connecting Software settings may not match machine configuration Verify supported software
Material not engraving correctly Material settings may vary Follow official specifications
Uneven engraving results Material positioning may shift Secure material placement
Safety alert triggered Detection systems identify possible risk Review operating conditions
Unsure about material compatibility Different materials react differently Follow official product specifications

Tips for Better Results

  • Keep work surfaces stable
  • Use supported software
  • Test settings on sample materials first
  • Clean the workspace regularly
  • Monitor machine safety systems
  • Secure materials before engraving
  • Follow official operating recommendations

Frequently Asked Questions

Is this a good laser engraver for beginners?

Yes. Home laser engraving machines prioritize accessibility and simplified operation for users entering laser engraving.


Does a portable laser engraver have advantages?

Portable designs improve mobility and allow users to work in multiple environments.


Can I engrave wood and acrylic?

The source indicates support for a range of materials including acrylic and other common creative materials.


Do I need additional accessories?

Accessory requirements vary depending on projects. Follow official product specifications.


Can I use third-party design software?

LONGER machines support LaserGRBL, LightBurn, MKS, and LaserBurn app compatibility.


Is laser engraving suitable for a home business?

Many users adopt compact laser systems for customized products and small-scale production.


Are safety systems important?

Yes. Safety systems help identify potential risks and support safer operation.


Final Thoughts

Home laser engraving machines continue making creative manufacturing more accessible than ever before. LONGER research highlights several important advantages: compact designs, broader material support, software compatibility, and integrated safety features.

For creators, educators, hobbyists, and small businesses, these systems help solve several common challenges:

  • Limited creative flexibility
  • Space constraints
  • Manual production inefficiency
  • Entry barriers for beginners

Before choosing a system, remember:

  • Follow official product specifications
  • Verify material compatibility
  • Prioritize safety
  • Select a machine that matches your project goals

As home manufacturing continues evolving, laser engraving technology is becoming an increasingly practical tool for turning ideas into finished products.

By Lasergravierer-Blog | April 20, 2024