Lasergravierer-Blog

How to Use LaserGRBL to Control the Ray5 Mini for Laser Engraving

For Windows users, right-click This PC, select Manage, and open Device Manager. Expand the Ports (COM & LPT) section to locate the CH340 driver. Identify the COM port assigned to your Ray5 Mini and select it from the port list in LaserGRBL. Set the baud rate to 115200, then click Connect.

1) Connecting the Ray5 Mini to LaserGRBL

Expand the Ports (COM & LPT) section to locate the CH340 driverCOM and Baud

Once connected, the GRBL firmware will respond with a “welcome message” indicating the firmware version. You’ll also see “Status: Idle” displayed in the lower-right corner of the LaserGRBL interface — confirming a successful connection.

For macOS users, navigate to About This Mac → Overview → System Report, then click USB under the Hardware section. If the driver has installed automatically, you’ll find “USB Serial” listed under connected devices.

GRBL Firmware Information

If no COM port appears in the dropdown list, it means the engraver was not detected. This could be due to an unplugged USB cable, the engraver being powered off, or a missing driver. To fix this, go to Tools → Install CH340 Driver within LaserGRBL to install the necessary driver.

Machine StatusLaserGRBL Drive

2) Creating and Engraving a Project in LaserGRBL

Once the Ray5 Mini is properly connected, you can start setting up your engraving project.
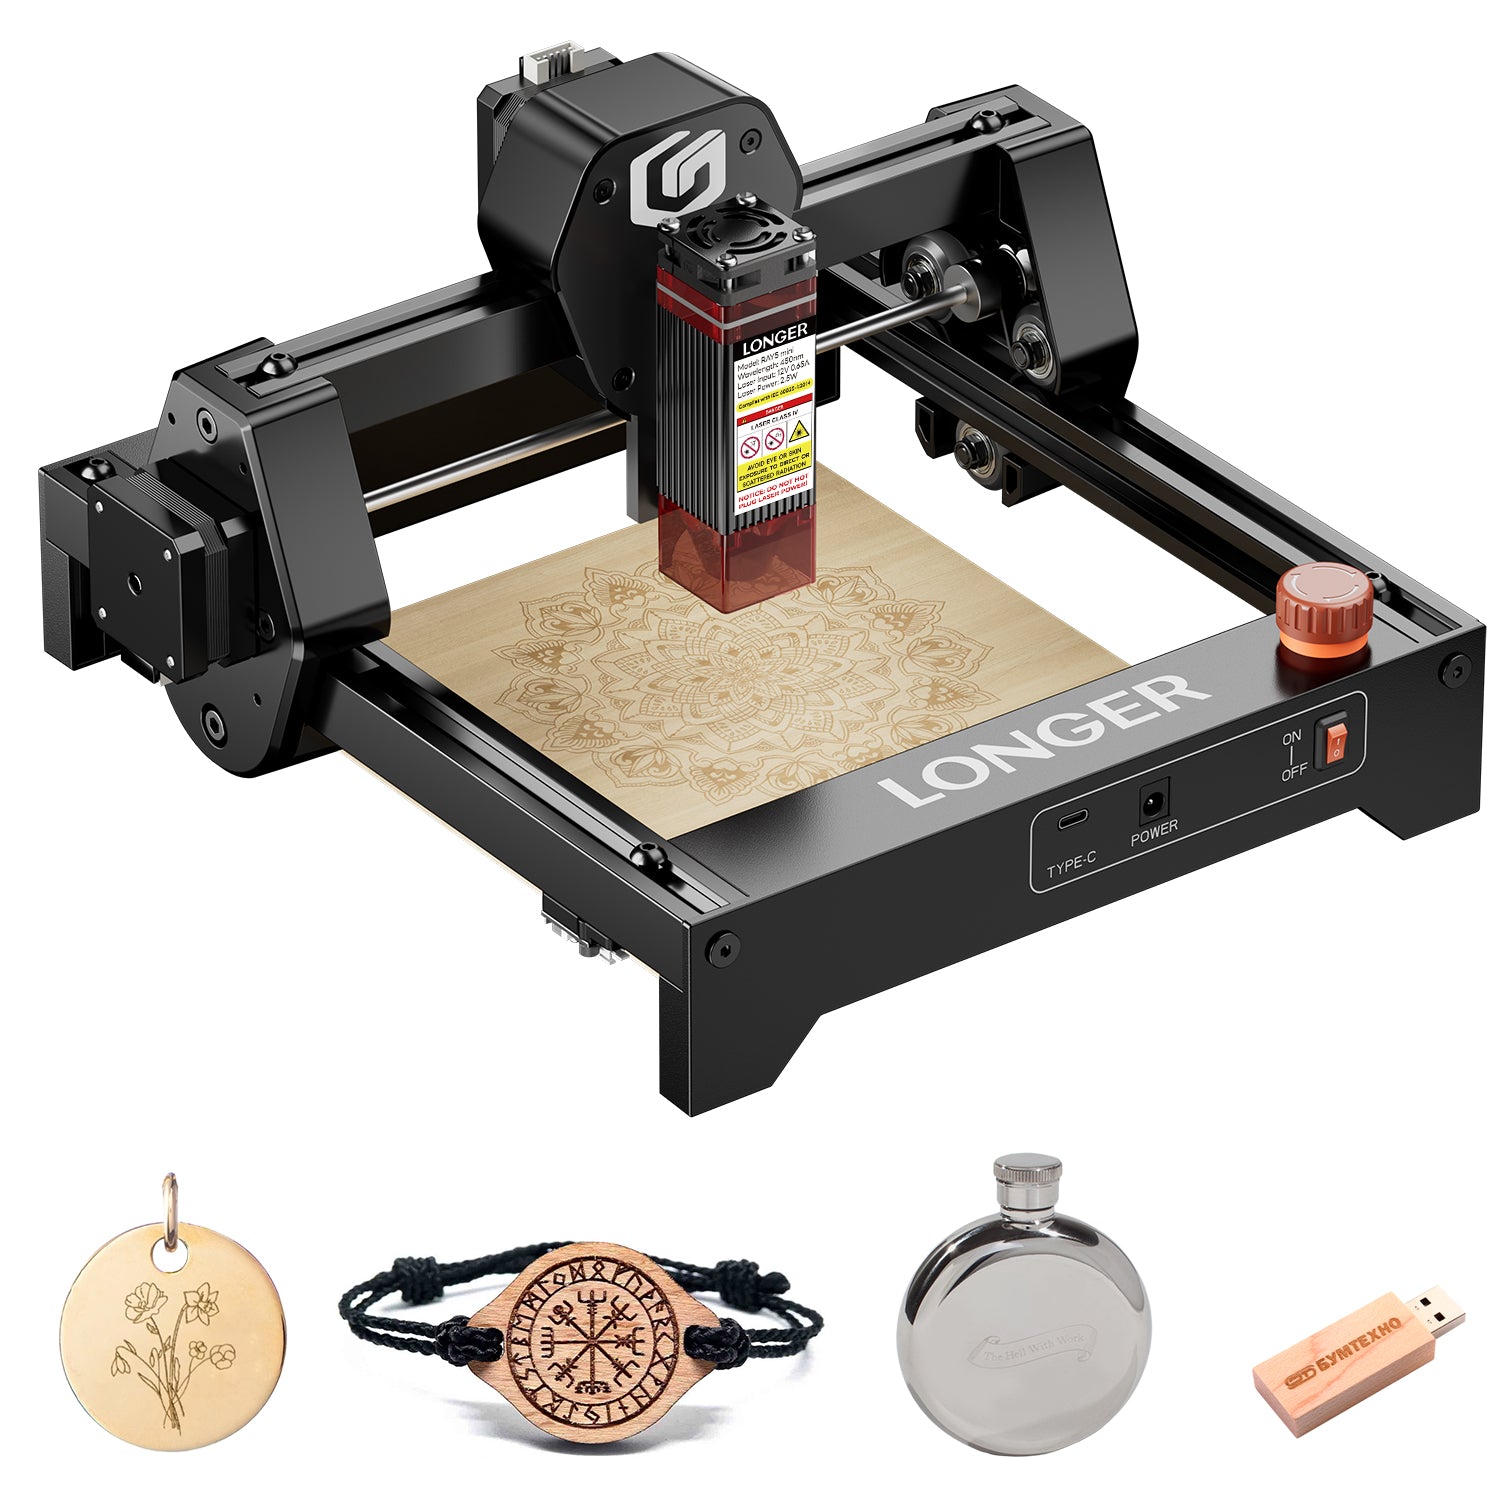
Click File → Open File to import the image or design you want to engrave. Set the quality to 10 lines/mm, then click Next. Refer to your material’s parameter chart to define the optimal engraving power (S-MAX) and speed.

Make sure to select M4 – Dynamic Power Mode for laser operation.

💡 Tip: The S-MAX value should be 10 times the target laser power.

  • For 100% laser power, set S-MAX = 1000

  • For 60% power, set S-MAX = 600

Next, resize your image to fit the desired engraving area. If the design extends beyond the workspace, you can fine-tune its position using XY offset adjustments.

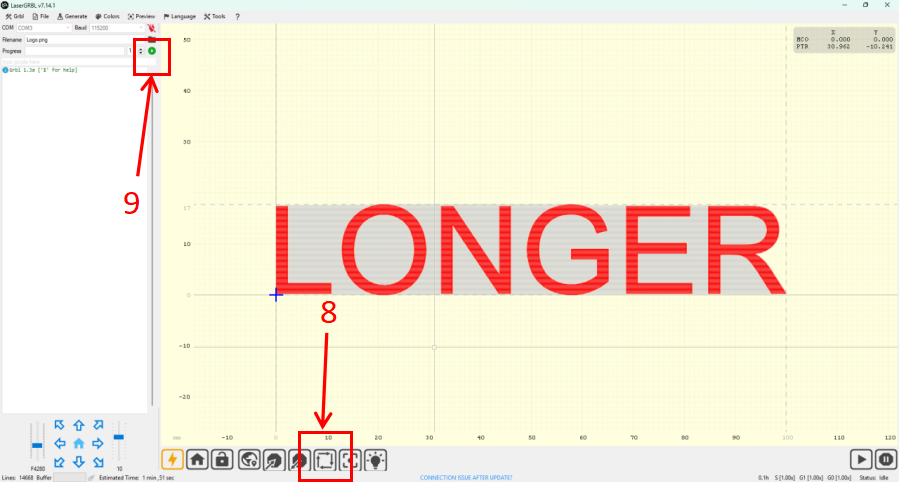
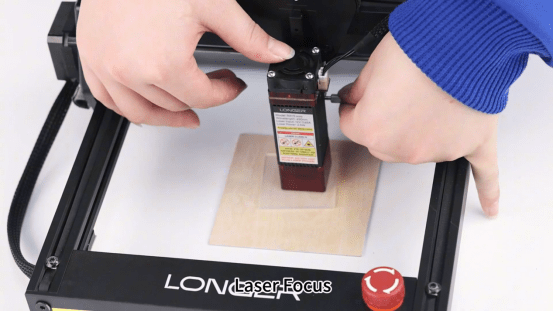
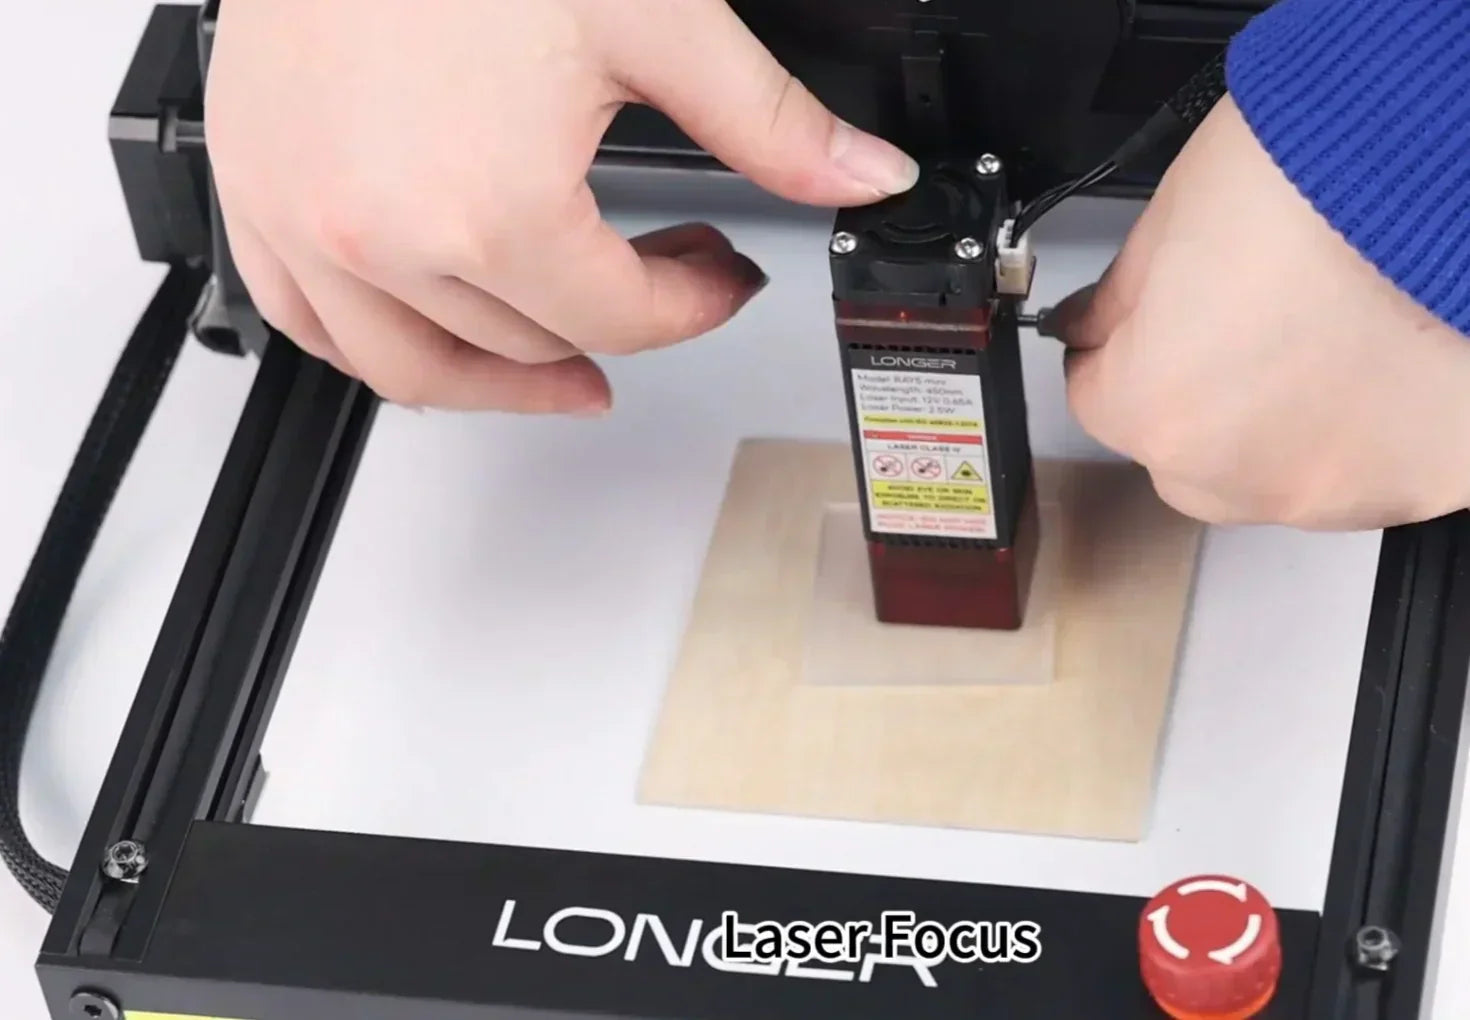
After importing the file and configuring parameters, use the focusing block to set the correct laser focus distance on the Ray5 Mini. Then, click the Frame button to confirm the engraving position on your material. Finally, press Start to begin the engraving process.

LaserGRBL Progress and Openfile

Additional Tips for Stable Engraving

  • Always check that your engraving surface is level and clean before starting.

  • Ensure the laser module lens is free of dust or debris for consistent output.

  • Save your preferred engraving profiles in LaserGRBL for faster setup in future projects.

Quality and NextDynamic Power Size and Offset

By following these steps, you can achieve precise, high-quality results with your Ray5 Mini laser engraver using LaserGRBL software — whether for DIY creations, small-scale production, or detailed material testing.

By Lasergravierer-Blog | October 14, 2025
LONGER How To|Guide to Connecting Ray5 Mini with LaserBurn (Mobile & PC)

This detailed guide walks you through connecting the LONGER Ray5 Mini laser engraver to LaserBurn software on both mobile and desktop. From Wi-Fi setup and file management to engraving workflows and real-time controls, it covers everything you need to start engraving with confidence. Whether you're a beginner or just need a quick reference, this how-to makes setup fast and frustration-free.

By Lasergravierer-Blog | September 16, 2025
LONGER Research | RAY5 mini Laser Engraver Overview: Compact Yet Powerful

The LONGER RAY5 mini is a compact yet powerful laser engraver designed for creators on the go. With support for over 300 materials, high-speed performance, and built-in safety features, it’s the perfect tool for hobbyists, classrooms, and small businesses looking for precision and portability.

By Lasergravierer-Blog | September 16, 2025
LONGER How to: Ray5 Mini Laser Engraver Tips Using LightBurn

The LONGER Ray5 Mini is a compact, high-precision laser engraver ideal for small-scale projects. This guide walks you through setup, focusing, and engraving using LightBurn software. From importing your design to the finished result, discover how to get professional-quality engravings with ease. The Ray5 Mini balances performance, safety, and user-friendliness—perfect for hobbyists, creators, and small studios alike.

By Lasergravierer-Blog | July 29, 2025
How to Install and Setup the new Longer Ray5 Mini

This setup guide walks beginners through the quick and easy installation of the Longer Ray5 Mini, a compact and portable laser engraver with 2.5W or 3.5W options. Ideal for first-time users, the machine arrives mostly pre-assembled. The tutorial covers laser module installation, cable checks, axis adjustments, power setup, focus alignment, and LightBurn configuration. With just a few simple steps, you'll be ready to start engraving creative projects at home or on the go.

By Lasergravierer-Blog | July 5, 2025