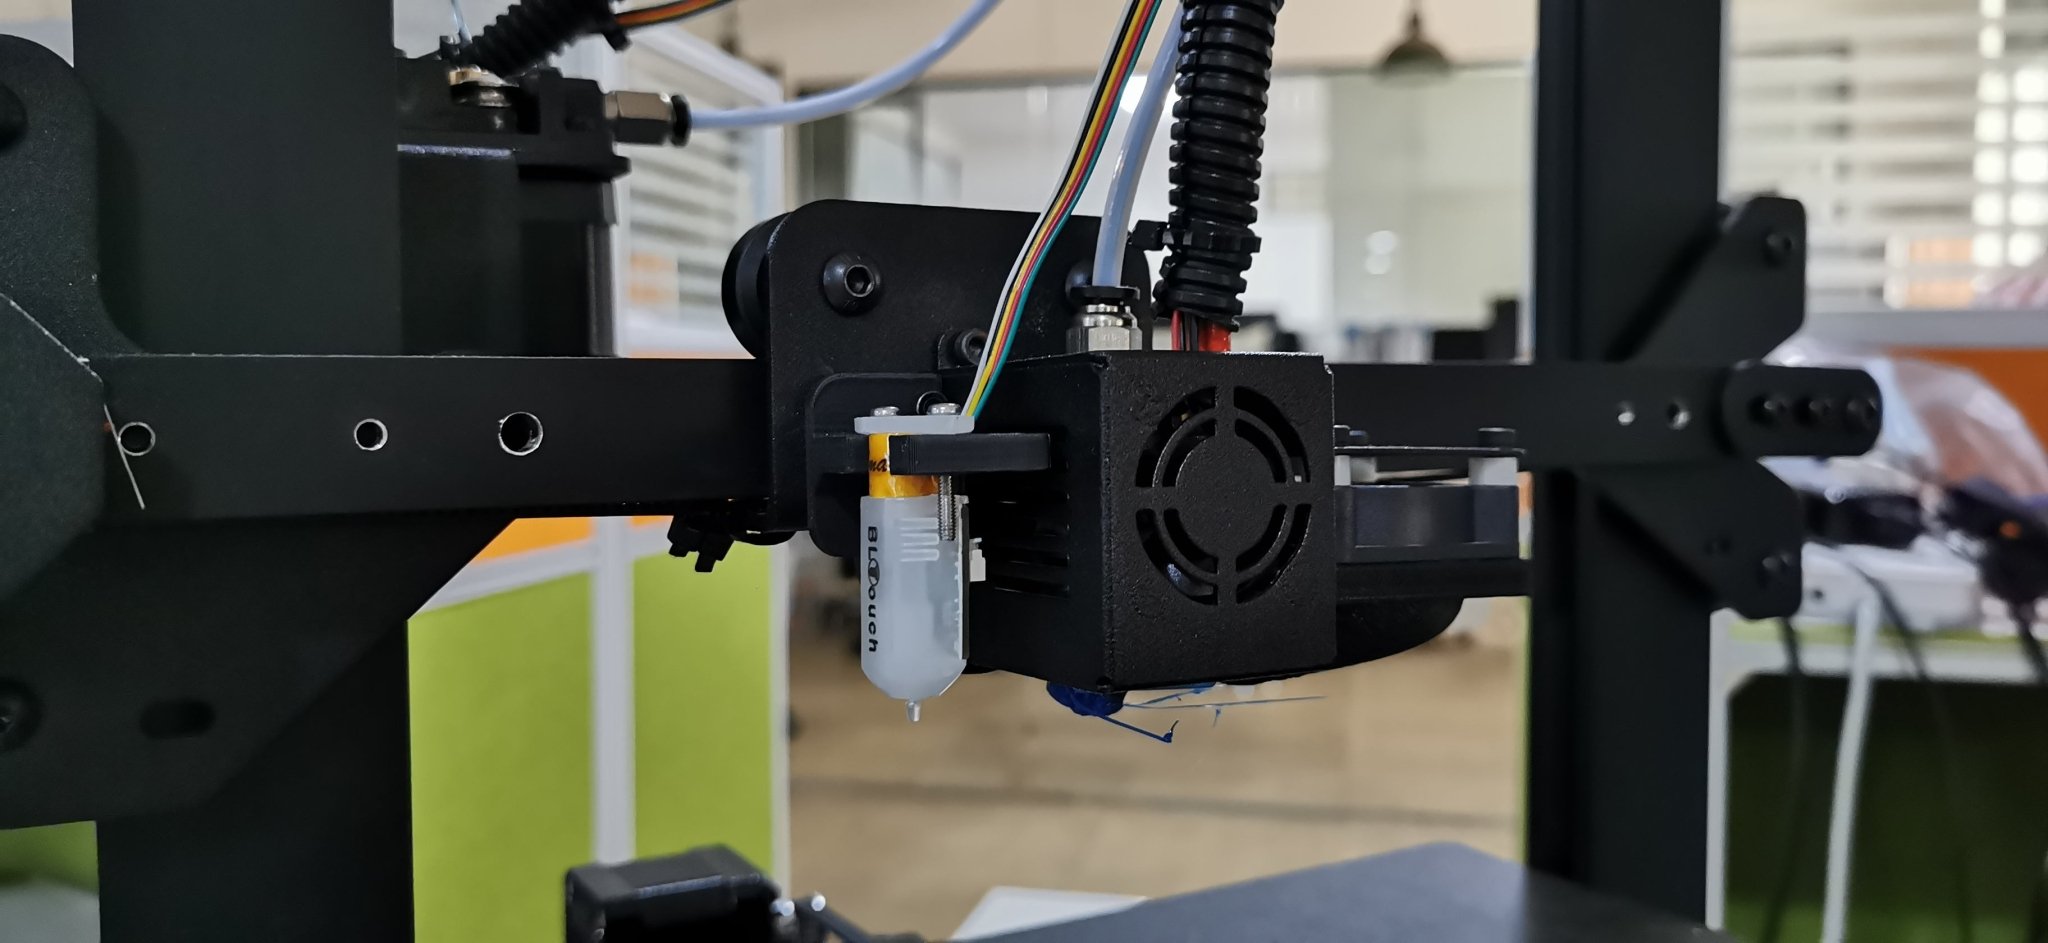


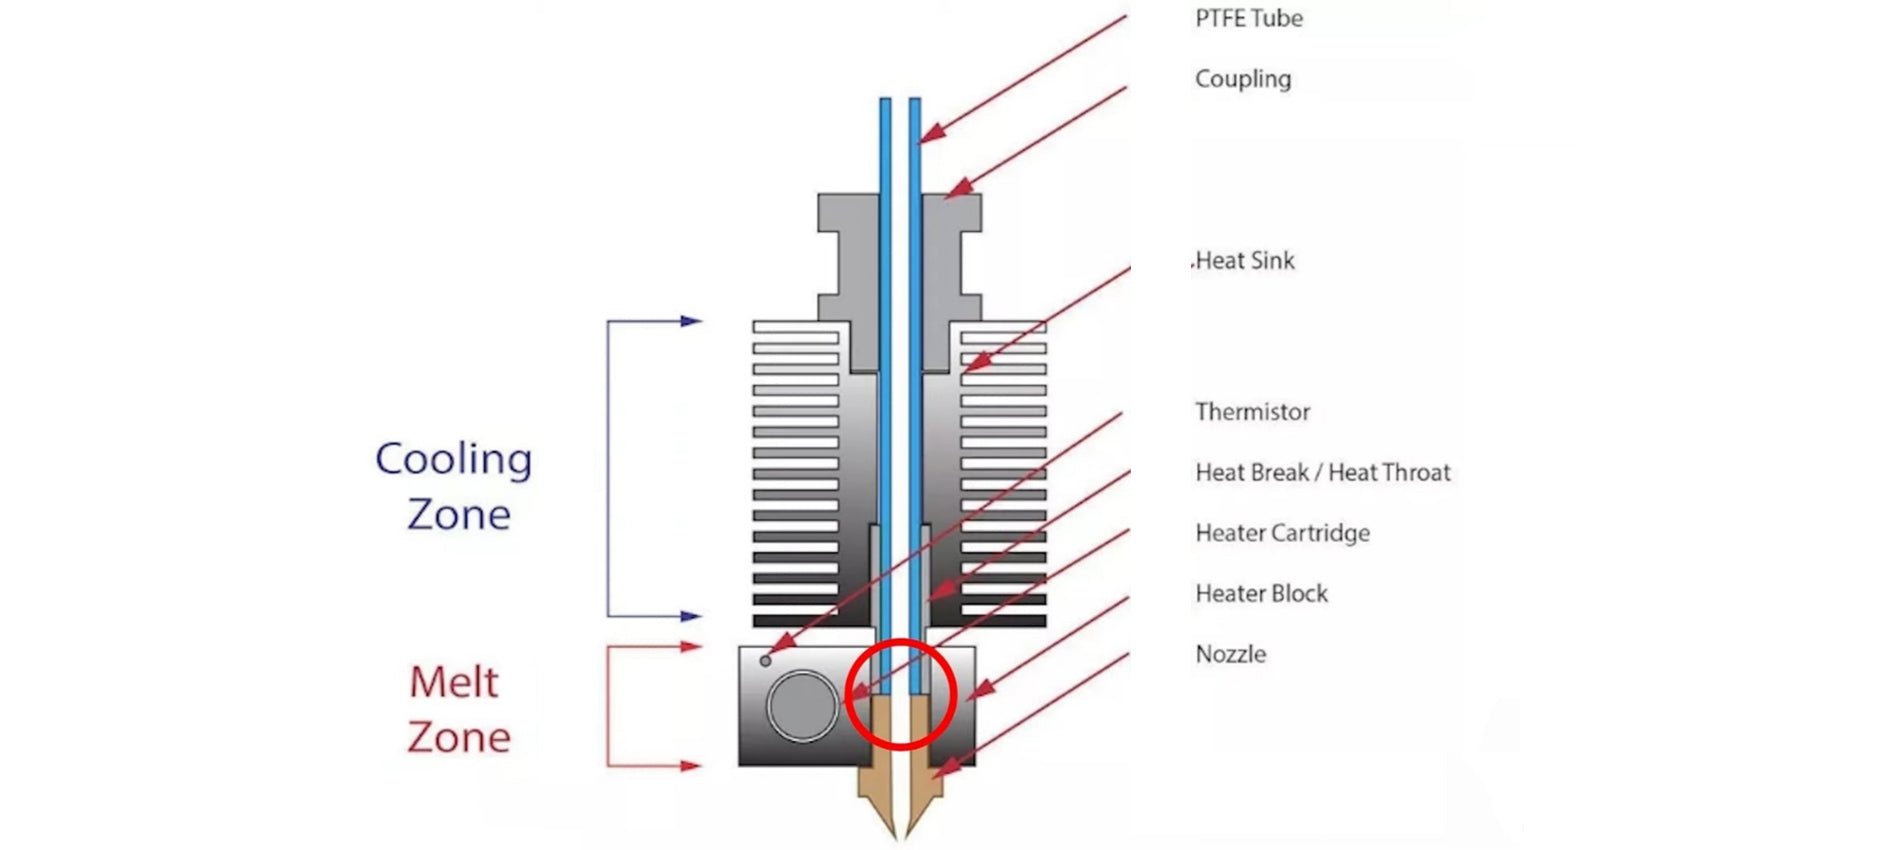
The Hotend is the part of an FDM 3D printer that deals with the melting and deposition of molten plastic material. A Hotend consists of a Nozzle that deals with depositing the molten material, a Heatblock that deals with the melting of the material and a Heatbreak that keeps the hot zone separate from the cold zone of the Hotend. The Heatbreak can be equipped with a heat sink, which in turn is equipped with a fan.
When assembling a Hotend, care must be taken to ensure that the PTFE tube is in beating with the Nozzle. This implies that the PTFE tube is inserted inside the Heatbreak, then the filament flows inside the PTFE tube and reaches the Nozzle directly, without intermediate zones; therefore, it is essential that the PTFE is tightly tightened and joined to the Nozzle, so that the filament flows forcibly through the exit hole of the Nozzle. In the event that there is even a slight gap between PTFE and Nozzle, then leakages of molten filament from the top edge of the Heatblock can occur, causing fillings and damage to both the print and the printer.

In addition, the PTFE tube, in the part in contact with Nozzle and Heatblock, tends to reach the same melting temperature set for the filament, however this is not a problem as PTFE supports temperatures up to 300C very well before melting, well beyond the normal printing temperatures of PLA, PETG and ABS. On the other hand, the higher the printing temperature, the greater the amount of heat that the Heatbreak must dissipate; in fact, when the heat is not dissipated properly, it tends to rise inside the PTFE causing the filament to melt in areas far from the nozzle, resulting in obstructions that prevent the filament from passing. In addition, the PTFE tube inside the Heatbreak also begins to lose its characteristics, thus causing obstructions. For this reason, it is necessary to accompany the Heatbreak with a heatsink with fan, in this way the passage of heat is quickly interrupted.

To solve these two problems, you can switch to a Hotend like the Hotend Trianglelab TCHC TR6 Model B, which is a Hotend with Bi-Metal thin wall Heatbreak; in this way the PTFE tube is not in contact with the hot Nozzle, but stops high in the Heatsink, where the temperature is cold. Therefore, the filament passes from PTFE to Bi-Metal thin wall Heatbreak when it is still solid, and so leakages of molten material cannot occur. In addition, the Bi-Metal thin wall Heatbreak is welded inside the Nozzle already factory, and therefore it is not possible for losses of molten material between the Bi-Metal thin wall Heatbreak and the Nozzle.

With this type of Hotend it is therefore possible to definitively solve two problems that afflict users of a 3D printer, namely the leakage of molten material between PTFE and Nozzle, and the deformation of the PTFE tube due to the high temperatures reached during the printing of materials such as PETG / ABS / NYLON.

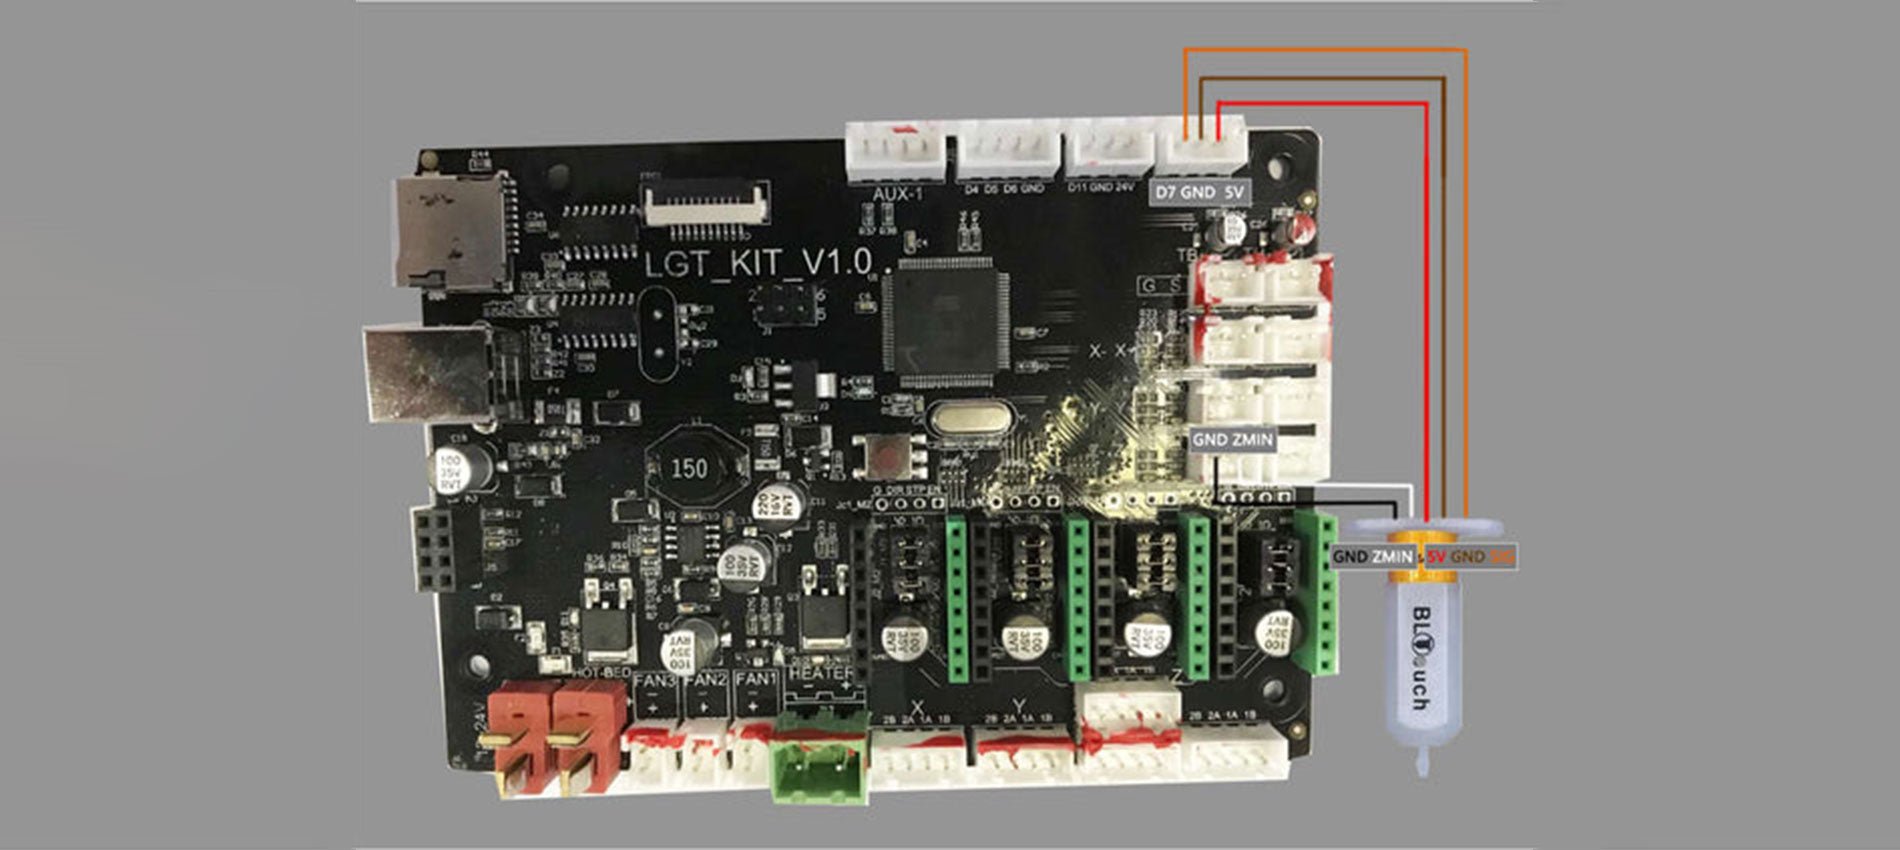
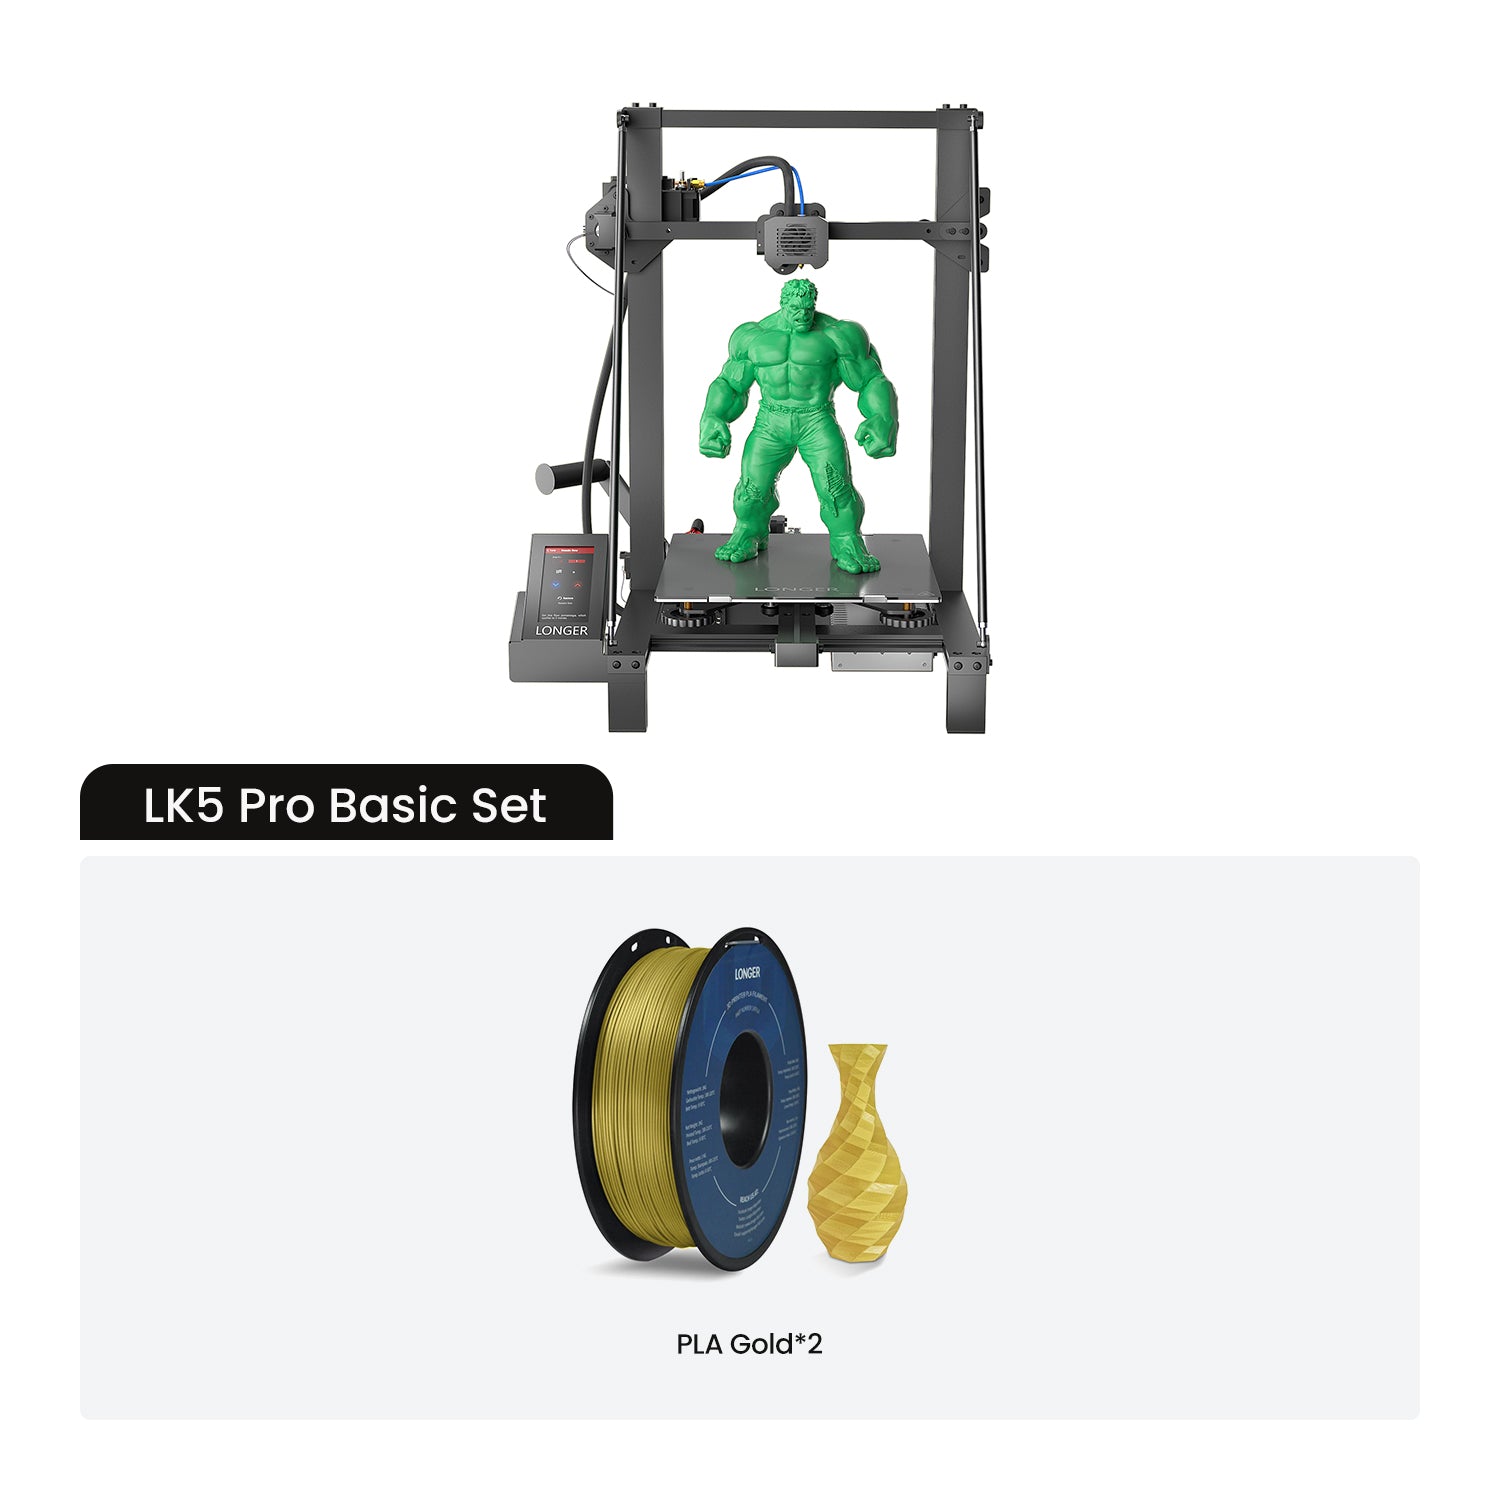
The Hotend Trianglelab TCHC TR6 Model B is the same size as the Hotend MK8 of the Longer FDM 3D printers, so the installation is very user friendly and plug & play. The new Hotend fits both the Longer Classic Printhead and the new Longer Dual Blower, although the Longer Dual Blower is recommended as it provides greater heat dissipation of the Heatsink, as it has a much larger fan than normal. For installation, simply remove the print head cover and the fans, then just unscrew the old Hotend MK8 and screw the new Hotend TCHC TR6 Model B. Instead, as regards the connection of the cables, simply connect the two white cables of the heating resistor to the HEATER port on the mainboard, instead or two black cables of the temperature sensor must be connected to the TH port of the mainboard. The most skilled and experienced users can simply cut the cables of the old Hotend and solder them to the cables of the new Hotend.

Once the assembly and calibration procedures have been completed, you can immediately proceed with printing. You may need to reduce the retraction values inside the slicer and adjust small settings, however 3D printing will be much easier and more enjoyable thanks to this anti-leakage and PTFE-free Hotend in the hot zone.