Academy

LONGER Research: Innovations in Ray5 20W Laser Engraving for Ceramic Art - LONGER
LONGER Research: Innovations in Ray5 20W Laser Engraving for Ceramic Art

Laser engraving has become a pivotal technique in producing intricate designs on ceramics. Historically, CO2 laser engraving machines, which operate at shorter wavelengths, were commonly used but often proved less effective on ceramics. LONGER will use Diode Ray5 20W continues to push the boundaries of what is possible in ceramic art and customization.


LONGER has been at the forefront of this innovation, offering powerful laser engraving machines like the Ray5 20W. This machine features a working area of 400 x 365 mm, making it well-suited for detailed and precise engravings on ceramics.


The Ray5 20W laser, with a wavelength of 450nm and a fixed focus of 40mm, was fine-tuned for optimal performance. Adjustments in laser power, pulse duration, and scanning speed were made to achieve the highest quality engravings on various ceramic surfaces, especially those with intricate surface profiles or glaze coatings.


The Ray5 20W, with its precise 0.08x0.1mm laser spot size and high engraving speed of up to 10000mm/min, produced detailed and deep engravings. Using Ray5 20W deeper and more detailed, and the engraved designs were harder and more wear-resistant. This makes them suitable for both aesthetic and practical applications, such as dishware, furniture components, and outdoor sculptures.


Ceramic material selection, including stoneware, bone china, and high-fire ceramics. The type of glaze and surface finish were key factors in determining the effectiveness of laser engraving. Additional surface treatments like glazing further improved the aesthetic and functional qualities of the engraved ceramics.


LONGER’s laser engraving machines, such as the Ray5 20W, enable extensive customization of ceramic tableware. Here are some examples of potential designs:


Personalized Text: Clear and precise text can be engraved on plates, mugs, and bowls, making them unique with names, initials, or dates.


Custom Patterns: Fine details and symbols, including geometric shapes, plant motifs, or abstract forms, can be intricately carved on ceramic surfaces.


Logos and Branding: Businesses and special events can benefit from laser engraving to create branded tableware or promotional items.


Artwork and Illustrations: Detailed artwork and illustrations, whether they depict specific scenes, facial features, or simple sketches, can be engraved on ceramic pieces.


Customized Designs: Laser engraving allows for limitless creativity. Any combination of text, images, or new designs can be brought to life on ceramic tableware, reflecting personal or thematic preferences.


By leveraging the capabilities of the Ray5 20W, LONGER continues to push the boundaries of what is possible in ceramic art and customization, offering tools that blend creativity with advanced technology. Longer Ray5 laser engraver is going to bring life to your ideas.

By Academy | June 24, 2024
Review about Longer Ray5 10W - LONGER
Review about Longer Ray5 10W

With its powerful 10–12W output, the Longer Ray5 10W laser engraver changes the game when of laser printing. In this full review we will go over all of the amazing features, and functions that make the Longer Ray5 10W the best choice for both professionals and hobbyists.

The Basics of How to Use the Longer Ray5 10W (10-12W Power)

When used for engraving, the Longer Ray5 10W is a technical marvel that will make both the quality and quantity of the work done much better. Because it has a powerful laser source, this engraving machine can perfectly engrave and cut a wide range of materials. Please let me break down how everything works with each other:

Laser Lighting Source:

The Ray5 10W, a very efficient laser light source that can make 10 to 12 watts of power, is the heart of the Longer Ray5.

Careful Attention to Pointing the Laser

The laser source sends out a wave of light that can be directed on the material's surface to do its job. A very precise control over where the focus is placed gives you the most accuracy, especially when working with complicated patterns.

A focused laser beam makes so much heat when it hits something that it either evaporates or burns. One thing that can be done with this method is engraving, and another is cutting. The results will be clean and accurate.

Precision and a sense of being in charge

With the 3.5-inch touchscreen, you will have full control over the engraving process. You can make sure that every job is done properly by fine-tuning the parameters, changing how fast the engraving is done, and managing a lot of different tasks.

The 10 watt power of the Longer Ray5 10W makes it better at working with a wider range of surfaces. The fact that it works with many materials, such as wood, plastic, metal, glass, leather, and more, makes it a useful tool for many tasks.

Features of Ray5 10W (10-12W) that stand out

One reason the Longer Ray5 10W is such a great choice for laser printing and cutting is its 32-bit chipset system, which makes it much easier to use and faster. The carving work you do will go much more quickly and easily now with computer.

The display screen is 3.5 inches wide.

The great thing about the 3.5-inch monitor is that i lets you see the cutting process very clearly. You have full control over the speed of the writing, as well as the settings and everything else.

400x400 mm Work Area

The work area is 400 mm by 400 mm, which is not only big, but also strong and long-lasting. The metal alloy plates will cover your work better to make your work safe from any damages.

0.06x0.06 mm Laser Spot:

With a tiny laser spot that is only 0.06 by 0.06 millimeters, the Longer Ray5 10W is a precise tool that can be used for both engraving and cutting. It's easier to make complicated shapes with this tiny laser dot, which makes it possible to be very accurate.

Updated Compressed Laser Technology

10000 mm/min Work Speed:

The fast speed of 10,000 mm/min on this laser cutter makes sure that your projects will be finished quickly and correctly. The cuts are more accurate and shallower because the laser only touches a smaller part of the object for long span of time.

Powerful Cutting Capacity:

The Longer Ray5 10W has a heavy-duty cutting blade that can easily go through 20 mm of wood and 30 mm of plastic. It is a great choice for a lot of different cutting jobs because it uses a technology called Compression Spot.

Package Size:

The Longer Ray5 10W's case is 621 mm long, 299 mm wide, and 127 mm high, making it a small and easy-to-transport option. This makes sure that your engraver will get to you without any damage and in perfect working order.

Movement Protection:

To avoid mistakes, this machine has a feature called "Movement Protection" that turns it off right away if it is moved by accident during use. The addition of this extra protection step makes it less likely that something bad will happen.

Wide Compatibility:

The Longer Ray5 10W works great with many types of apps, such as the famous LaserGRBL and LightBurn. The MKSLaser app lets you handle and operate your laser from afar when you're on the same Wi-Fi network. This makes the printing process more flexible and easier.

Wide Compatibility

FAQs:

We'll answer some of the most important questions about the Longer Ray5 10W below.

What kinds of things can I use in the laser engraver?

The Longer Ray5 10W can cut many different materials, such as wood boards, acrylic, plastic, cardboard, non-woven fabrics, etc.

What does the technology called "compressed double-beam" do in the 10W form of the Longer Ray5?

Compressed double-beam technology is used in the Longer Ray5 10W's laser heads. This makes the laser stronger and more accurate. Even though the laser beam is much smaller than the spot, the spot itself is 0.6 mm across. Because the target length of its laser is longer than 50 mm, it has a high energy density and can cut very well.

What will the engraved material feel like?

The Longer Ray5 10W makes carvings that are accurate, smooth, delicate, and nice to look at.

Could you please tell me how fast the Longer Ray5 10W can go?

The fastest speed that the Longer Ray5 10W can work at is 10,000 mm per minute. Everything will go off without a hitch and exactly as planned because it's all set up so well.

Does the Longer Ray5 10W make noise or movements when it's in use?

The Longer Ray5 10W works in a way that is both quiet and free of noises to make sure that the engraving process is done correctly. With lines that are so straight and clean, engraving is a breeze.

Does the laser engraving tool work with Windows and other popular operating systems?

There are several pieces of software that can be used with the Longer Ray5 10W. Along with Mac and Linux, the LightBurn software works with several versions of Windows, such as XP, 7, 8, and 10. Another thing is that it works with the Windows version of LaserGRBL.

Laser Engraving Cases

Conclusion

The Longer Ray5 10W (10-12W Power) is the only laser engraving machine you need to go ahead with in the printing field. It is highly customized in a lot of ways; you can use it for both professional and formal work.

You give life to your creative ideas with the accuracy and detail they deserve because you have to work with so many different materials, from wood and plastic to metal and leather. It is possible to make exact drawings because the laser's focus point has a laser spot that is only 0.06 by 0.06 mm. According to our research, the Longer Ray5 10W is the most cost-effective laser engraving machine on the market.

By Academy | November 20, 2023
Lens Cleaning for Longer Ray5 10W

Longer Ray5 10W has a laser module capable of engraving and cutting multiple types of materials. However, depending on the type of work that is carried out, it is possible that a fair amount of smoke is produced, which can inevitably settle on the lens of the laser module and therefore blur it. Once the lens of the laser module is dirty or clouded, the laser beam can no longer pass through it, and therefore the emission of the laser module is drastically reduced. As a consequence, more and more power will be needed to engrave the same materials already engraved previously, until it will be practically impossible to engrave any type of material, even setting 100% power. This problem occurs most when an air assist system is not used; in fact, an air assist system allows you to create air pressure in the vicinity of the lens, thus preventing smoke and dust from settling easily on the lens.

Laser lens and Protective lens

In order to solve this problem, it is necessary to proceed to cleaning the lens of the laser module; once the lens is cleaned, the laser beam can pass through it without suffering losses, and therefore the materials will be engraved or cut again to perfection.

To proceed with the cleaning of the lens of the laser module of Longer Ray5 10W, it is necessary first to completely disassemble the laser module, as shown in the figure:

completely disassemble the laser module

The laser module of the Longer Ray5 10W has a factory-installed protective lens, which can be unscrewed and cleaned separately from the laser module. This lens is a simple protective glass and has no focusing function. After removing the protective lens, you can proceed to clean the lens with the use of a cotton swab soaked in alcohol. Be careful to prevent alcohol from entering the inside of the lens.

completely clean and free of dirt

Use one or more cotton swabs soaked in alcohol until the lens is completely clean and free of dirt; at this point, therefore, you can proceed to screw it to the laser module and reassemble the laser module of Longer Ray5 10W. At the end of the cleaning procedure, you can proceed to engrave a sample file contained in the microSD card of Longer Ray5 10W so you can evaluate the total restoration of the functionality of the laser module.

By Academy | July 25, 2023
Lens Cleaning for Longer Ray5 5W - LONGER
Lens Cleaning for Longer Ray5 5W

Longer Ray5 5W has a laser module capable of engraving and cutting multiple types of materials. However, depending on the type of work that is carried out, it is possible that a fair amount of smoke is produced, which can inevitably settle on the lens of the laser module and therefore blur it. Once the lens of the laser module is dirty or foggy, the laser beam can no longer pass through it, and therefore the emission of the laser module is drastically reduced. As a consequence, more and more power will be needed to engrave the same materials already engraved previously, until it will be practically impossible to engrave any type of material, even at 100% power.

In order to solve this problem, it is necessary to proceed to cleaning the lens of the laser module; once the lens is cleaned, the laser beam can pass through it without suffering losses, and therefore the materials will be engraved or cut again to perfection.

To proceed with the cleaning of the lens of the laser module of Longer Ray5 5W, it is necessary to first completely disassemble the laser module, as shown in the figure:

The laser module of the Longer Ray5 5W has a factory-calibrated lens, so be careful not to unscrew or screw on the lens. Otherwise, the focus will be lost irreparably. Once the lens is accessible, with one hand you have to hold the whole laser module upside down, while with the other you can proceed to clean the lens with the use of a cotton swab soaked in alcohol. Be careful to prevent alcohol from entering the laser module.

Use one or more cotton swabs soaked in alcohol until the lens is completely clean and free of dirt; at this point, therefore, you can proceed to reassemble the laser module of Longer Ray5 5W. At the end of the cleaning procedure, you can proceed to engrave a sample file contained in the microSD card of Longer Ray5 5W so you can evaluate the total restoration of the functionality of the laser module.

By Academy | July 25, 2023
Text Layout Cutting with Lightburn and Longer Ray5 - LONGER
Text Layout Cutting with Lightburn and Longer Ray5

Longer Ray5 allows you to engrave and cut multiple types of materials. In particular, many users of Longer Ray5 prefer to create a custom text and then engrave or cut it on wood panels or similar material. Engraving a text using the laser beam is not a big problem, as it is sufficient to set the right parameters for the type of material chosen, and the result will be excellent. However, if you want to cut (e.g., on wood or paper) your custom text, then setting the right parameters may not be enough.

In fact, depending on the type of text chosen, it may be necessary to make manual changes to the text so that the cut can take place correctly. Analyzing the issue in detail, assuming you want to laser cut the word "NICE," then there is no problem; however, if the word is "HELLO," then it should be noted that the letter "O" consists of a closed surface, which when cut will fall away from the material and thus change the layout of the letter "O."

Specifically, this problem occurs with all letters that contain a closed surface within them, such as the letters "A – B – D – O – P – Q – R."

Using LightBurn software, you can solve this problem really easily and quickly. In detail, first you proceed with the creation of your own personalized text within LightBurn. After entering the text, you will visually check for any letters that have problems when cutting.

In the example given here, there are some letters that cannot be cut correctly and therefore need to be corrected first. The solution to this problem lies in eliminating the closed surface inside the letter: to do this, just create a "bridge" that connects this closed surface with the rest of the letter.

In this way, after making the cut, this closed surface will remain attached to the cut panel, and therefore the layout of the letter will not be changed.

In particular, you must manually create a small rectangle, which must be pasted inside each problematic letter in order to create a bridge between the closed surface of the letter and the letter itself, as shown in the example below. After that, you have to make a Boolean subtraction between the letter and the rectangle.

We proceed to insert a rectangle for each letter that needs to be corrected, then we proceed with the subtraction (the procedure must be repeated for each letter, one letter at a time). Finally, the end result will look like this:

At this point, you can make a cutting preview or proceed with the export of the G-code on the microSD of Longer Ray5 and perform the cut (always remembering to set the correct parameters first to be able to cut the type of material chosen).

This technique can also be applied when using different text layouts, such as italic text or number format, so that you always eliminate any closed surfaces that prevent you from making a correct laser cut.

By Academy | July 6, 2023
Engraving & Cutting with Lightburn and Longer Ray5 - LONGER
Engraving & Cutting with Lightburn and Longer Ray5

Longer Ray5 allows you to engrave and cut multiple types of materials. In particular, many users of Longer Ray5 prefer to carry out engraving and cutting work at the same time, especially when it comes to working with wood panels; however, engraving and cutting do not necessarily have to be two distinct processes, as using Lightburn, you can perform both machining operations in one operation.

In particular, after opening an image in LightBurn, proceed to set the engraving parameters in the window on the right of the screen. I know that the engraving parameters are those of the model image.

After setting the engraving parameters, right-click with the mouse on the imported image, then select Trace Image.

In the screen that opens, define the quality of the cutting perimeter by increasing or decreasing the Threshold value, then confirm by pressing OK.

The image will be superimposed by a perimeter, as set in the previous screen, and at the same time in the window on the right of the screen will appear a new entry relating to the cut to be made, indicated with Model Line. For Model Line, set image cropping parameters, such as speed, power, and number of passes.

At the end, press Save Gcode to export the working file to the microSD of Longer Ray5, then proceed to start working on Longer Ray5. Alternatively, before exporting the GCode, you can check the simulation of the engraving and cutting process by pressing Preview.

In this way, Longer Ray5 will engrave the selected image, after which it will cut the image following the perimeter set above.


Above is the introduction of the first layer calibration; I hope it can help you. If you still have any questions during the operation, please visit our Support Page. Our knowledgeable staff is happy to assist you and your team with any questions.

Want to learn more about RAY5 Laser Engraver? Check out the video below.

https://www.youtube.com/playlist?list=PLLz1z_0pXsW0rjYbC2V_upO1YlU4HeuAg

Step into a world of precision craftsmanship with LONGER RAY5 Series. These high-accuracy laser engravers and cutters redefine what's possible, effortlessly mastering materials with unparalleled precision and ease. Whether you seek to infuse your home with personalized charm or elevate your professional projects, these versatile machines seamlessly adapt to your needs. Their compact design makes them an excellent choice for home laser engravers and cutters, adding a touch of sophistication to your creative space. Meanwhile, their precision engineering makes them equally at home in the professional arena, where they serve as the quintessential desktop laser cutter, providing industrial-grade precision right at your fingertips. Explore limitless possibilities and unlock your creativity with Longer RAY5 Series.


Read more

By Academy | June 19, 2023
Material Testing for Longer Ray5 10W & 5W - LONGER
Material Testing for Longer Ray5 10W & 5W

Longer Ray5 5W and Longer Ray5 10W allow you to engrave and cut different types of materials, quickly and easily. However, for each type of processing it is necessary to set different parameters regarding power and speed, precisely because each type of material reacts differently to the laser beam.

To have a reference about what power and speed to adopt for each type of material, there is a fairly complete table accurately reporting the best parameters to use.

about what power and speed to adopt for each type of material

However, the table can only be understood as a general reference; in fact, assuming you want to cut the basswood with Longer Ray5 10W, the recommended parameter is 100% power & 350 mm/min speed, but there are various types of basswood, and each one reacts differently during cutting, so it is not said that these parameters are perfect for each type of basswood, since some basswood could be burned instead of simply cut or not cut at all.

In order to obtain the correct parameters for the type of basswood you intend to cut, Lightburn has a powerful material test tool, which allows you to quickly determine the most specific and correct parameters. From the Lightburn home screen, select Laser Tools – Material Test; this screen will open:

select Laser Tools – Material Test

First, set the Count value to 5 for Vertical and Count to 4 for Horizontal; Also, set Height and Width to 5.00 mm.

Since the recommended parameters for cutting the basswood are 100% power & 350 mm/min speed, you can set a range between 100 and 500 mm/min for speed and a range between 50% and 80% for power (so as to avoid stressing the laser with 100% power).

Next, proceed with Edit Text Setting:

Edit Text Setting

This screen is used to engrave the labels of the test table. Since it is an engraving, set 3000 mm/min speed and 50% Power; Also, set Mode Fill.
Confirm by pressing OK.

At this point, proceed with Edit Material Settings:

Edit Material Settings

In this screen you can set the method of processing the material; since it is a matter of cutting, select Mode Line, and possibly set Number of Passes to 1 or more.
Confirm by pressing OK.

Once back on the main screen, press Save Gcode to export the test file, copy it to the microSD, and start testing on Longer Ray5.

When Ray5 has completed the job, reviewing the table will help you determine which parameters are best to set.


Similarly, if you want to proceed with an engraving test instead of cutting, open the Material Test screen. Since the recommended parameters for engraving the basswood are 35% Power & 3000 mm/min speed, set the testing range as shown in the image below:

set the testing range

On the Edit Material Settings screen, since this is an engraving, select Mode Fill:

the Edit Material Settings screen select Mode Fill

Once back on the main screen, press Save Gcode to export the test file, copy it to the microSD and start testing on Longer Ray5.

When Ray5 has completed the job, reviewing the table will help you determine which parameters are best to set.


Note that, before exporting the Gcode, both for a cut test and for an engraving test, you can always select Preview, which allows you to see in advance how the final result will look.


Lightburn Preview

Above is the introduction of parameter settings and material testing , hope it can help you. If you still have any questions during the operation, please visit our Support Page. Our knowledgeable staff is happy to assist you and your team with any questions.


The Longer Laser RAY5 Series is capable of engraving a wide range of materials, including plywood, basswood, hardwood, pinewood, acrylic, kraft paper, stainless steel, aluminum alloy, ceramics, and more. Additionally, the Longer RAY5 can cut materials such as basswood, acrylic, bamboo, kraft paper, and more.


With its powerful engraving and cutting capabilities, it transcends boundaries to become the best engraving machine and the best laser cutter for a variety of materials. Seamlessly transition from a wood laser cutter to a metal laser engraver, or even become a master jewelry engraver. Discover boundless, unlimited potential with the Longer Laser RAY5 Series.


Read more

By Academy | May 30, 2023
Air Assist Kit installation for Longer Ray5 10W & 5W - LONGER
Air Assist Kit installation for Longer Ray5 10W & 5W

Visible light and laser beam have in common the same nature, as both are composed of photons, however the difference between them is in the fact that visible light has an optically isotropic propagation (that is, it propagates identically in all directions) while in the laser all the energy is concentrated within a single beam of very small section. Therefore, when the laser hits matter, it is instantly able to radiate a great power in a very small area, causing a sudden and rapid increase in temperature that alters the state of matter.

Laser engraving machines, such as Longer Ray5, are able to emit a laser beam that instantly transforms the state of matter by combustion, and the contrast between the laser-subjected surface and the surrounding surface creates the visual effect commonly called Laser Engraving. However, the energy hitting a single point is not limited to that point, but the heat generated is also transmitted to the areas surrounding the point, causing the typical burning effect of laser processing.

In order to avoid or reduce this effect, an air assist mechanism can be used, which consists of a compressor capable of continuously blowing pressurized air directly onto the area subjected to the laser. In this way, the heat exchanged between the laser area and the surrounding area is mitigated by the fresh air of the Air Assist compressor, thus avoiding the burnt effect around the laser engraving. In addition, the air blown on the engraving zone cancels the heat exchange with the surrounding areas but does not damage the engraving ability of the laser beam. A simple example to understand this phenomenon can be this: if on a summer day with the sun high in the sky you go to the sea, if there is wind, then you feel cool, while if there is no wind, then you feel hot, but in both cases the sun causes burns to the skin in the same way.


Longer Ray5 10W Air Assist installation

The longer Ray5 10W has an official Air Assist kit that consists of two parts, the nozzle kit and the air compressor, available at the following link: https://www.longer3d.com/products/air-assist-set .

Installing the Longer Air Assist on the 10W laser module is really easy; just follow the steps below:

  • First, proceed to disassemble the laser module from the rest of the machine


  • Install the metal nozzle on the laser module


  • Connect a rubber hose between the metal nozzle and the pressure regulator, and connect another part of the rubber hose to the regulator inlet


  • Connect the inlet pipe of the regulator to the outlet of the air compressor


    • Finally, install the laser module on the Ray5, activate the compressor switch and start an engraving from the Longer Ray5 display


Longer Ray5 5W Air Assist installation

To proceed with the installation of the Air Assist kit on the Longer Ray5 5W, it is necessary to purchase, as for the 10W version, the kit consisting of the nozzle kit and the air compressor, available at the following link: https://www.longer3d.com/products/air-assist-set . However, the metal nozzle included inside the kit is compatible with 10W module only; therefore, it is necessary to have a 3D printer to print with PLA or PETG the following nozzle:https://www.thingiverse.com/thing:5585296 .


Installing the Longer Air Assist on the 5W laser module is really easy; just follow the same steps as the installing method for the 10W laser module, but install the 3D-printed nozzle on the laser module instead of the metal nozzle. After that, as mentioned, just follow the same steps as shown for installation on the 10W module.


Conclusions

The use of air assist not only increases the engraving quality but can also increase the laser's cutting capacity thanks to the possibility of removing smoke and combustion debris thanks to the continuous breath of air; without air assist, these would end up settling on the laser lens, hindering the output laser beam of the module. Whether for hobbyist or professional use, Longer Air Assist is absolutely recommended if you want to achieve the maximum performance offered by Longer Ray5 10W and Longer Ray5 5W.

https://www.longer3d.com/collections/laser-engraver

By Academy | May 9, 2023
LONGER RAY 5 Newest 20W vs. 10W vs. 5W, What's the Differences? Which One to Buy? - LONGER
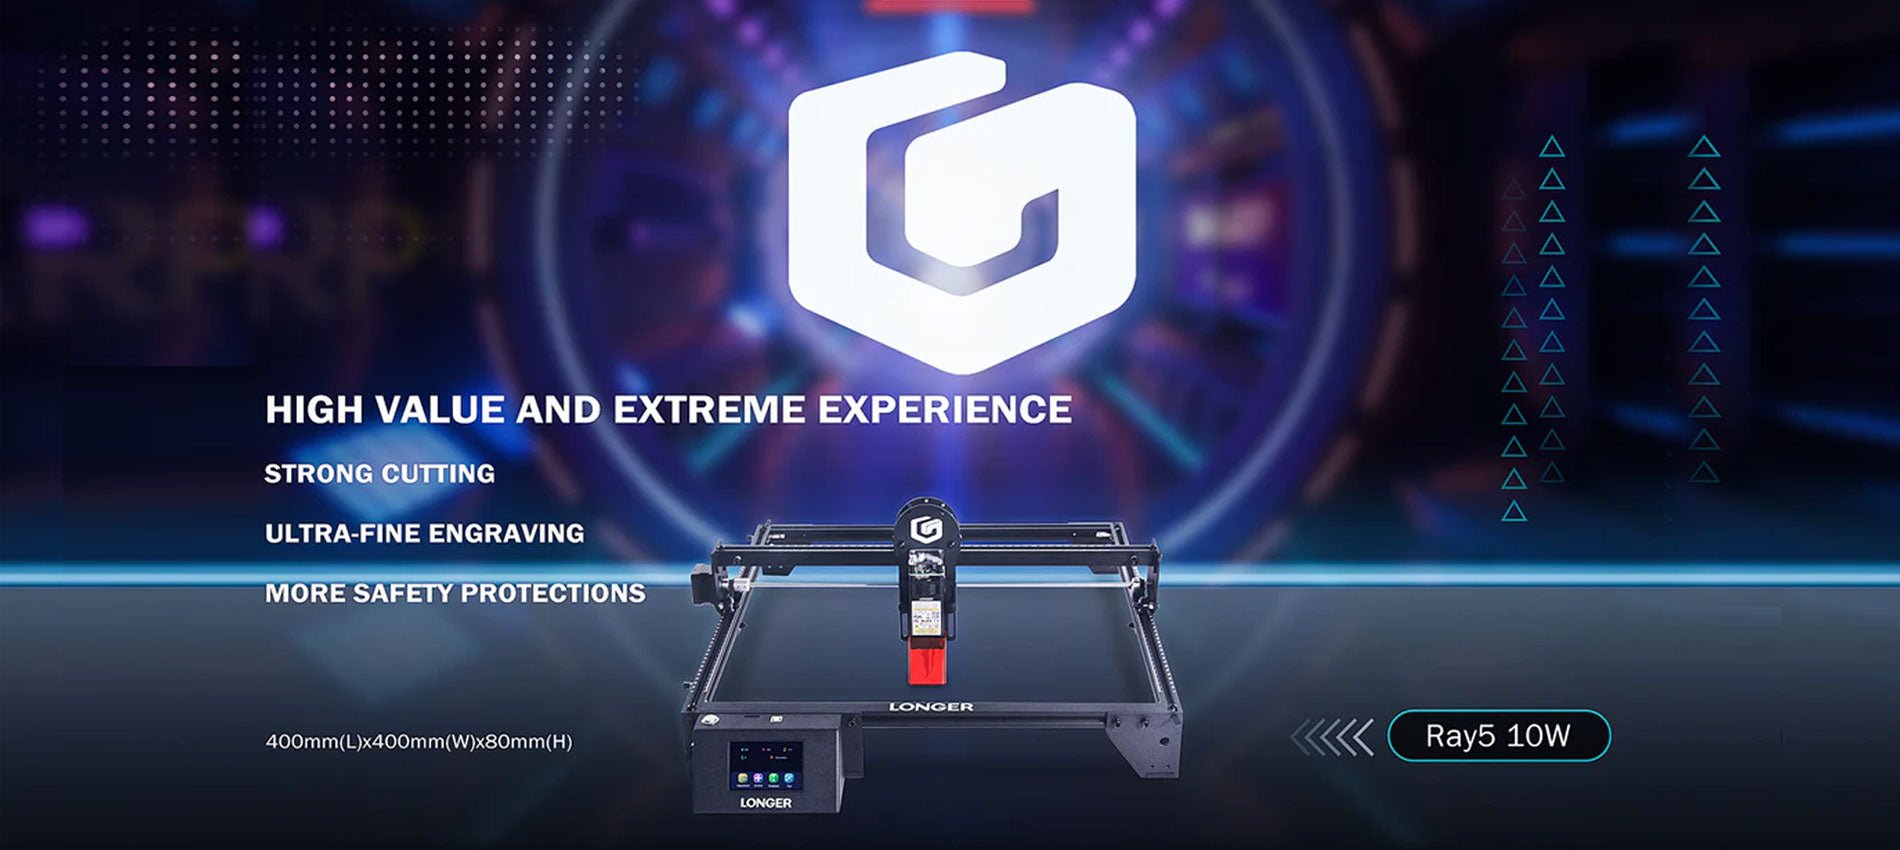
Ray più lungo 5 più recente 20W vs. 10W contro 5W, quali sono le differenze? Quale acquistare?

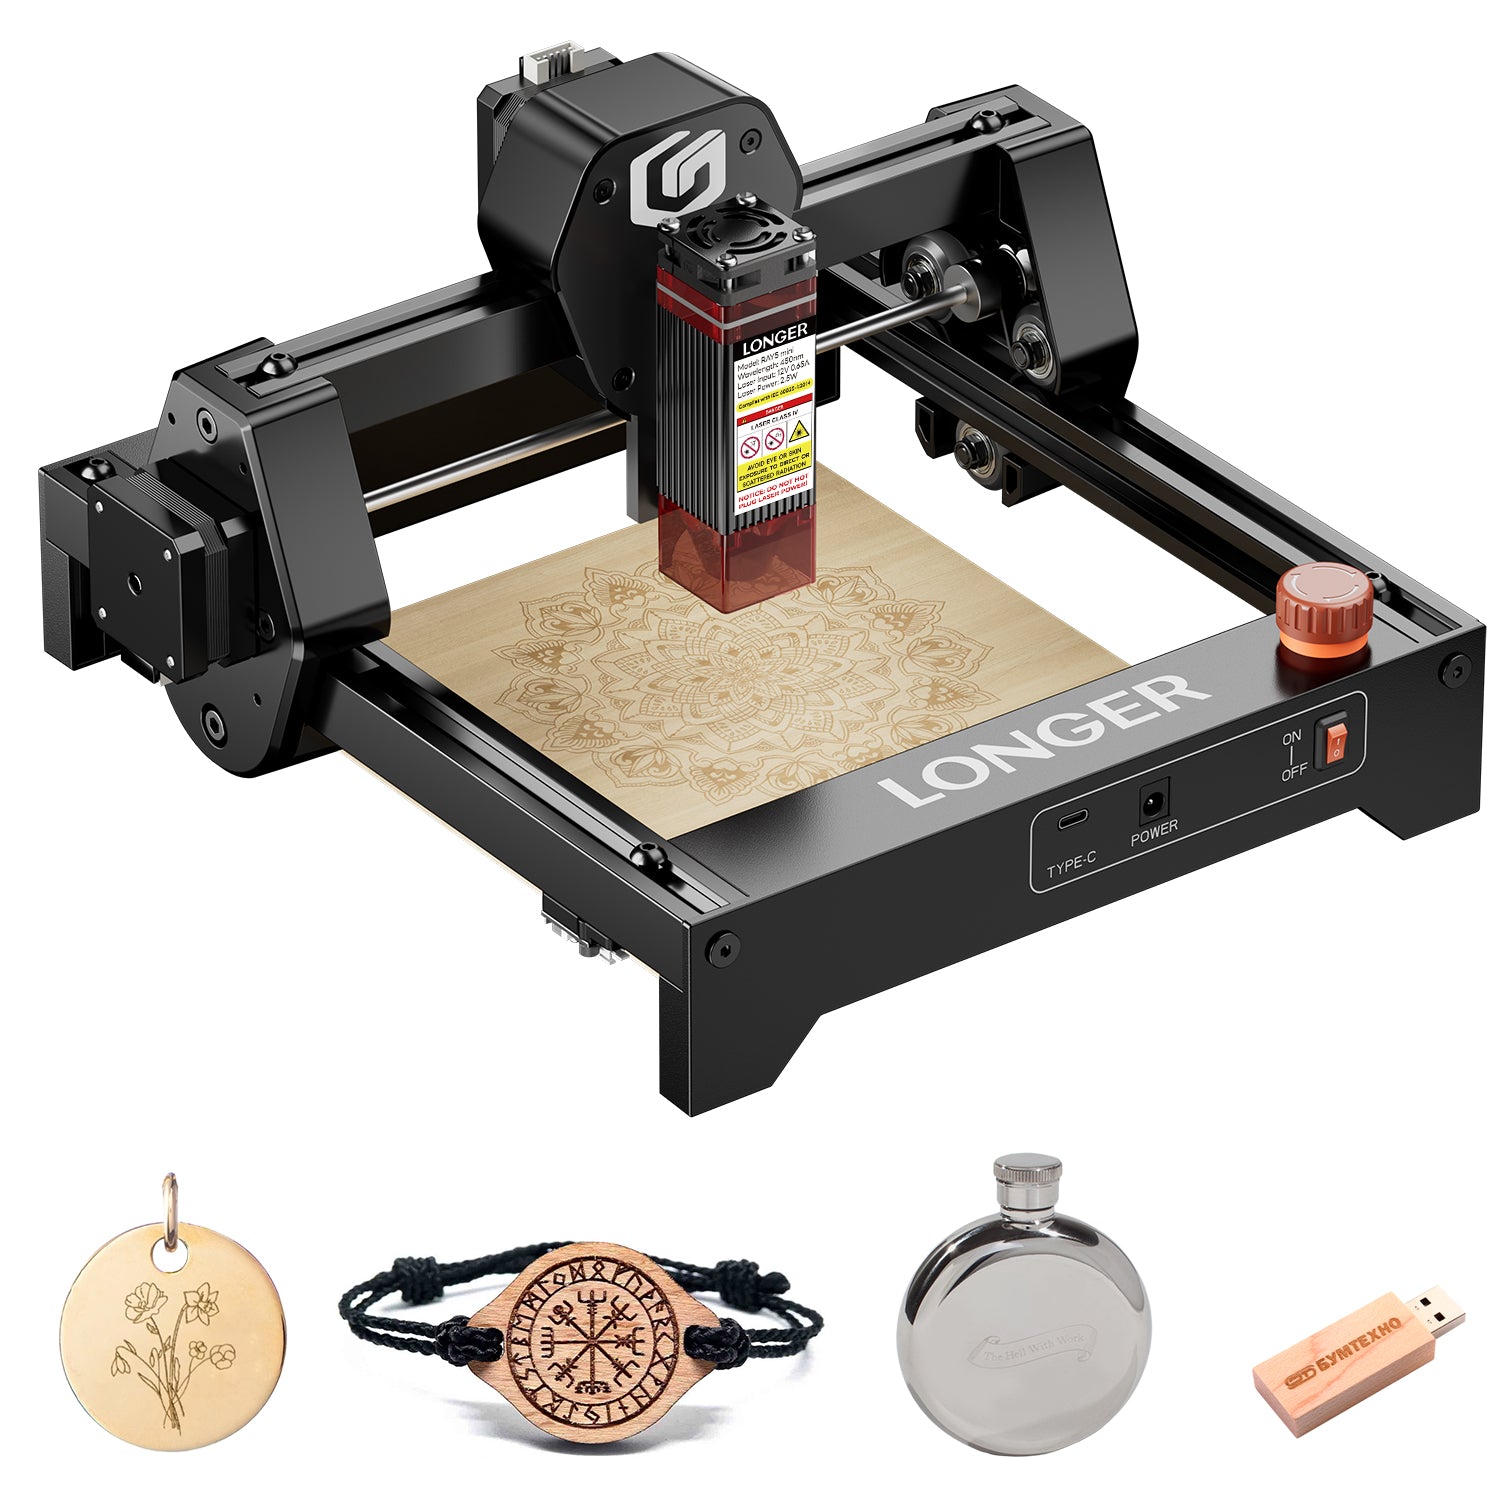
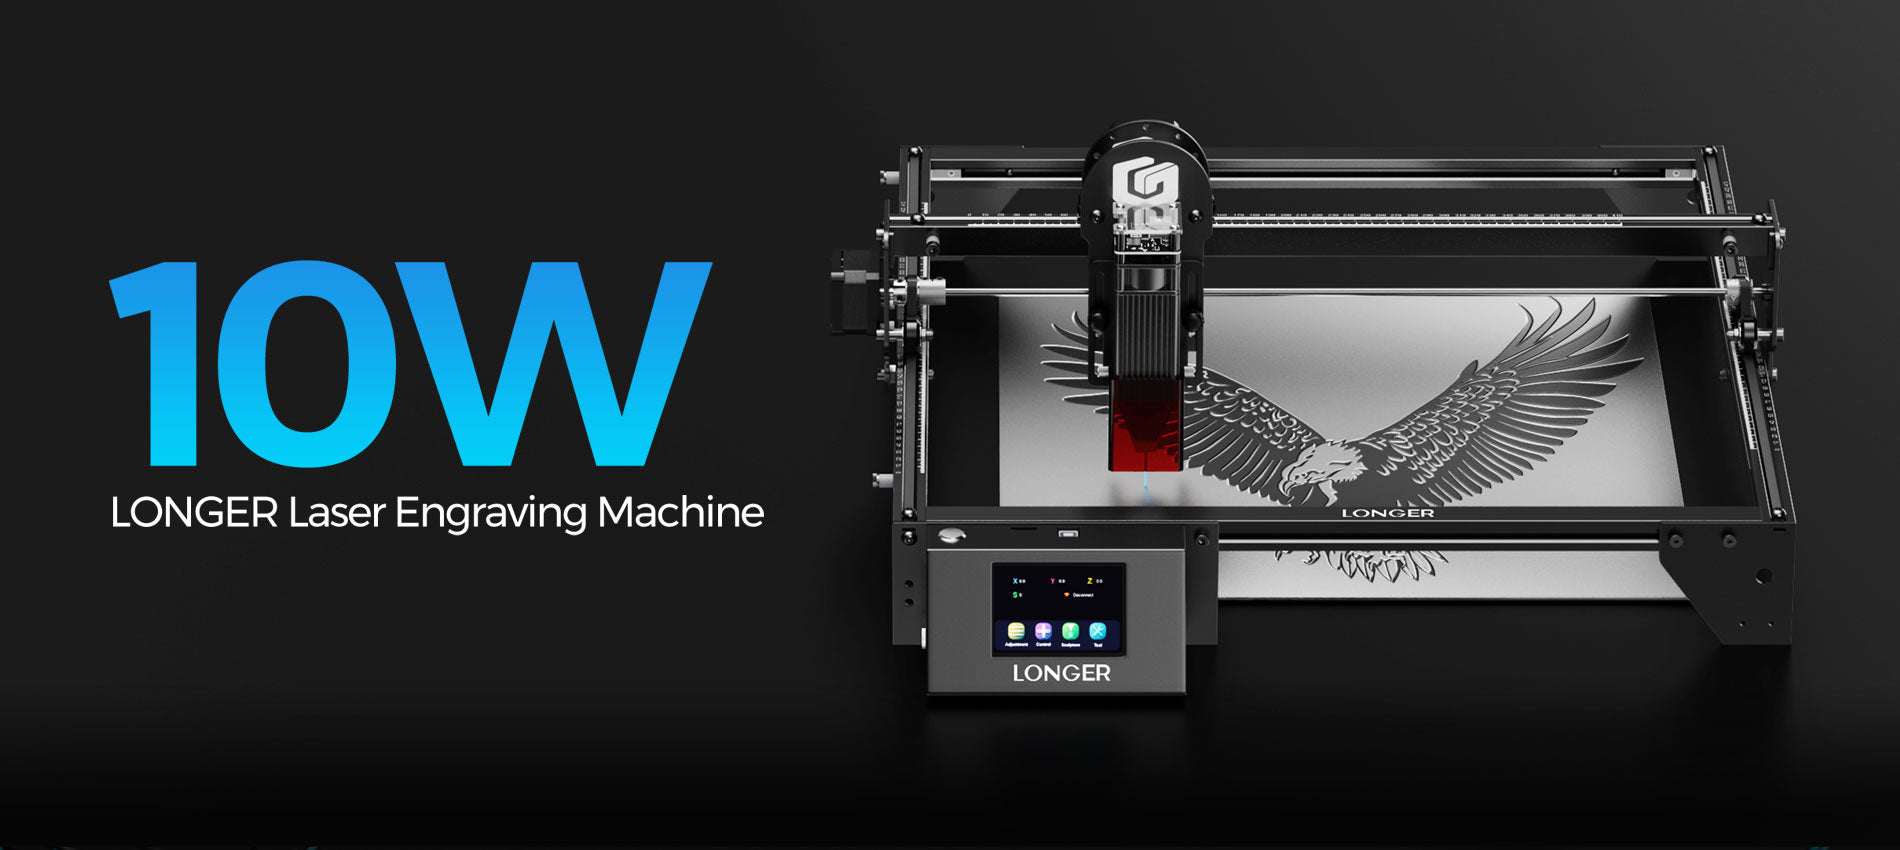
Se vuoi incidere correttamente praticamente qualcosa, avrai bisogno di un incisore laser. Questo perché i laser sono estremamente precisi. Poiché vendono gli incisori Ray5 5W e Ray5 10W, le persone più a lungo sono un posto fantastico per iniziare. Le dimensioni, la potenza e la lunghezza focale del raggio sono le distinzioni chiave tra loro; Tuttavia, possono incidere una quantità significativa di materiale.

Se stai cercando uno strumento per incidere l'oggetto selezionato, dovresti scegliere il modello più adatto alle tue esigenze. Bene, non preoccuparti, dato che siamo qui per parlarti dei tre tipi di base di incisione laser, delle loro differenze e una guida per scegliere quale ti si addice in base alle tue esigenze. Senza ulteriori indugi, tuffiamoci subito.

Cos'è il potere laser?

Prima di conoscere i tre tipi di poteri laser, indaghiamo solo cosa sia il potere laser. La forza del laser è ciò che determina quanta energia viene presa dal foglio di lavoro. La regola di base è che quando la potenza laser è aumentata, anche l'angolo di curvatura cresce, raggiunge un picco e poi ricomincia a cadere mentre la potenza laser aumenta ulteriormente.

Maggiore è la potenza laser, più calore viene assorbito, il che si traduce in una temperatura di picco più elevata e, quindi, una quantità più incredibile di deformazione plastica sulla superficie scansionata. Questo fa aumentare l'angolo di piega. Dopo aver raggiunto il massimo, l'angolo di piega inizia a diminuire a causa di un aumento della potenza laser.

Questo è principalmente il risultato di due fattori. In primo luogo, lo scioglimento avviene nella regione che viene irradiata a una potenza più elevata e l'energia termica che viene applicata viene utilizzata nella trasformazione di fase piuttosto che nella flessione del materiale. In secondo luogo, quando la potenza è aumentata, aumenta anche la temperatura di picco della superficie del fondo della nave.

Ciò si traduce in una riduzione della differenza tra la deformazione plastica sulla superficie superiore e la superficie inferiore, che a sua volta porta a una riduzione dell'angolo di curvatura a maggiore potenza.

In termini di potenza laser ottica, la stragrande maggioranza delle più popolari incisori laser sul mercato ora si inserisce solo in due categorie primarie, vale a dire la potenza ottica 5W e 10W. I moduli nella prima categoria contengono ciascuno un singolo diodo laser. Al contrario, il Moduli da 10W contenere ottiche ingegnose che combinano la luce laser da due diverse sorgenti di diodi laser, con conseguente potenza di uscita che è due volte più forte di quella dei moduli a basso potere.

Cosa significa esattamente la "W"?

La wattaggio è uno degli aspetti più significativi da considerare quando si discute di tagliatori laser. È qualcosa che dovrai specificare quando acquisti per la prima volta la macchina ed è il fattore che influisce sulla potenza di taglio e sulla velocità del progetto.

Quando la valutazione della potenza è aumentata, aumenta anche il flusso di energia. Quando si tratta di taglierini laser, avere un laser da 20 W anziché un laser da 5 W consentirà all'energia di trasferire a una velocità sostanzialmente più veloce.

Puoi vedere una sequenza di laser all'interno della testa di a Raggio più lungo 5 Se lo fai a pezzi e guardi il laser al suo interno. Tuttavia, consigliamo vivamente di non farlo. La testa del laser da 20 W è costituita da quattro laser da 5 W, tutti puntati nella stessa direzione e concentrati attraverso la testa del laser.

Perché? Lo scopo è quello di generare più potenza e più energia da un singolo raggio laser.

Differenze tra Raggio più lungo 5  5W vs. 10W vs. 20W

Il raggio 5 più lungo 5W, 10W e 20 W condividono tutte alcune caratteristiche in comune tra loro. D'altra parte, ci sono un numero comparabile di differenze. Concentriamoci su ciò che differenzia queste macchine in una serie di confronti testa a testa in modo da poter prendere la decisione più informata possibile su quale acquistare.

Potenza della testa laser

Prima di andare oltre, c'è qualcosa che deve essere chiarito: sebbene la testa laser sia l'unica differenza tra i due, ha un impatto significativo sul funzionamento del tuo Incisore laser a raggio più lungo, e qui esamineremo queste differenze.

Indipendentemente da quale opzione di potenza con cui segui, il Ray 5 più lungo ti fornirà lo stesso framework, sensori e allegati da utilizzare. La testa laser è l'unico componente diverso.

Lo staff di Ray 5 più lungo si riferisce ad esso come un "modulo plug-and-play" nella loro spiegazione. Hai solo bisogno di due cavi e dieci minuti del tuo tempo per l'aggiornamento da un taglierina laser da 5W o da 10 W a un modello da 20 W, che ti dà una maggiore potenza di taglio.

Le variazioni della potenza laser dipendono da quale testa laser usi e dai diversi materiali che puoi tagliare. Puoi migliorare la potenza del laser da 5 W o 10 W acquistando a Modulo 20W per aggiungere ad esso.

Per dirla in altro modo, se vuoi un 20 W, hai la possibilità di acquistarne uno appositamente progettato a tale scopo. L'unica scelta a tua disposizione se si desidera un 5W o 10 W è acquistare la macchina nel suo stato attuale.

I vantaggi sono significativi anche se l'adeguamento è piuttosto semplice. Le sezioni successive riguardano la differenza che fa il semplice scambio di testa.

Rapidità del completamento del progetto

Il tempo esatto necessario per finire il progetto dipende da alcuni fattori diversi:

  • Rapidità del percorso
  • Precisione nella profondità di taglio, selezione di materiali e complessità nel design.
  • La profondità dell'incisione o del taglio.

I restanti tre di questi cinque parametri non dipendono in alcun modo dal cutter laser. La velocità con cui il cutter laser completa il tuo lavoro dipende esclusivamente dalla velocità di routing e dalle impostazioni della velocità di taglio.

In questa competizione, le velocità delle varie rotte non differiscono l'una dall'altra. La velocità di routing del 5W, 10w, E 20W è tutto 10000 mm/min, che è molto più veloce delle generazioni precedenti.

Dove ci troviamo con la profondità di taglio adesso? Qui è dove vedrai una deviazione significativa dalla norma. Un laser con 10 W di potenza può tagliare quasi esattamente il doppio di un laser con 5 W di potenza. Rispetto al 10W, il 20 W ha il doppio della profondità di taglio.

Ciò indica che esiste una differenza teorica nella profondità di taglio che equivale a quattro volte maggiore quando si passa da 5W a 20 W.

Ray 5 più lungo afferma che la differenza potrebbe essere molto diversa a seconda del materiale utilizzato:

Quando si tratta della quantità di tempo, ci vorrà per realizzare un progetto. Un cutter laser da 20 W farà il lavoro più rapido, seguito da un taglierina laser da 10 W e, infine, un cutter laser a raggi da 5 W sarà il più lento.

Spazio per fare tagli e area di lavoro più lunghi ray 5

Mentre il telaio di ogni raggio più lungo è uguale, anche le aree di taglio delle varie configurazioni sono abbastanza comparabili. Il raggio più lungo 5 5W e il raggio più lungo 5 da raggi da 10 W offrono esattamente la stessa area di taglio, misurando 400x400mm (15,75 × 15,75 pollici).

Sebbene la testa laser sul 20 W sia significativamente più grande di quella trovata sul 10 W, l'area di taglio è marginalmente ridotta. L'area di taglio per un laser da 20 watt è di 375 × 375 mm (14,76 × 14,76 pollici).

Sebbene la differenza non sia enorme, è comunque abbastanza significativa da indicare che i taglieri laser da 5W e 10 W hanno un piccolo vantaggio in questa categoria.

Alternative ai materiali (capacità di taglio)

Un ulteriore aspetto dell'argomento collegato alla potenza laser sono i molti tipi di materiali con cui si può lavorare. Mentre si tenta di incidere o tagliare determinati materiali, sono necessarie forza e forza significativamente maggiori.

Puoi lavorare con una maggiore selezione di materiali quando hai un 20 W. Puoi anche lavorare con materiali più sostanziali, che apre ancora più possibilità per i tipi di progetti che puoi sviluppare.

IL Ray5 20W Viene dotato di un potente modulo laser con un output da 20 W. Inoltre, questa macchina presenta la più recente generazione di tecnologia di miglioramento laser, che aumenta la sua capacità di taglio. Può tagliare 0,002 pollici (0,05 mm) di acciaio inossidabile, nonché 0,59 pollici (15 mm) di legno di pino e 0,31 pollici (8 mm) di acrilico in un singolo passaggio.

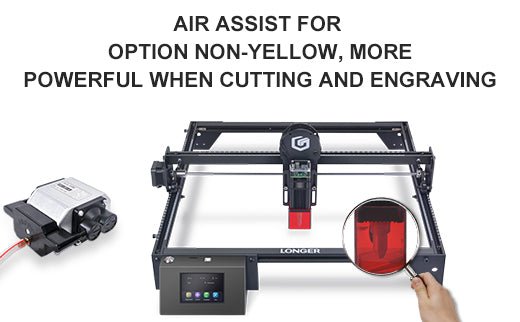
A causa dei recenti progressi nella tecnologia laser compressa, il punto laser può ora essere piccolo quanto 0,08*0,1 mm2, rendendo possibile l'incisione di opere d'arte con linee più sottili, consistenza più chiara e dettagli più attraenti. E l'interfaccia assistita dall'aria è riservata, il che consente di abbinare facilmente un'ampia varietà di pompe d'aria a più superfici igieniche.

Mentre l'utilizzo del cutter da 5 W, del metallo, della ceramica e della pietra diventa molto più impegnativa con cui lavorare e, in tutta onestà, l'ambiente di potenza 5W è più comunemente usato per l'incisione di quanto non sia per il taglio. Quando si utilizza un taglierina laser da 5 W o 10 W, la maggior parte delle persone aderisce al taglio di materiali realizzati in legno, carta, plastica, pelle, scheda PCB, ossido di alluminio, placcatura non riflettente e metallo laccato.

Pensa a ottenere il laser da 20 W se si desidera lavorare con una varietà di vari tipi di materiali. Ai fini dei nostri progetti, abbiamo tagliato con successo anche i boschi più densi.

Precisione

Cosa dovresti fare se hai bisogno di disegnare linee su un componente estremamente sottile e accurato? In questo scenario, ti consigliamo vivamente di evitare di usare la testa laser da 20 W, anche se il rischio è ancora relativamente basso.

La dimensione del punto del laser da 20 W è 0,08 × 0,10 mm. Immagina che il punto laser sia il punto in cui è puntato un puntatore laser. Se il raggio usa questo puntatore laser per tagliare, vorrai che la punta sia più piccola possibile.

Le macchie laser del 5W sono 0,08 × 0,08 mm e i 10 W sono laser 0,06 × 0,06 mm. Il punto laser del laser da 20 W è significativamente più grande.

Quindi, se hai bisogno di un componente accurato, dovresti attenersi al 5W o al 10W.

Diversa capacità di incisione

I pezzi possono anche essere incisi con questo tipo di taglierina laser, che è un'altra funzione utile di queste macchine. Una piccola quantità di materiale viene rimossa dalla superficie superiore per produrre disegni tramite incisione. Poiché l'incisione non va in profondità come il taglio, la potenza richiesta non è così significativa.

IL Ray 5WLa capacità di incisione è significativamente migliorata grazie a un punto laser più piccolo e una precisione più elevata rispetto al suo predecessore. Poiché il componente necessita di un solo passaggio con il laser e la velocità di routing è la stessa su tutta la linea per queste tre possibilità, il 5W è quello che dovrebbe essere scelto.

Se hai bisogno di incidere e tagliare lo stesso oggetto, andando con il Laser da 10 W. Potrebbe essere la scelta migliore per te. Possiede un eccellente equilibrio di forza di taglio e precisione.

Crea creazioni colorate

La capacità di generare incisioni colorate sul metallo è una capacità speciale che è esclusiva per 20 w Ray 5 più lungo e non può essere trovato su nessun'altra macchina. Qual è il meccanismo dietro questo? A causa della maggiore potenza fornita dal Laser 20W, è in grado di ossidare il metallo a vari tassi. È difficile da credere quando lo vedi di persona.

L'alterazione della potenza del laser provoca l'ossidazione del metallo a vari tassi, producendo infine una varietà di colori. È efficace su ottone, rame, acciaio inossidabile e titanio oltre all'alluminio. L'unica differenza è la gamma di colori disponibili per te (che dipende dal tipo di metallo).

I laser con output da 5W e 10 W non sono abbastanza potenti da svolgere questo compito. Avrai bisogno del modello da 20 W se desideri creare vivide incisioni sul metallo.

Prezzi Laser Ray 5 più lungo, disponibile in 5W, 10W e 20W.

Cosa dovrei aspettarmi di pagare per questo? La distinzione non è così bizzarra come può sembrare inizialmente:

  • Raggio più lungo 5w: $ 299,99
  • Raggio più lungo 10w: $ 449,99
  • Ray più lungo 20W: $ 899,99

Questi sono attualmente in sconto. Quindi è giunto il momento di effettuare un acquisto.

Quale materiale diverso può tagliare o incidere di alimentazione laser diversa?

Il taglio usando un laser può essere fatto su un'ampia varietà di materiali, tra cui ma non limitato a legno, carta, plastica, vetro, pelle, schiuma, tessuti e metalli. Selezionando i parametri più adatti per il laser, si può garantire che i tagli prodotti siano di alta qualità e abbiano una finitura superficiale liscia. D'altra parte, non si suggerisce di utilizzare un taglierina laser per tagliare determinati materiali, come vinile o ABS.

Per produrre il taglio desiderato, un taglierina laser opera concentrando un raggio laser ad alta energia sulla superficie della sostanza che sta tagliando. Questo fa bruciare ed evaporare il materiale.

Quando viene lavorato da un laser, ogni materiale mostra le proprie caratteristiche uniche e richiede una configurazione unica dei vari parametri laser per ottenere un taglio pulito con un alto livello di finitura superficiale.

A parte questo, la capacità di un laser di tagliare il materiale è determinata dal tipo di laser che viene impiegato.

In generale, il taglio laser funziona meglio con materiali naturali come legno, carta, pelle e metalli, tra le altre cose, perché questi materiali non producono o solo una quantità limitata di sottoprodotti potenzialmente pericolosi.

Takeaway finale

Il miglior risultato possibile sarà raggiunto con una potenza laser su misura specificamente al materiale costituente. Ad esempio, la carta incisione utilizza una potenza significativamente inferiore rispetto al legno di incisione in media. È necessaria una quantità minima di potenza per ottenere un'incisione uniformemente omogenea in acrilico e non è molto profonda. Inoltre, avere una potenza più elevata consente un lavoro più rapido durante la lavorazione dei materiali di incisione.

Il software consente un controllo semplice della potenza di output del laser. Tuttavia, l'hardware ha un ruolo nel determinare la massima potenza. I seguenti criteri devono essere soddisfatti: sei in grado di elaborare un'ampia varietà di materiali con una macchina laser che ha un'alta potenza laser, che ti offre molta libertà.

By Academy | February 23, 2023
Air Assist Kit installation for Longer Ray5 10W - LONGER
Installazione del kit di assistenza aerea per Ray5 più lungo 10w

La luce visibile e il raggio laser hanno in comune la stessa natura, poiché entrambi sono composti da fotoni, tuttavia la differenza tra loro è nel fatto che la luce visibile ha una propagazione otticamente isotropica (cioè si propaga in modo identico in tutte le direzioni) Laser tutta l'energia è concentrata all'interno di un singolo raggio di sezione molto piccola. Pertanto, quando il laser colpisce la materia, è immediatamente in grado di irradiare una grande potenza in un'area molto piccola, causando un aumento improvviso e rapido della temperatura che altera lo stato della materia.

Macchine a incisione laser, come Ray5 più lungo, sono in grado di emettere un raggio laser che trasforma istantaneamente lo stato della materia per la combustione e il contrasto tra la superficie soggetta al laser e la superficie circostante crea l'effetto visivo comunemente chiamato incisione laser. Tuttavia, l'energia che colpisce un singolo punto non è limitata a quel punto, ma il calore generato viene anche trasmesso alle aree che circondano il punto causando l'effetto di combustione tipico dell'elaborazione laser.

Al fine di evitare o ridurre questo effetto, è possibile utilizzare un meccanismo di assistenza d'aria, che consiste in un compressore in grado di soffiare continuamente aria pressurizzata direttamente sull'area sottoposta al laser. In questo modo, il calore scambiato tra l'area laser e l'area circostante è mitigata dall'aria fresca del compressore di assistenza d'aria, evitando così l'effetto bruciato attorno all'incisione del laser. Inoltre, l'aria soffiata sulla zona di incisione annulla lo scambio di calore con le aree circostanti, ma non danneggia la capacità di incisione del raggio laser. Un semplice esempio per capire questo fenomeno può essere questo: se in una giornata estiva con il sole in alto nel cielo vai al mare, se c'è vento, allora ti senti freddo mentre se non c'è vento, allora ti senti caldo, ma dentro Entrambi i casi il sole provoca ustioni sulla pelle allo stesso modo.

Ray5 più lungo 10w ha un ufficiale Kit di assistenza aerea Questo consiste in due parti, il kit di ugelli e il compressore d'aria. L'installazione dell'assistenza aerea più lunga è davvero semplice, basta seguire i passaggi seguenti:

  • Innanzitutto, procedere a smontare il modulo laser dal resto della macchina


  • Installa l'ugello di metallo sul modulo laser


  • Collegare un tubo di gomma tra l'ugello metallico e il regolatore di pressione e collegare un'altra parte del tubo di gomma all'ingresso del regolatore


  • Collegare il tubo di ingresso del regolatore all'uscita del compressore d'aria


  • Infine, installa il modulo laser su Ray5, attiva l'interruttore del compressore e avvia un'incisione dal display Ray5 più lungo


L'uso dell'aria assist non solo aumenta la qualità delle incisioni, ma può anche aumentare la capacità di taglio del laser grazie alla possibilità di rimuovere i detriti di fumo e combustione grazie al respiro continuo d'aria; Senza assistenza aerea, questi finirebbero per stabilirsi sulla lente laser, ostacolando il raggio laser di uscita del modulo. Sia per hobbista che per uso professionale, è assolutamente raccomandato un assistenza aerea più lunga se si desidera ottenere le massime prestazioni offerte da Ray5 più lunghi.

By Academy | September 16, 2022